A line symbol is in fact a compound line, i.e., it is composed of multiple child lines. The creation of a line symbol is thus accomplished by adding child lines. A desirable line symbol is constructed by setting the solid patterns, types, and styles of the child lines.
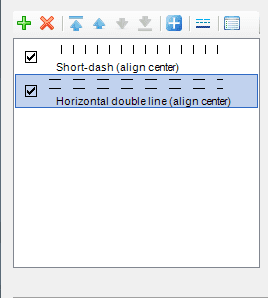
The Child Line Manager (shown in the figure below) in the Line Symbol Editor can be used to effectively manage child line(s) constituting a line symbol.
When creating a line symbol (see: Creating a Line Symbol), once the Line Symbol Editor is opened, the child line list will be empty by default. The user needs to add child lines to make a line symbol. When editing a line symbol that already exists in a line symbol library (see: Editing Line Symbols), once the Line Symbol Editor is opened, all the child lines constituting this line symbol will be shown in the child line list in the Child Line Manager.
Each item in the child line list corresponds to a child line.
Create Child Lines
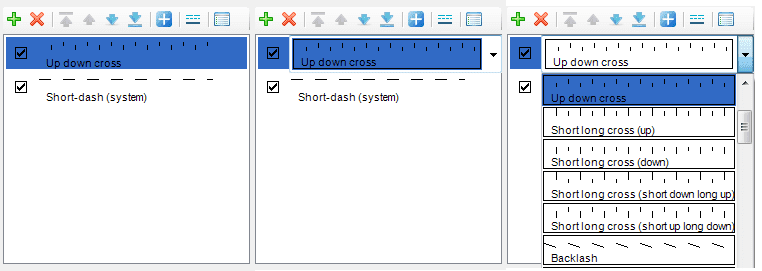
When creating a line symbol in the Line Symbol Editor, the first step is to create a child line. Click the Add button in the toolbar of Child Line Editor to add a child line. The default type of an added child line is of the short dash type (the system line type).
Double click on the newly added child line. The status of the child line changes to the status shown in the middle figure below, i.e., to a drop-down list box. Click the drop-down button on the right and choose a new type for the child line in the pop-up child line type list.
Delete Child Lines
- Select the child line to be deleted from the child line list in the Child Line Manager area, or select multiple child lines at a time by holding down the Shift or Ctrl key;
- Click the Delete button in the toolbar of Child Line Manager to delete the selected child line(s). Note: Please be cautious about this operation because the child line(s) cannot be restored once deleted.
Change Child Line Order
In the Child Line Manager, the order of the child lines in the child line list is the order in which the child lines are layered from top to bottom in the line symbol; the top child line in the child line list also lies at the top of the line symbol; and the child line at the bottom of the child line list also lies at the bottom of the line symbol. The order of child lines can be adjusted through the Move To Top, Move Up, Move Down, and Move To Bottom buttons in the toolbar of Child Line Manager, and the order of the child lines in the line symbol will be adjusted accordingly.
- Select the child line to be moved in the child line list in the Child Line Manager area, or select multiple child lines at a time by holding down the Shift or Ctrl key;
- Click the Move To Top button in the toolbar of the Child Line Manager to move the selected child line(s) to the top. If multiple child lines are selected, all of them are moved on the top of other child lines and the relative positions between the selected child lines are not changed.
Click the Move Up button in the toolbar of the Child Line Manager to move the selected child line(s) up one layer, i.e., to bring the selected child lines to the front of the next child line. If multiple child lines are selected, all of them are moved up one layer and the relative positions between the selected child lines are not changed.
Click the Move Down button in the toolbar of the Child Line Manager to move the selected child line(s) down one layer, i.e., to send the selected child lines to the back of the previous child line. If multiple child lines are selected, all of them are moved up one layer and the relative positions between the selected child lines are not changed.
Click the Move To Bottom button in the toolbar of the Child Line Manager to move the selected child line(s) to the bottom. If multiple child lines are selected, all of them are moved to the bottom of other child lines and the relative positions between the selected child lines are not changed.
Append Existing Line Symbols
Creating from scratch is not the only way to obtain a child line for a line symbol. Existing line symbols can serve as child lines too and be used to create the current line symbol.
- Click the Append button in the toolbar of Child Line Manager;
- The Select dialog box then pops up. This dialog box shows a line symbol library in the same way as the Symbol Library Manager. By default, the line symbol library in the Select dialog box is the current line symbol library. Select the line symbol to be imported from the symbol list, or select multiple symbols at a time by holding down the Ctrl key.
Since the Select dialog box shows a symbol library in the same way as the Symbol Library Manager, operations similar to those in the Symbol Library Manager can be performed here. You can open another line symbol library file or add a default line symbol library through the functions on the File menu in the Select dialog box, and then select the line symbol to import.
- Once the line symbol to be appended has been selected in the Select dialog box, click the OK button to append the selected line symbol to the child line list of the current line symbol. The appended content is not the line symbol itself, but the child lines of the selected line symbol. Thus you can perform further editing on the appended content.
Set Child Line Types
The Line Symbol Editor provides a variety of child line types for creating line symbols. The following two methods can be used to set the child line type.
- In the child line list in the Child Line Manager, select the child line whose type is to be set;
- Click the Line Style button in the toolbar of Child Line Manager, the status of the selected child line in the child line list changes to a drop-down list which lists all the available child line types. Select a type to assign that type to the selected child line.
The other method to set the type for a child line:
- In the child list in the Child Line Manager, select the child line whose type is to be set, and double click on the selected child line;
- In the child list, the status of the selected child line changes to a drop-down list. Click on the drop-down button on the right. In the pop-up drop-down list that shows the child line types, click the needed type to assign that type to the selected child line.
Set Child Line Properties
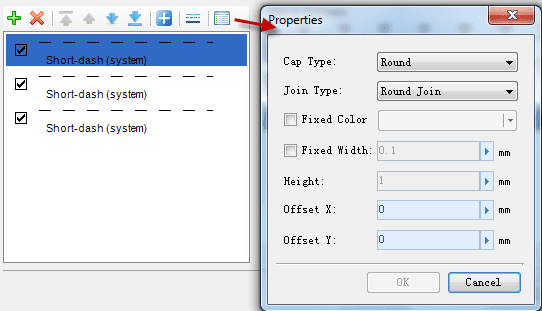
The properties of a child line refer to the properties of the styles and formats of the child line, such as color, width, offsets, and cap type.
- In the child line list in the Child Line Manager, select the child line whose properties are to be set. Multiple child lines can also be selected at a time by holding down the Shift or Ctrl key so that their properties can be set in a batch fashion;
- Click the Properties button in the toolbar of Child Line Manager, and set the child line’s properties in the pop-up Properties dialog box. For details, please refer to: Setting Child Line Styles.
- Once the style is set, click the OK button in the Properties dialog box.


