UI for the 3D Line Symbol Editor
Structure of the 3D Line Symbol Editor
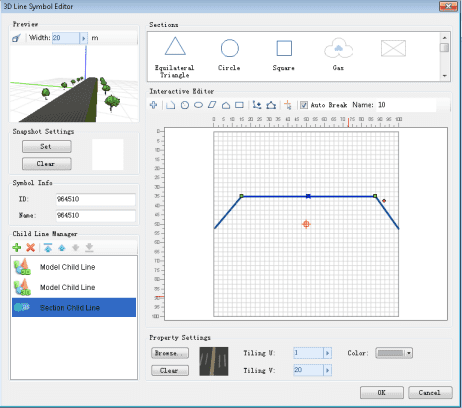
Below shows the UI of the 3D Line Symbol Editor:
- Symbol Properties: The Symbol Properties area is for setting or editing the properties of a 3D line symbol including the symbol ID and the symbol name.
- Child Line Manager: The Child Line Manager is for managing child lines constituting a 3D line symbol. The functions include: adding and deleting child lines, adjusting the order of child lines, and setting the child line types.
- Preview Area: This area displays the 3D line symbol created or edited by the user. The preview area provides basic preview operations and can satisfy various preview requirements by users.
- Snapshot Settings: Taking a snapshot is to “take a picture” of the current 3D line that has been created and to save it as a picture which will be used when symbolizing a 2D map with 3D symbols. You can set the snapshot of the newly-created 3D line and clear a snapshot.
- Child Line Property Setting area: This area is for setting properties of child lines. 3D line symbols with different styles can be created by setting the properties of the child lines. The properties that can be set for a child line are different for different child line types. For detailed description, please refer to the “Structure of the Child Line Property Setting Area” section on this page.
Child Line Property Setting Area
- Structure of the setting area for section child line properties
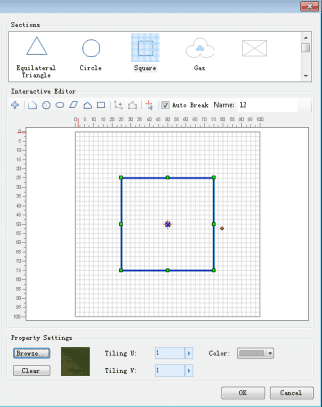
The left figure below demonstrates the composition of the Child Line Property Setting Area for a section child line. The division of this function area is as follows:
- Interactive Editing Area: This area is for drawing sections of a section child line. It provides drawing and editing tools for various geometric shapes, as well as a ruler and background grid lines.
- Recent Section List Area: This area provides the list of sections that are recently used for creating 3D line symbols and functions for importing symbols. Through this area, you can conveniently construct sections quickly and avoid some repetitive work.
- Texture Setting Area: This area provides functions for setting line colors of sections, pictures for creating textures, and the number of times of tiling textures.
- Structure of the setting area for model child line properties
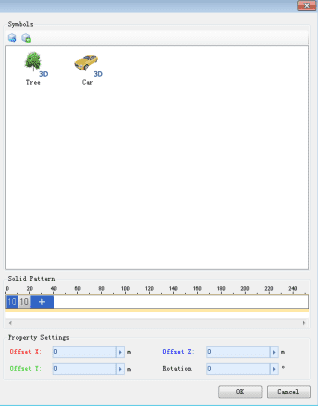
The right figure below demonstrates the composition of the Child Line Property Setting area for a model child line. The division of this function area is as follows:
- Recent Model List Area: This area provides the list of models that are recently used for creating 3D line symbols. This list also includes 3D marker symbols or models imported by users. You can choose models from this list to make the current model child line.
- Solid Pattern Setting Area: This area is for setting the solid pattern of a model child line in order to create more model child line types. For descriptions of solid patterns of model child lines, please refer to: the Setting the Solid Pattern of Child Lines section of Creating Model Child Lines.
- Offset and Angle Setting Area: This area is for setting the X, Y, and Z offsets for the model and the rotation angle of the model.
Browsing Operations in the Preview Area
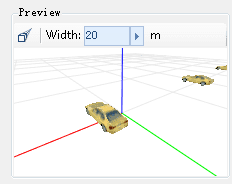
In the 3D Line Symbol Editor, the visual effect of the created or edited 3D line symbol in the space (constructed by the X, Y, and Z axes) will be displayed in the preview window in the preview area in real-time, as shown below. Using the **mouse, you can change the view angle and preview the 3D line. Below are detailed descriptions of the related operations.
- Operating with the mouse:
- Hold down the left mouse button and drag: To pan the preview of the 3D line.
- Roll the mouse wheel: To zoom in and out on the 3D line preview.
- Hold down the mouse wheel and drag: To change the pitch angle of the 3D line preview.
- Hold down the right mouse button and drag: To zoom in and out on the 3D line preview.
- Restore default view point: To restore the 3D line preview in the preview window to the default view point.
Combining the mouse operations described above when previewing a 3D line enables multi-angle and multi-aspect viewing and can help you adjust the 3D line.


