The Environment tab allows you to change the environment settings of the application program.Include the followings: Basic settings, style setting, scene settings and running settings.
Basic Settings
In Basic Settings, you are allowed to set Desktop Title and Decimal Places.
- Desktop Title: You can change the title by typing in the text box.
- Decimal Places: Controls the accuracy of the decimal.
All the decimal numbers are displayed by the setting of Decimal Places.
If it is read-only data, the data displays completely; if it is editable data, the data displays completely at editing status.
The attribute table below shows you the displaying modes.
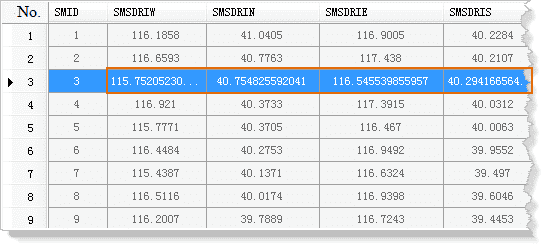
The following picture shows you the displaying of vector data. Only the data at the editing status can be shown completely.
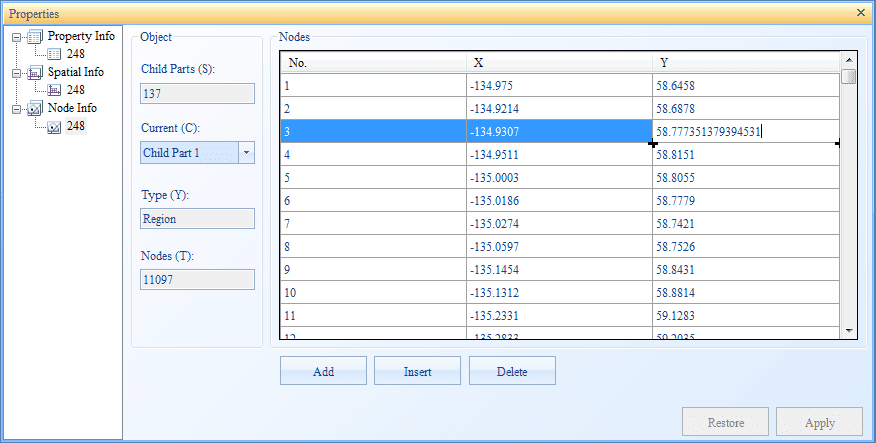
In addition, all numbers in the Properties window are displaying completely at editing status.
- Compute the thread : Parallel Computing is to break a task into several small tasks, and finish the task together. It is efficient way to strengthen the resolution ability of complex problem. Now, the development of multi-core microprocessors makes personal PC has parallel computing ability.
Parallel Computing can be implemented through serveral methods, including multiprocess, multithreading and other methods. Parallel Computing can be divide a task into several threads, and these threads can be excuted by multiple CPU cores to decrease the time and cost. In addition, it can meet demands with large scale or high precision.
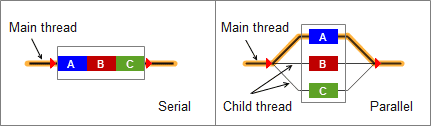
The following chart compares the serial and parallel. When a task is divided into A, B and C, serial needs executing three child tasks in turn, but parallel can excute three child tasks at the same time.
You can refer to following suggestions about how to set reasonable thread count:
- The multiple threads will be allocated in all cores of computer. When the thread count is equal to the number of cores, all cores are in the calculation, which can make full use of the computing resources of the computer.
- When the thread count is larger than the computer cores, thread scheduling and load balancing will take more time. So We do not recommend it.
- Analysis Memory: has two analysis modes: Standard and Large Memory. Compared to Standard, Large Memory has an advantage in terms of performance. It can avoid frequently interacting with data engine by reading data into memory one-time. It is suggested to use Large Memory on 64-bit system. If the data is large and the memory is small, it is easy to appear out-of-memory conditions.
Now, the functions that are supported by large memory are:
- Build network dataset: includes two types: Line dataset to create network, point and line datasets to create network.
Notes: Large Memory only supports a line dataset, or a line and point dataset to build network. For a network with two or more line (point) datasets, you can use Large Memory to build network for a line dataset (or a point dataset), then append other data to this network.
- Topology Processing: Point, line and region datasets.
- Topology Preprocessing: includes two parts: set the tolerance of topology preprocessing and topology preprocessing
- Build Region by Topology: Extract every closed region in line datasets or network datasets, and create a region dataset.
- Initialize GPU parallel calculation: Sets whether GPU parallel calculation mode is enabled.
SuperMap provides CUDA parallel computing mode for some analysis functions. As long as the host computer with the task is equipped with NVIDIA graphics card and the computing power is above 2.0, the parallel computing capability of the GPU will be used to perform the task. Its performance is relatively common CPU has a greater increase in parallel. At present, the CUDA parallel computing mode analysis functions include: slope and aspect calculation, three- dimensional shading (rendering mode), orthographic three-dimensional images.
There are two ways to set whether to enable CUDA parallel calculation mode:
- This property is set.
- By modifying the value of the node in the configuration file SuperMap.xml (the default is false), the configuration file is located in the “Product installation directory \ Bin” directory.
Note:
- When the application starts, the values set in the configuration file are read first. After you specify a value by this method, the configuration file is modified synchronously before the analysis is performed.
- The values specified in the configuration file are read only once when the application is started, and if modified, the application needs to be restarted for it to take effect.
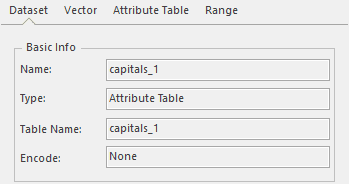
- The table name is consistent with the dataset name : Data in a database is organized in a table. Hence, a table name is the name of the attribute table of the corresponding dataset. The name of a table is given by the corresponding database as the internal rules, while the name of a dataset is customized by a user. Therefore, in general, the two names are different.
- If you uncheck this checkbox, iDesktop will name the table of the dataset that you create according to the data storage rules, or keep the original table name of the dataset that you import. Databases have constraints on the length of table names. iDesktop will only keep the first letters within the maximum length of a name if its length is very long.
- If you check this checkbox, iDesktop will make the table name of the dataset that you create or import consistent with its name, which can help you manage and search your data more easily. In the meanwhile, the feature also can avoid a table name getting truncated.
Note : Unchecking the checkbox is by default in case of garbled codes. For
example, Oracle uses UTF-8 to write data. When iDesktop uses a different
coding way to create an Oracle-based dataset, there will be garbled code in
the sever, which will influence table processing.
 |
|
---|---
- Use default system reminder box : The system is a pop-up dialog box (such as save the dialog box, process, etc.), is based on desktop style Office 2016 display, or with the Windows system style consistent. The differences are shown in the following figure.
- Use 1000 Separator : Checking this option means using the 1000 separator in the display of attribute tables or scales and so on.
- Display the current file caption in the desktop title : Checking this option can make the title of iDesktop include the current workspace name.
Style Settings
You can set the desktop font style, including changing the display scale, ribbon style, active form style settings.
- Change the display scale : Set the display ratio of the desktop font, by sliding the slider, select the appropriate font ratio. The slider has three scales: 100%, 125%, 150%. Calculate a new font size based on the selected scale and default font size. The default display scale is 100%.
- Ribbon Style :Set the type and size of the desktop ribbon font, and whether the font is bold.
- Active Form Style :Set the desktop activity form font type, size, and whether the font bold.
The above three settings, are immediately applied to the current set of style.
Scene Settings
Set the related parameters about the scene operations, including scene antialias, Float texture, PC device, etc.
- Scene Antialias After check the “Scene Antialias” box, it will optimize the new scene display. The display of scene and the layers is smoother. The setting range is [0,16]. The greater the value, the smoother the display effect. This setting comes into effect when open the scene again.
The scene antialias function has good smooth to the scene window, loading the untexture objects (point, line and region objects), models and pipes. Besides, when loading the vector layer, it needs to set the non clam to ground status, or it will be regarded as texture objects and don’t operate this function.
- Support Float texture : if it is discrete graphics, suggest to check Support Float texture; otherwise, it will affect the scene display performance
- PC device : Used to set whether the scene is used in the PC.
Runtime Settings
Set the path for the temporary map cache, what information to output in the Output Window during the operation, whether or not to generate runtime log, and whether or not to automatically check the workspace version.
- Cache Path: Where you want to place the temporary map cache. You can click the ellipsis button to select a destination folder.
- Generate runtime log: Whether you want to generate runtime log during your operation. When the box is checked, you can click the ellipsis button to select a destination folder.
- Creating Dump log : Select the creating Dump log. It means to generate a log file existing in the root directory “Dumps” folder when collapsing. User can view the log files in the Dumps foolder by clicking the Managing directory button. Click the Clear button to delete all files in the Dumps folder.
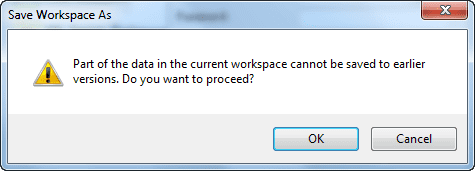
- Auto check workspace version: The version of the workspace will be automatically checked when it is opened if the Auto check workspace version box is checked. You can select to save the workspace as earlier version or new version. If saved as earlier version, some operation results you conducted in the new version may be lost. Therefore, we strongly recommend that you keep the Auto check workspace version box checked and save the workspace as new version.
- Output: What information you want to output in the Output Window. You can select Messages to output operation messages or Exceptions to output both operation messages and exceptions.