It’s used to modify the size or position of the point/line/region markers by mouse dragging when setting the CAD layer to be editable.
Introduction
Editing 2D plotting
Editing point plotting
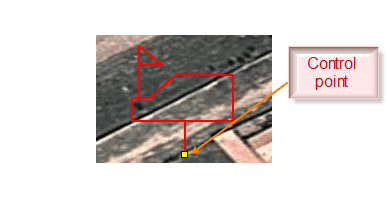
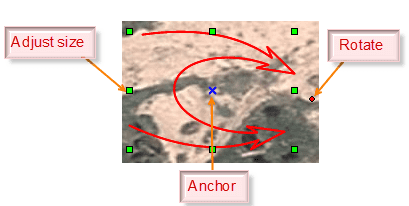
Select the point marker, the editing status will be as shown below.
Drag the “resize handle” to change the size; drag the “anchor handle” to move the position; drag the “rotation handle” to rotate the marker.
After selecting the marker, click Object Operation>Object Editing, click Edit Vertex to modify the draft line position of the point marker as follows.
Editing line/region plotting
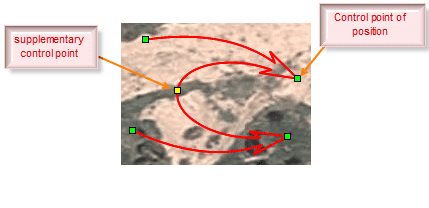
Select the line/region marker, the editing status will be as shown below.
Drag the “resize handle” to change the size; drag the “anchor handle” to move the position; drag the “rotation handle” to rotate the marker.
After selecting the marker, click Object Operation>Object Editing, click Edit Vertex to modify the single node and arrow positions of the marker as follows.
Editing 3D plotting
Editing point plotting
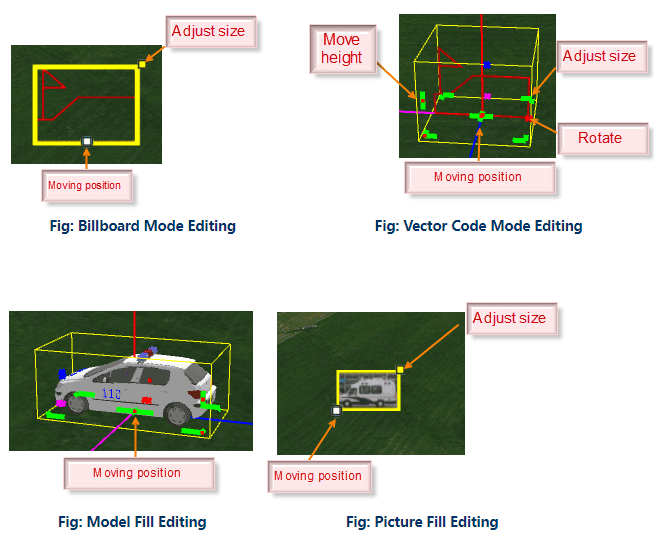
The point marker types contain Billboard Mode, Vector Code Mode, Model Fill and Picture Fill.
In the four modes, drag the “resize handle” to change the size; drag the “move handle” to move the position. For the Vector Code Mode, drag the “rotation handle” to rotate the marker, and drag the “move height handle” to adjust the height of the marker; for Billboard Mode and Picture Fill Mode, press Shift and click “move handle” to improve the height of the marker.
For the details about the four modes, please see 3D Plotting Properites.
Editing line/region plotting
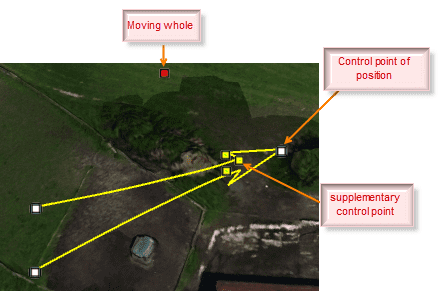
The editing of line/region marker is shown as below.
For the line/region marker, press Shift and click “move handle” to improve the height of the marker. “Move all points” can move the selected line/region markers in total; “Modify controlling points” controls the shape details of the marker, which can be used to adjust the feature point size such as the size of the arrow.

