Instructions
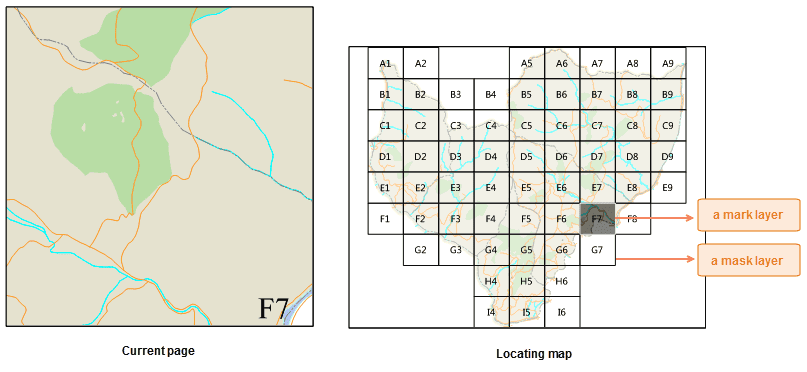
Usually when the map expresses a small range of detailed information, its spatial location is difficult to determine. The application provides a way to create a map locator to provide a reference for the map user, that is, to display another map frame range within a map frame. The location map displays a larger range than the main map, enabling the map viewer to quickly locate and identify the spatial location of the current map in a larger area. For example, locating a map might show the location of the province (the main map extent) in the country (the location map range).
Locates the map at the same time is also dynamic. The location map is automatically updated whenever the scope of the associated primary map changes.
The premise of creating a map fix is that the layout window already has at least two map frames, one of which has a range that is completely within the scope of another data frame. A larger map is a location map, and a smaller map is a main map.
There are two ways to generate a map: based on the current main map to draw a map locator and a custom location map, the following two ways to generate a detailed introduction.
Map locator based on current main map
Map locator based on the current main map, provided that the map series is enabled in the current layout and the “Draw Locator” button is available.
- Click Object Operation -> Map Series -> Draw locator. The state of the mouse in the current layout window changes to the state of drawing the map.
- At the location of the map to be drawn, click and drag the mouse to draw a location map generated based on the current index map, and add a map to the map node in the workspace manager. The name of the location map defaults to [current index map name _Locator].
- Locate Map : It is a new map including two layers generated by copying the index layer based on the index map. The two layers are: mask layer and mark layer.
- Mark layer : Used to highlight features in a targeted map located on the current map page.
- Mask layer : Used to dim map features in the navigation map that you don’t want to highlight. These are features that are not in the current page
- When you switch between different page numbers on the current page and view different pages, the location map will change accordingly to highlight the current page.
Custom location map
The user can pre-position the map and start the map locator in the layout.
Step 1: Prepare a location map
There are two layers in the location map: the mask layer and the mark layer.
- Copy a master map as a location map
- Copy the index layer in the copied location map in duplicate, one as a mark layer and one as a mask layer. Now, you need to do the following processing for these two layers for masking and highlighting.
- Edit mask layer
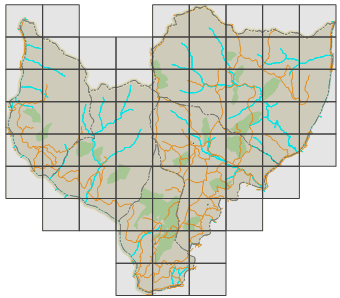
The mask layer darkens the area of the map that you don’t want to highlight, so change the fill color to gray in the style of the layer, adjust the background transparency to the appropriate value, and adjust the line style. For example, set the mask layer style as follows, the foreground color is gray, the background transparency is 90%, the line color is black, and the line width is 0.1mm, which gives the mask layer as shown below.
- Edit mark layer
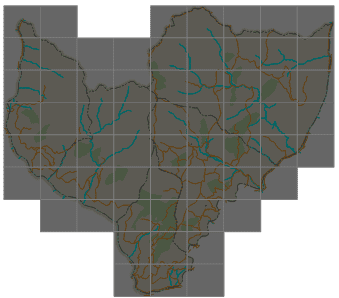
A mark layer is to highlight the currently selected page, so adjust the style of the layer to a style that is easy to identify, change the fill color to dark, adjust the background transparency to a suitable value, and adjust the line style. For example: set the markup layer style as follows, the foreground color is black, the background transparency is 60%, and the line width is 0.1mm, which gives the markup layer as shown below.
- Note: The mask layer and the mark layer need to retain the properties of the index layer. After the map series is enabled, the map will be filtered based on the specified current page, which will require masking and highlighting the layer area.
- If the user needs to display the index field label in the location map, the unified label map can be created based on the index layer. The result shown in the following figure is obtained by setting the label style.
- You can get a complete location map through the above operation.
Step 2: Enable Map Locator
The premise of creating a map locator is that there are at least two map frames in the layout window, one of which is the main map of the map series, and the other is a user-defined location map.
- Enable map series for the main map.
- Make the following settings in the Map Series Settings:
- Check the map locator.
- Select a custom one in the location map drop-down menu.
- Set the configured corresponding layer in the markup layer and mask layer drop-down menus respectively.
- When you switch between different page numbers on the current page and view different pages, the location map will change accordingly to highlight the current page.
A map series with a map locator is now created. You can locate and navigate through the various layout pages and indicate to the map viewer where the current page is in a larger range. The next step is to add dynamic text to the map series.


