The Map View module aims to browse local/online maps and mark maps. Moreover, it provides tools to create maps with AI technologies, measure distances and areas on maps, collect data, generate tracks of your travels, and so on.
On the Home page click Map View to enter into the module.
Mark on map
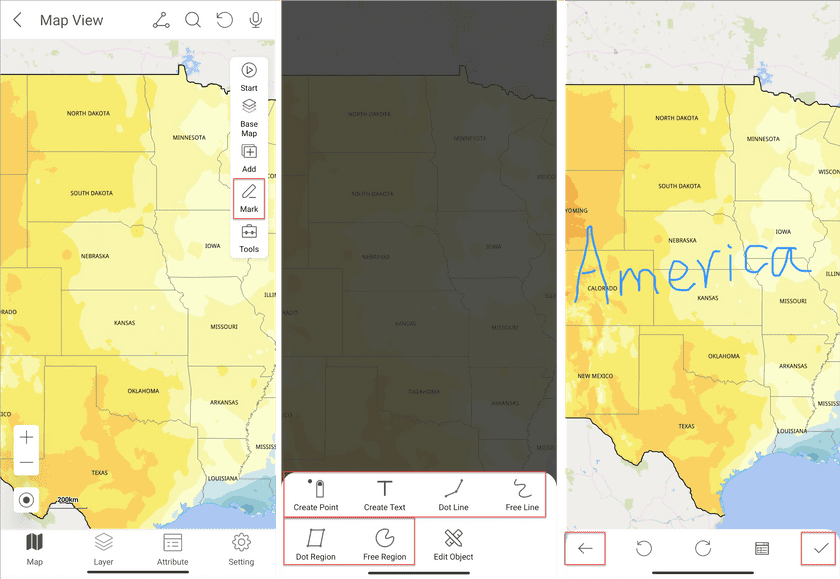
The module allows you to add and edit points, lines, regions, and text on maps. All added content will be saved in mark layers.
- Click Mark on the right toolbar and select the mark type you want to add. The predefined types include Create Point, Create Text, Dot Line, Free Line, Dot Region, and Free Region.
- Click on your map directly at proper positions to add a mark.
- Click OK icon on the right-bottom corner to save it.
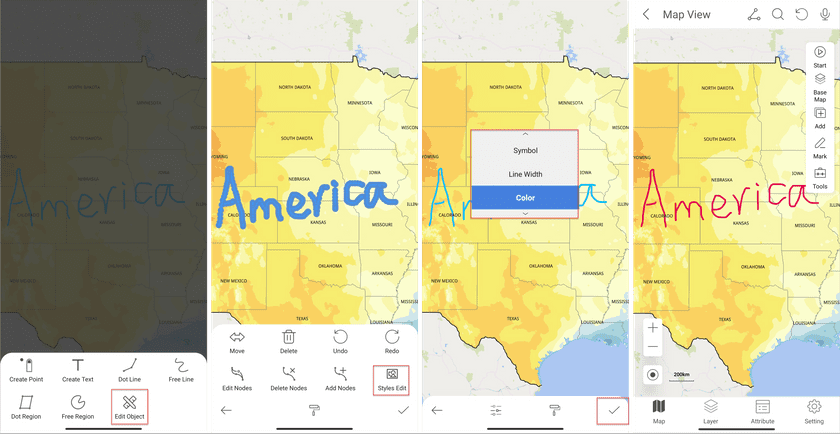
- Click Mark on the right toolbar and select Edit Object, and then you can select your mark and edit it.
- After selecting a mark click Style Edit and set its style.
- Click OK icon on the right-bottom corner to save it.
AI Cartography
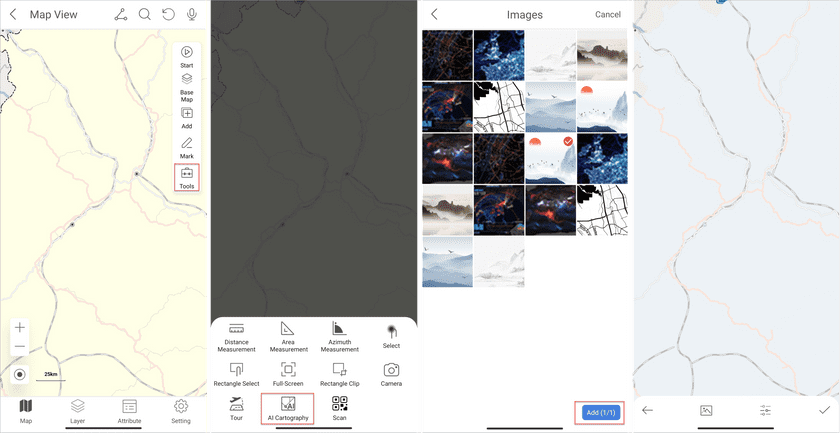
Create a new map in the same style as the style image. Note: the feature applies for vector maps.
- Click Tools on the right toolbar and select AI Cartography.
- Select a picture as the style image, and click Add. The app will generate a new map automatically.
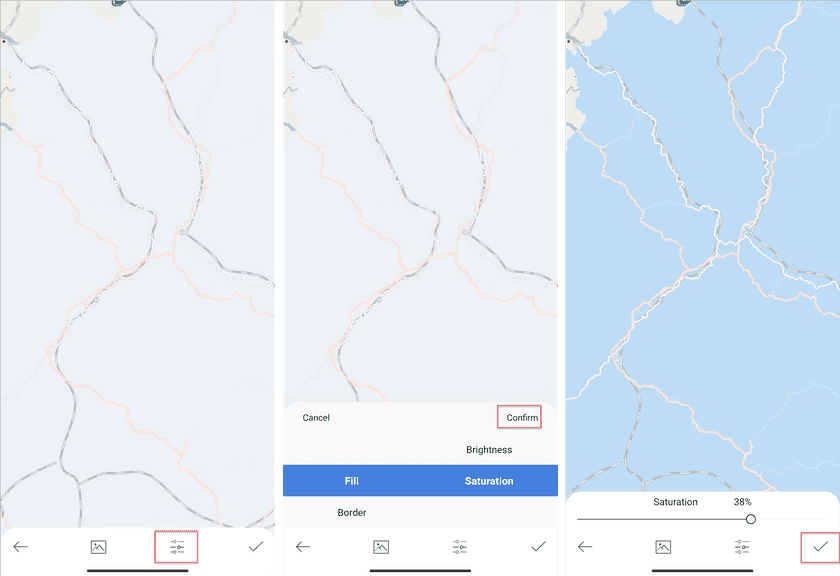
You can set saturation, brightness, and hue of fillings, outlines, lines, and marks.
- After creating a new map, you can click the Switch icon to set the styles of its fills, borders, lines, and marks.
Tour
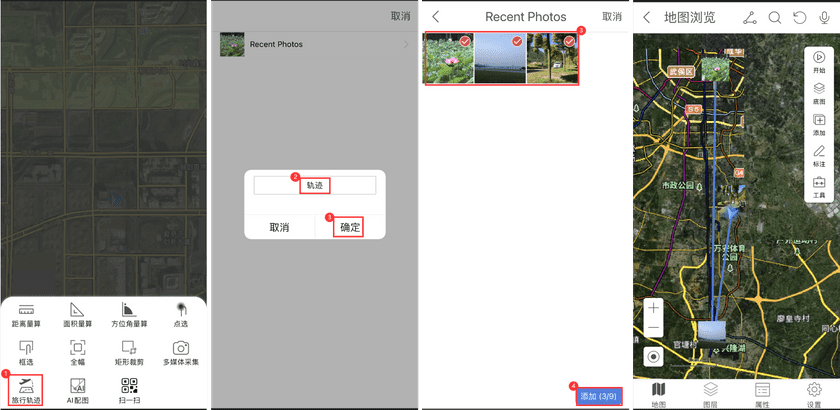
The app can recognize the position and time of each picture, generate the tracks of your travels, and display them on maps directly. Note: the involved pictures should contain positions.
- All modules organize the Tour tool except for the Scene View module. After accessing a module like Map View, click Tools on the right toolbar > Tour, enter a name for your track, and select required pictures.
- After all, click Add. The app will generate tracks according to the added order of pictures and display on proper positions.
Map clip
Clip a raster, image, or vector map resulting in a new map.
-
Click Tools on the right toolbar, select Rectangle Clip, draw a rectangle on your map, and then click OK icon on the right-bottom corner.
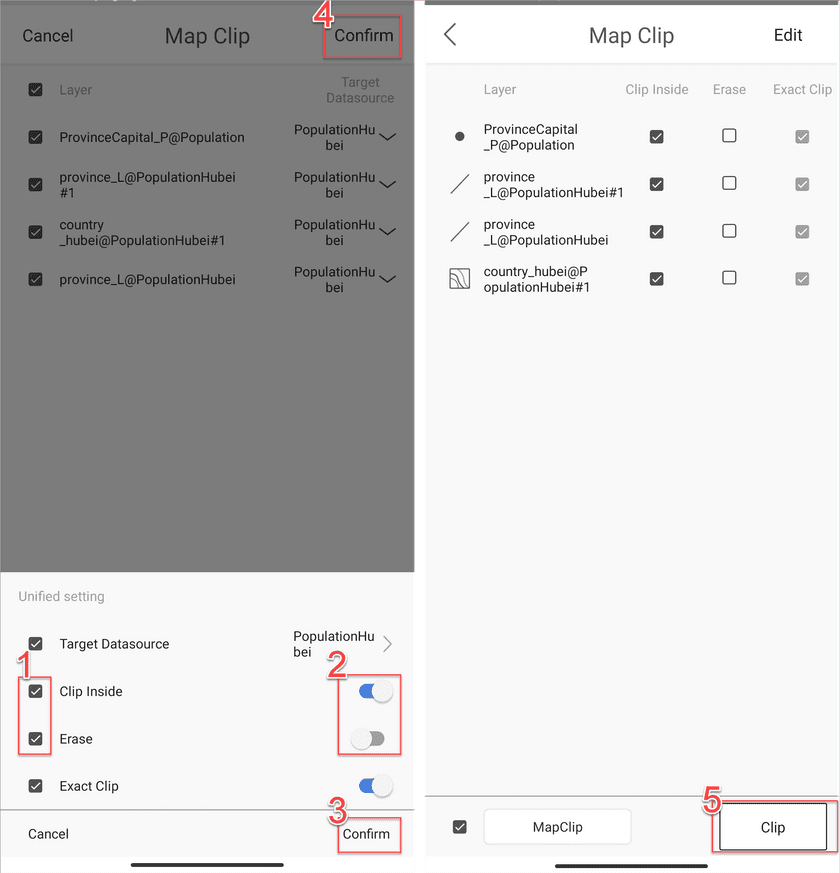
Clip Inside: check this item to clip the content inside the rectangle box. Otherwise, the app will clip the content outside of the rectangle box.
Erase: check this item to delete the clipped content from your map.
Save as a clip
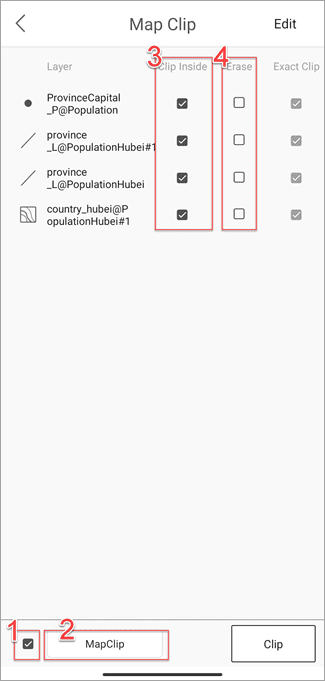
- On the Map Clip page check the button Save As button on the left-bottom corner and enter the clip name.
- On the Map Clip page check the checkbox in the column Clip Inside beside a layer name to clip the content inside the clipping area from the layer
- On the Map Clip page check the checkbox in the column Earse beside a layer name to erase the clipped content from the layer.
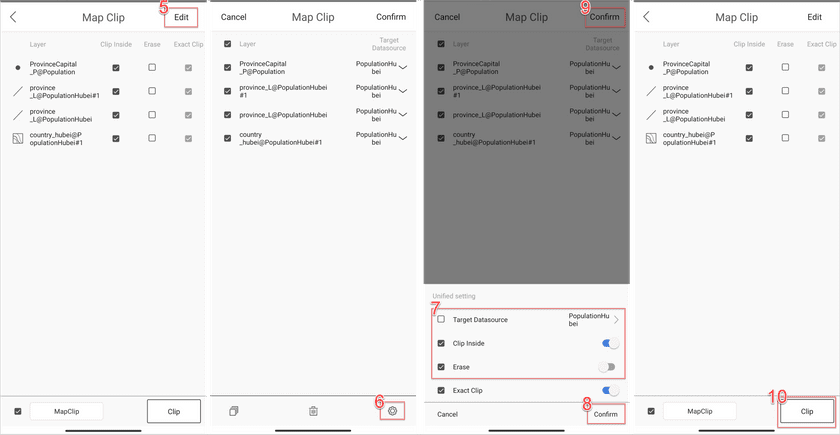
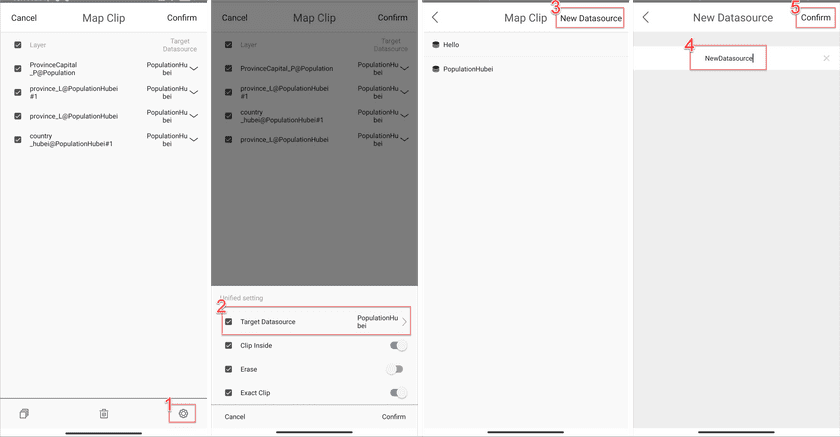
- Besides, on the Map Clip page, you can click the Edit button on the top-right corner and click the Set icon on the bottom-right corner to set clipping parameters in bulk. After all settings, click Clip on the Map Clip page to perform the operation.
Target datasource
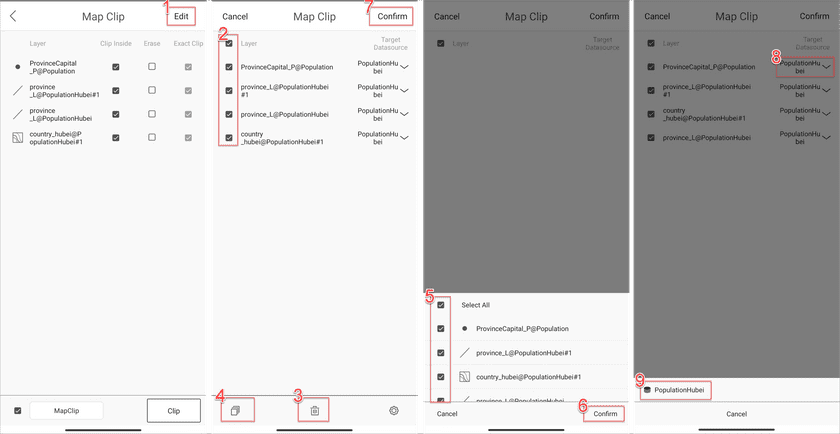
On the Map Clip page, click the Edit button on the top-right corner to open the setting page.
- Check the checkbox beside a layer and click the Delete icon on the bottom center to remove it. Click the Layer icon on the left-bottom corner, and then you can add layers to clip.
- Click the drop-down arrow on the Target Datasource column beside a layer to set the target datasource to save data.
- Click Set icon on the top-bottom corner to open the Unified setting page and check Target Datasource and click the icon at the right side to set the target datasource in bulk.
Map measurement
Measure distances, areas, and angles on your map.
Measure distance
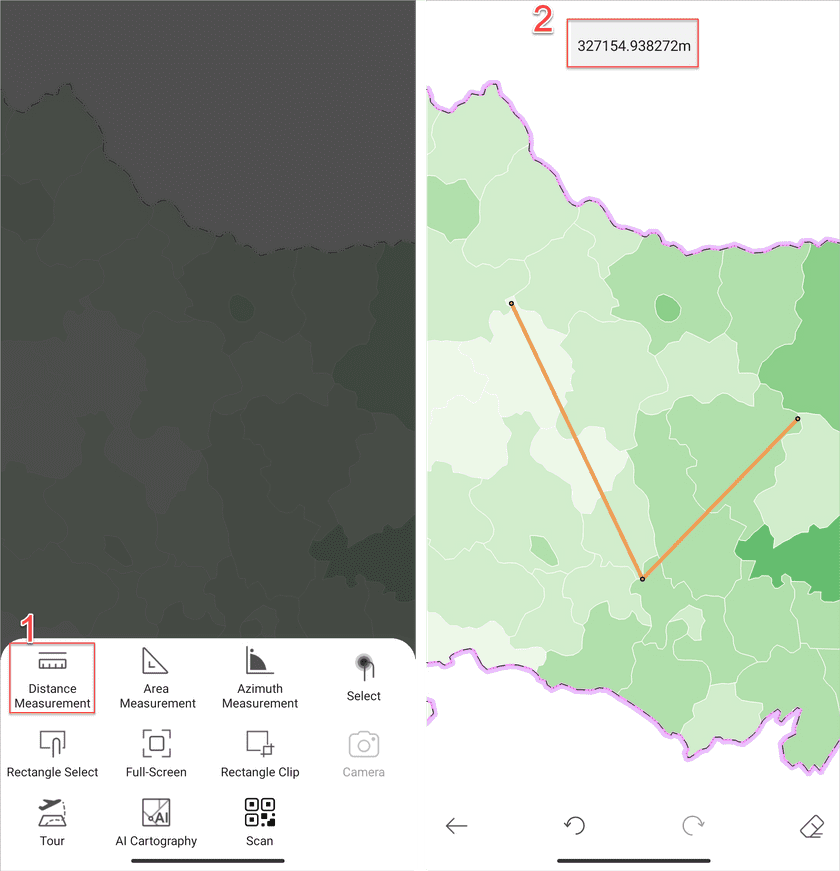
- Click Tools on the right toolbar, select Distance Measurement, and draw lines on your map. The map will display the distance.
Area measurement
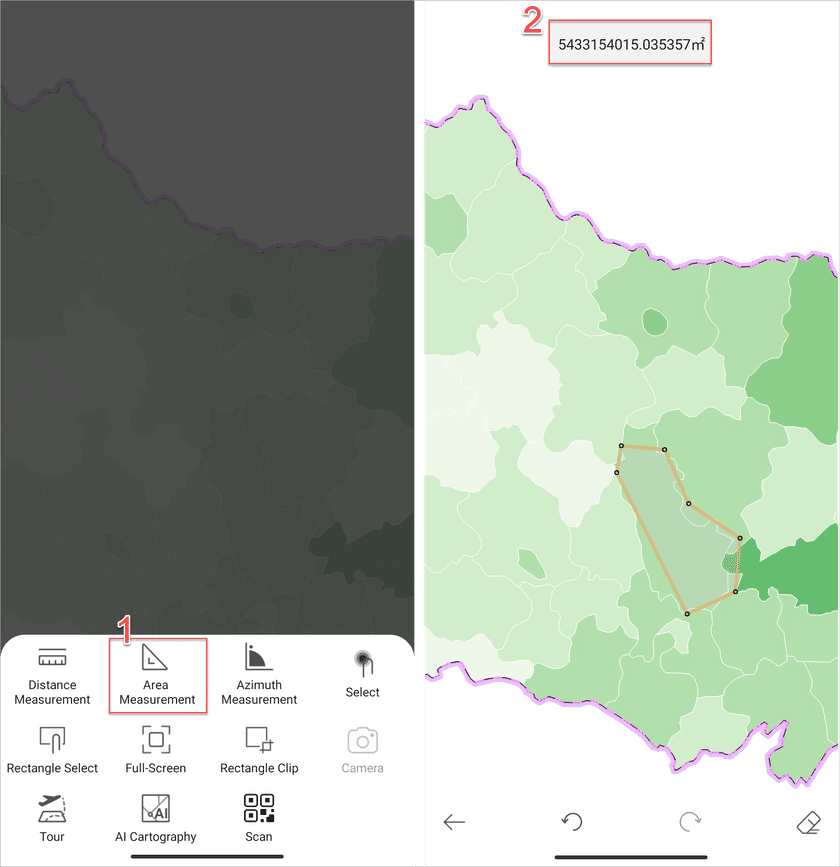
- Click Tools on the right toolbar, select Area Measurement, and draw polygons on your map. The map will display the area instantly.
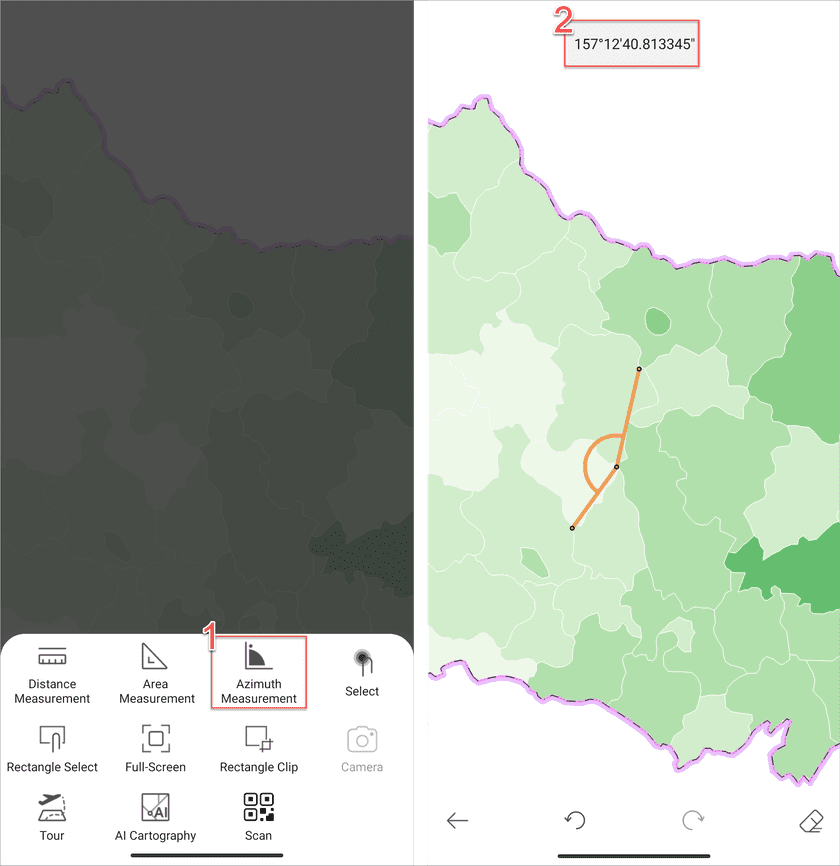
Measure azimuth
- Click Tools on the right toolbar, select Azimuth Measurement, and draw polylines on your map. The map will display the azimuth instantly.
Speech Recognition
You can speak certain words to operate your map like zooming, positioning, and POI searching.
- Click the Microphone icon on the top-right corner and speak commands like Zoom in, Zoom out, Close, Search, etc.

