AR Navigation is used to navigate people inside a building.
Data Collection
We take SuperMap building as an example to collect POIs like the seat of each staff, offices, tea room, washroom, and routes.
Prepare data
(1). Create the target dataset
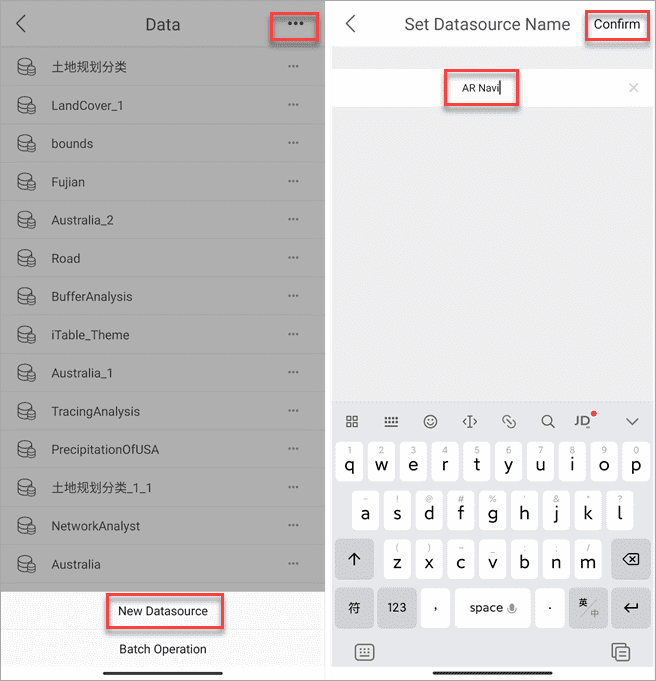
- Create a datasource: on the home page of SuperMap iTablet click Profile > Data > three-vertical-dots icon > New Datasource. After entering the datasource’s name click Confirm.
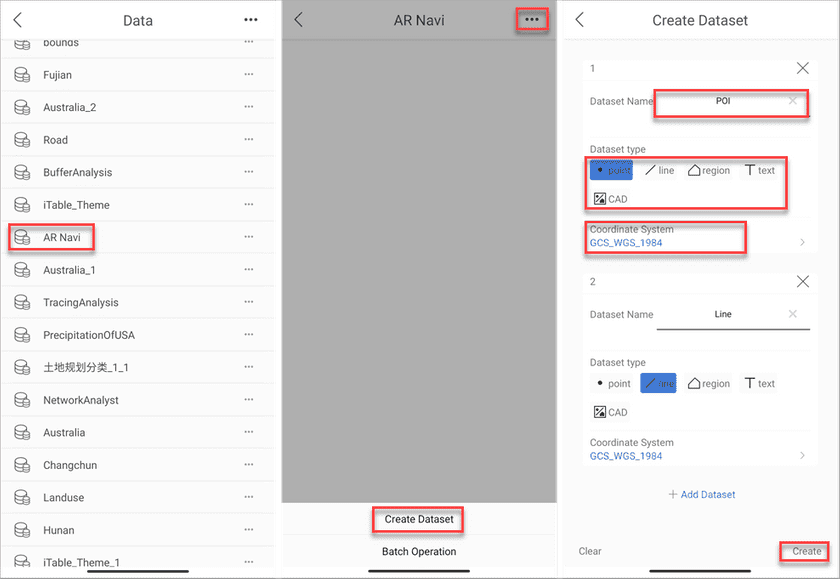
- Create a dataset: in the Data page click the newly created datasource > three-horizontal-dots icon on the top-right corner > Create Dataset. In the Create Dataset page enter the name, type, coordinate system of dataset. After all click Create to create a dataset. Besides, you can click Add Dataset to create multiple datasets.
We created a point dataset and a line dataset for the POI collection and set their coordinate systems to GCSWGS1984.
(2). Add datasets
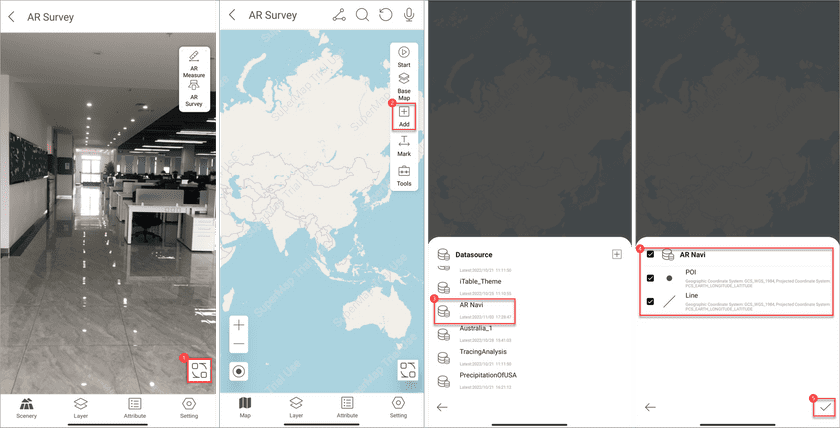
- On the home page of SuperMap iTablet click AR Survey to access the module. Click the Switch icon on the right-bottom corner to switch the current scene to the map view. And then click Add on the right toolbar, specify the created datasource “AR Navi”, and choose all datasets to add to the current map.
Collect data
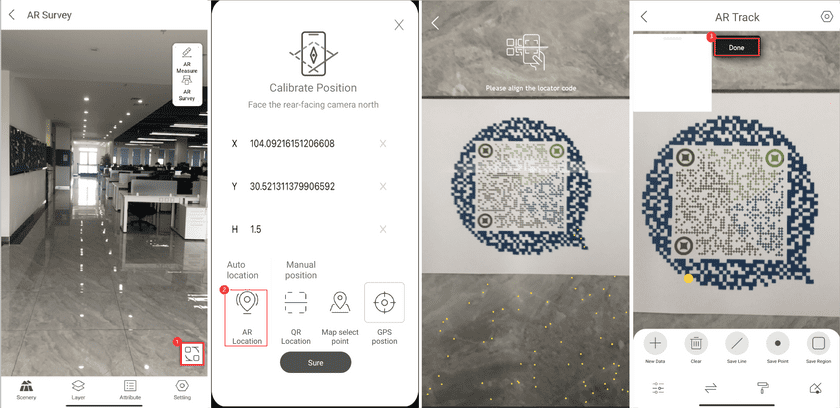
Click the Switch icon on the right-bottom corner to switch the screen to AR scene.
(1). Calibrate the current position
- Click AR Survey, in the popup Calibrate Position page select AR Location, and scan the QR code to calibrate the current position.
(2). Collect
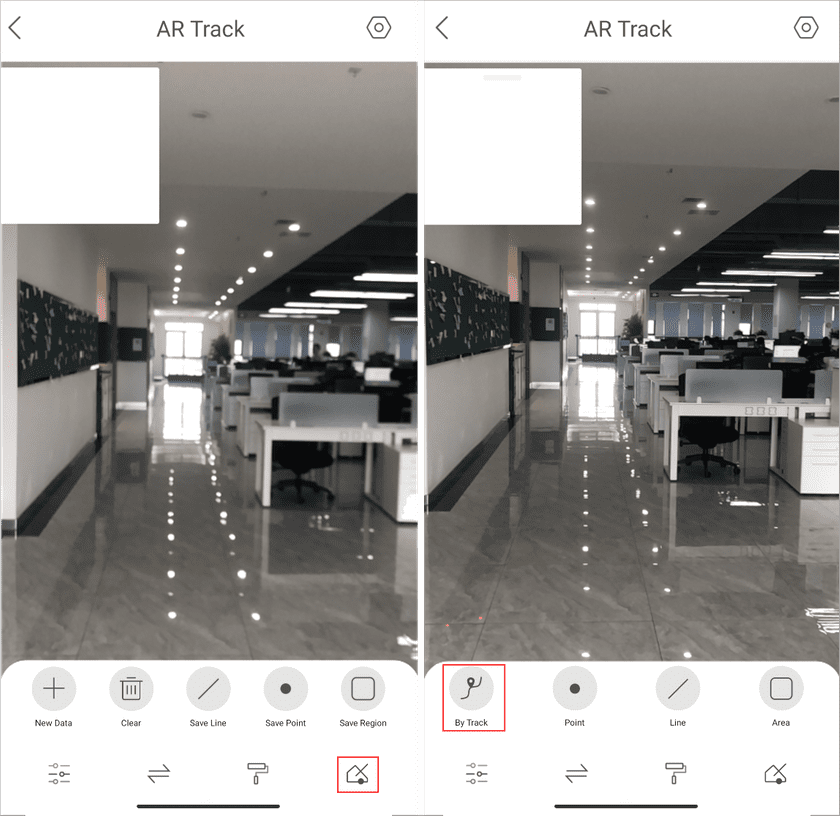
- Select the collected type: click the icon on the bottom-right corner and select a collection. Here we select By Track.
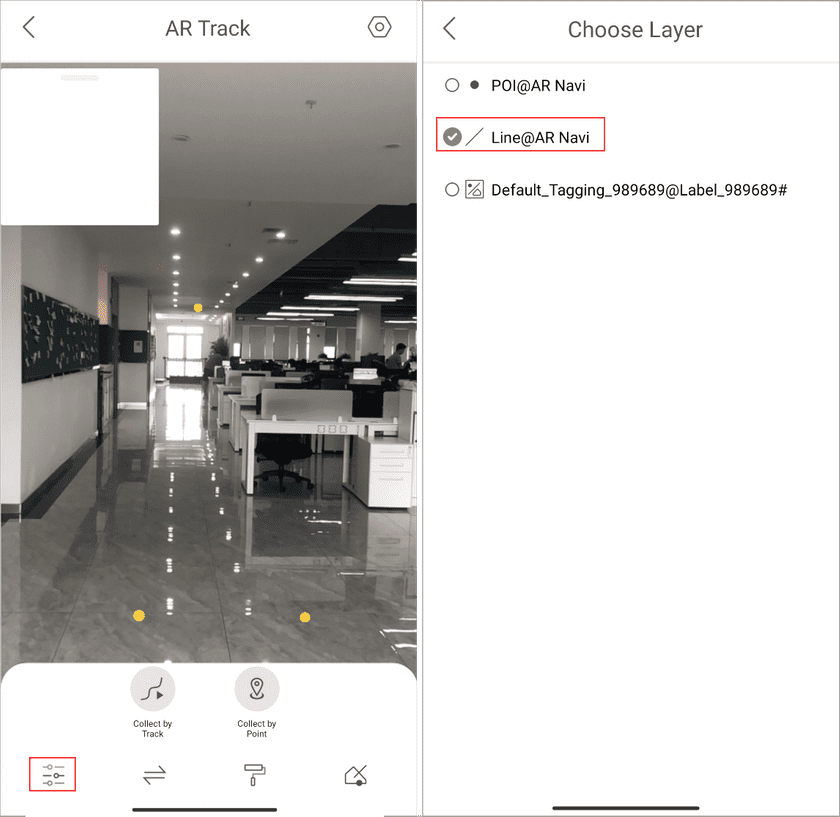
- Select a target dataset: click the icon on the left-bottom corner to open the layer-list page. And then select the layer to save the collected data.
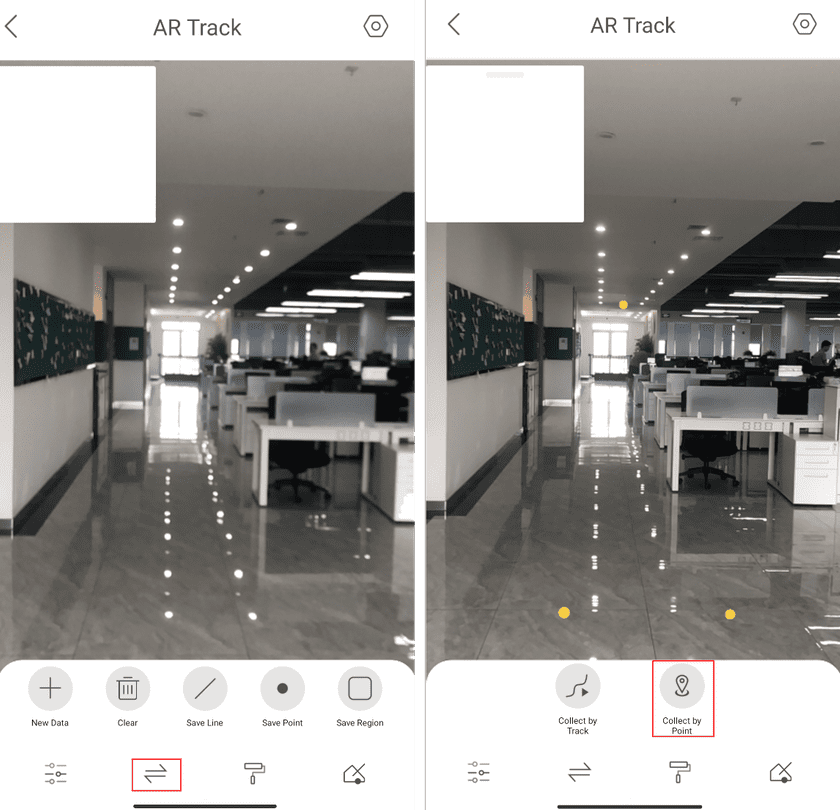
- Select the collection way: click the Switch icon and select a collection way. Here we select Collect by Point.
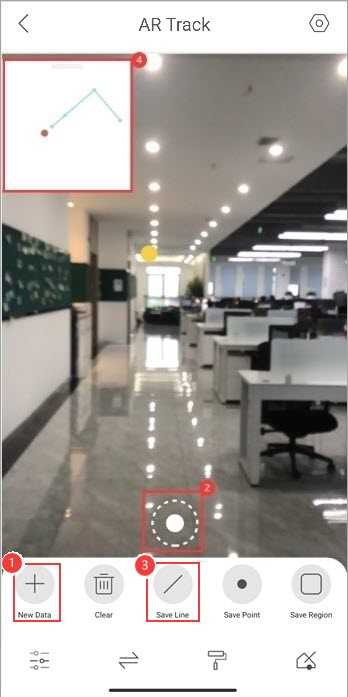
- Collect routes: click New Data to start to collect tracks. And then move along each route. During the procedure, you can click the Add Points icon to record each position. The small map view will display the collected routes instantly. After all, click Save Line to finish the collection.
- Collect POI: set the target dataset to POI and set the collection way to Collect by Point to collect all POIs.
Create AR navigation data
Process data
(1). Create a map
- Access the Navigation module, create a new map named “AR Navi”, add all collected data in the datasource “AR Navi” to the map, and click Save Map.
(2). Process data
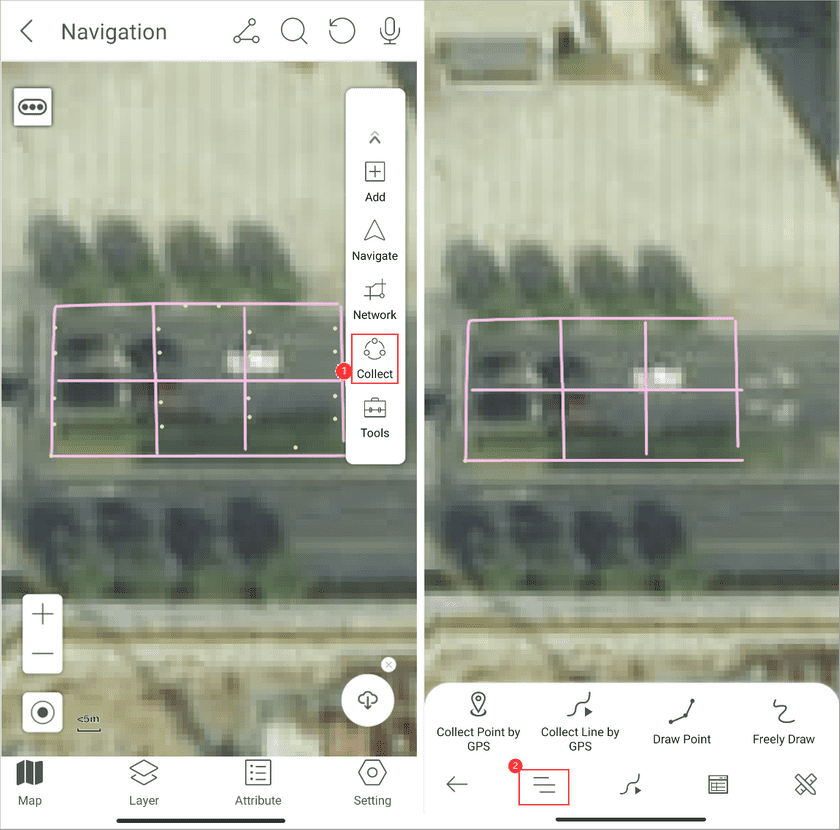
- Select dataset: Click the Collect icon on the right toolbar first > the Layer icon on the bottom toolbar to open the layer selection page.
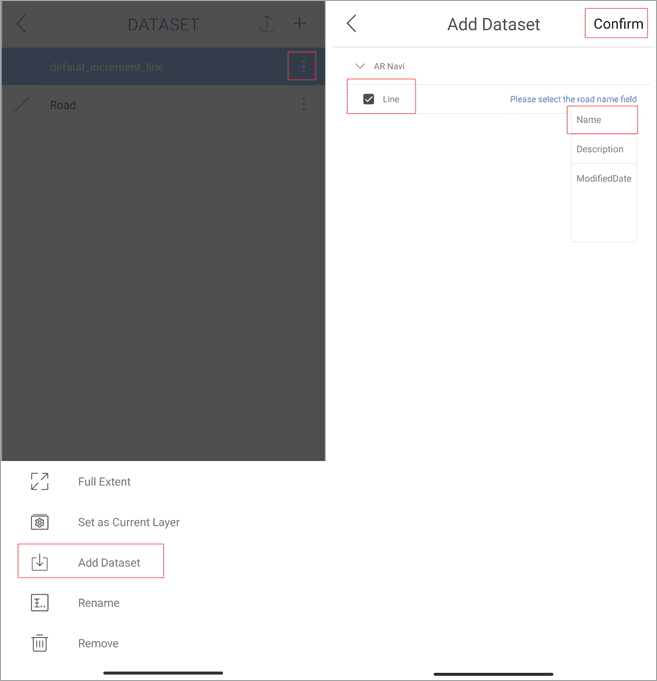
- Add data: click three-vertical-dots icon beside the default layer > Add Dataset, check the dataset “line”, select the road name field, and click Confirm on the top-right corner. And then the app will copy the collected data from the dataset “line” and paste to the default layer “defaultincrementline”.
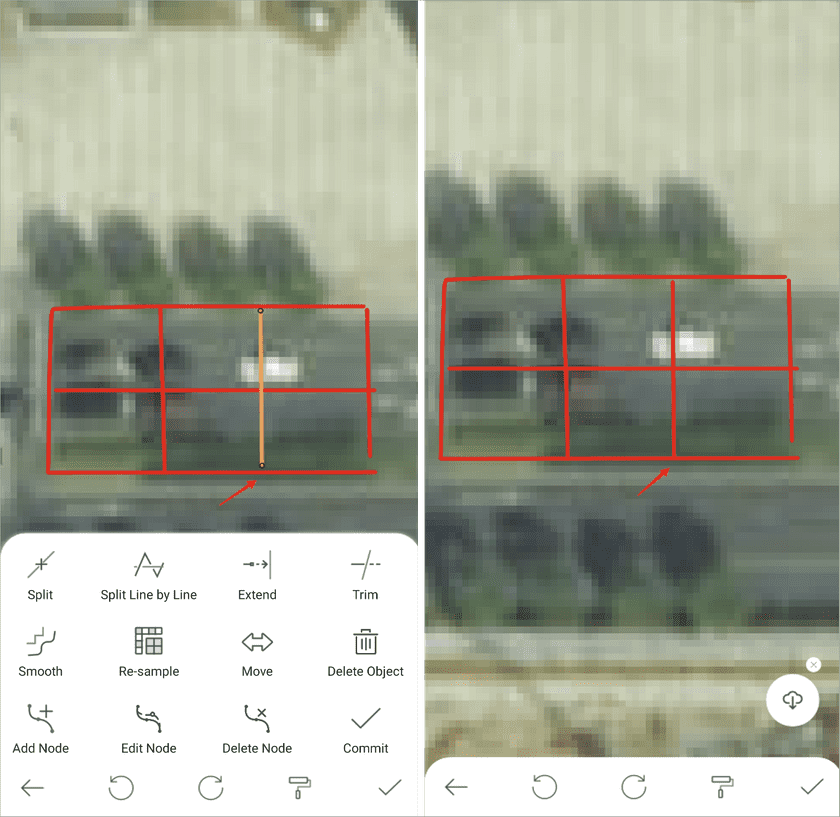
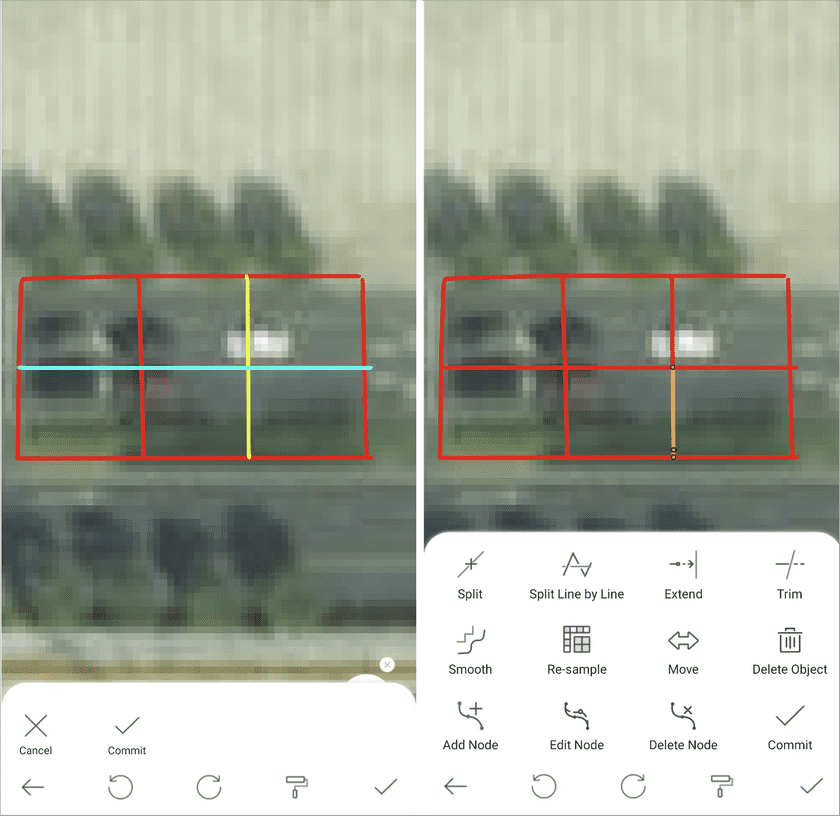
- Edit road net: process the collected data according to the real roads, such as extending and splitting routes.
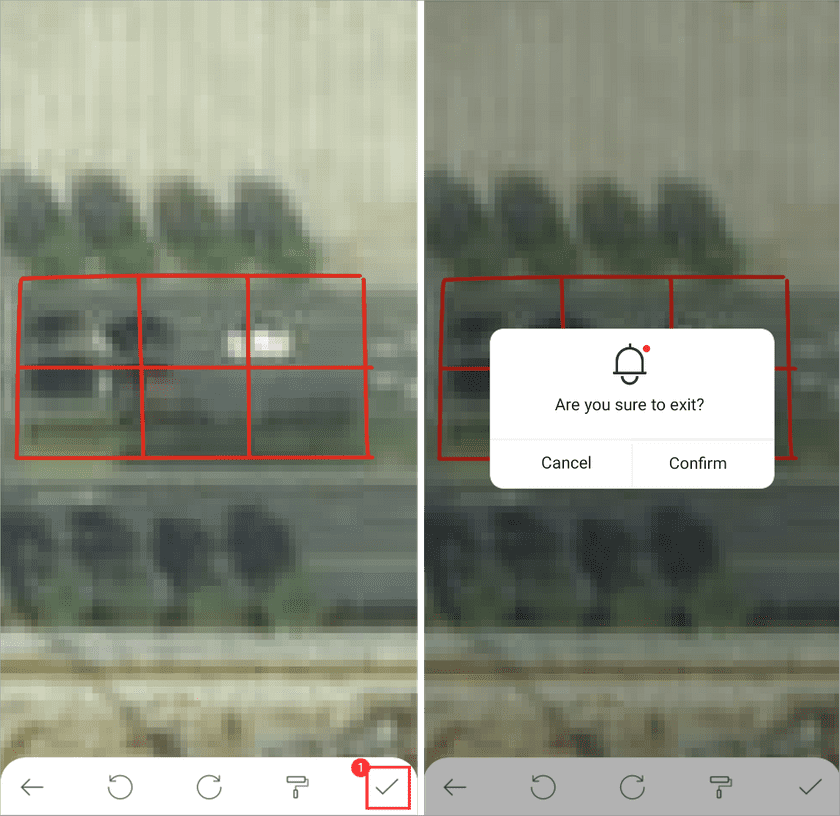
- Click the Commit button and the Confirm icon to save the changes.
Create road net
(1). Create road net
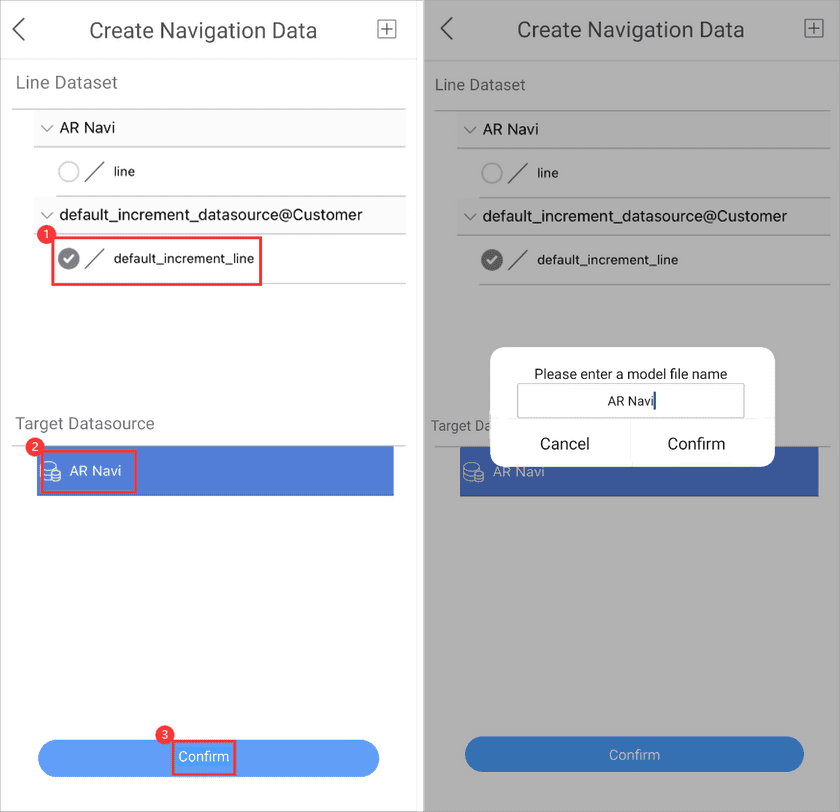
- Click Network on the right toolbar > New, check the dataset “defaultincrementline” created above to save the generate road net, select AR Navi as the target datasource and click Confirm. In the pop up dialog box, enter the network model name. Here we enter “AR Navi”. And then click Confirm to build route network. After saving the map exist the module.
(2). Process route network
- The generated route network data can’t be used for AR navigation directly. You are required to process it further. Click Profile on the home page > Data, and select the datasource “AR Navi” to open the dataset list page.
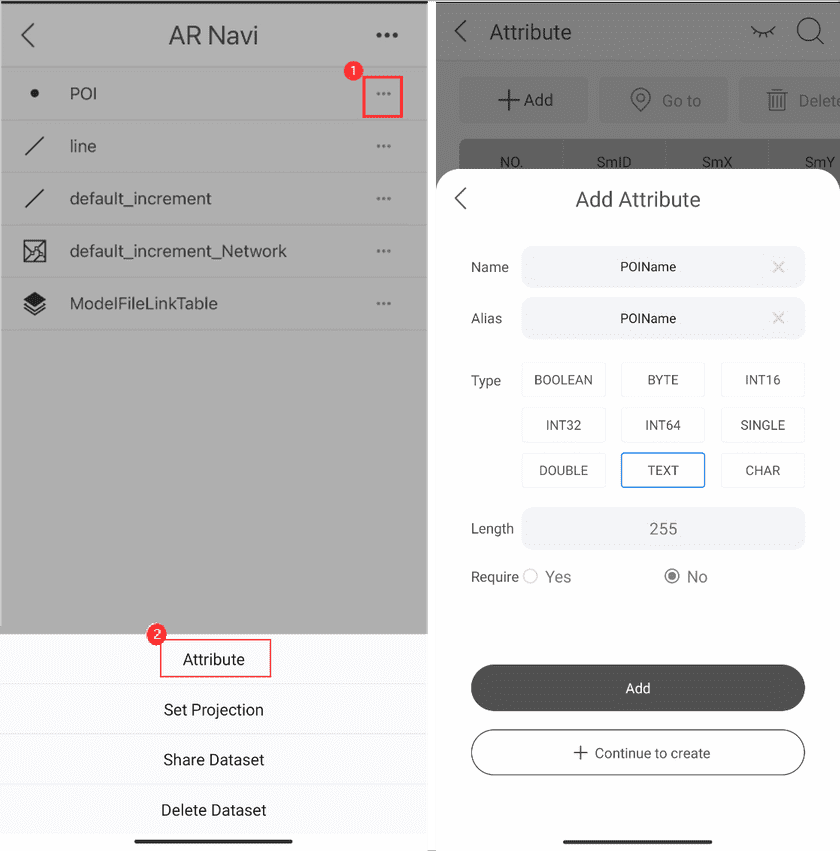
- Process the POI dataset: click the three-horizontal-dots icon beside the dataset “POI” > Attribute > Add, add the required text field POIName as the POI name field, and enter the name of each POI.
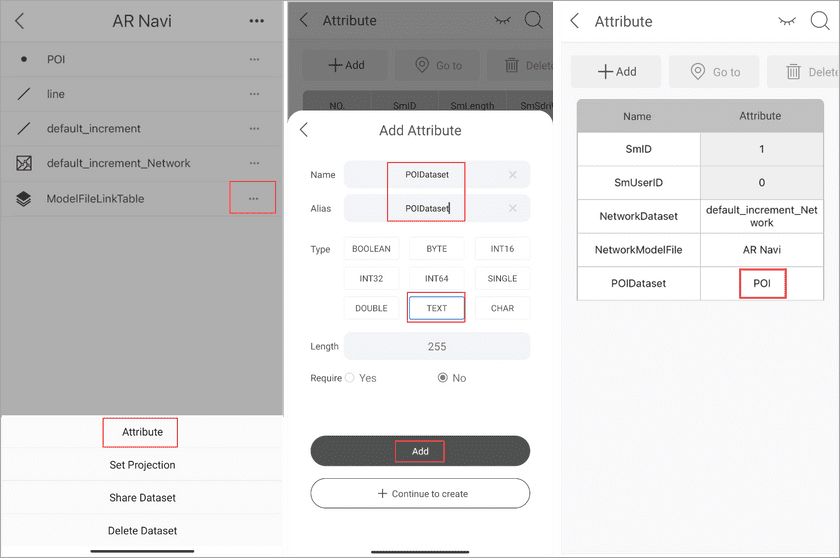
- Process attributes of network data: click the three-horizontal-dots icon beside the attribute table “ModelFileLinkTable” > Attribute > Add, create the required text field POIDataset, set the field value to POI that is the name of the poi dataset.
AR navigation
- Access the AR Map module and click Navigation on the right toolbar.
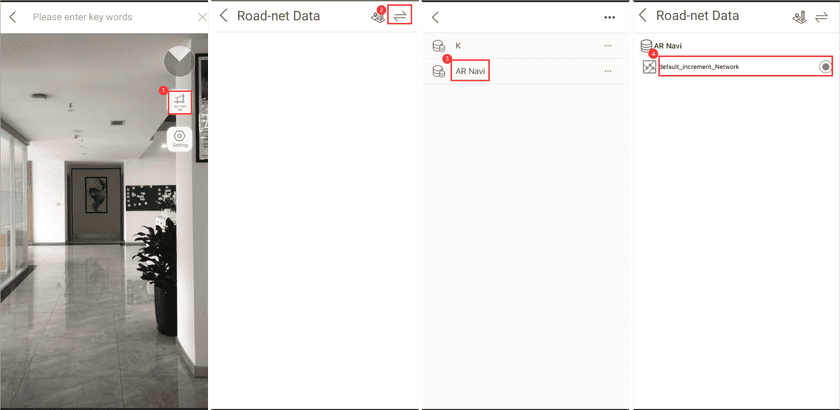
- Select network: click the Network button > Switch icon to open the datasource list. Select the datasource “AR Navi” and check the route network data. After all click the Back icon on the left-top corner.
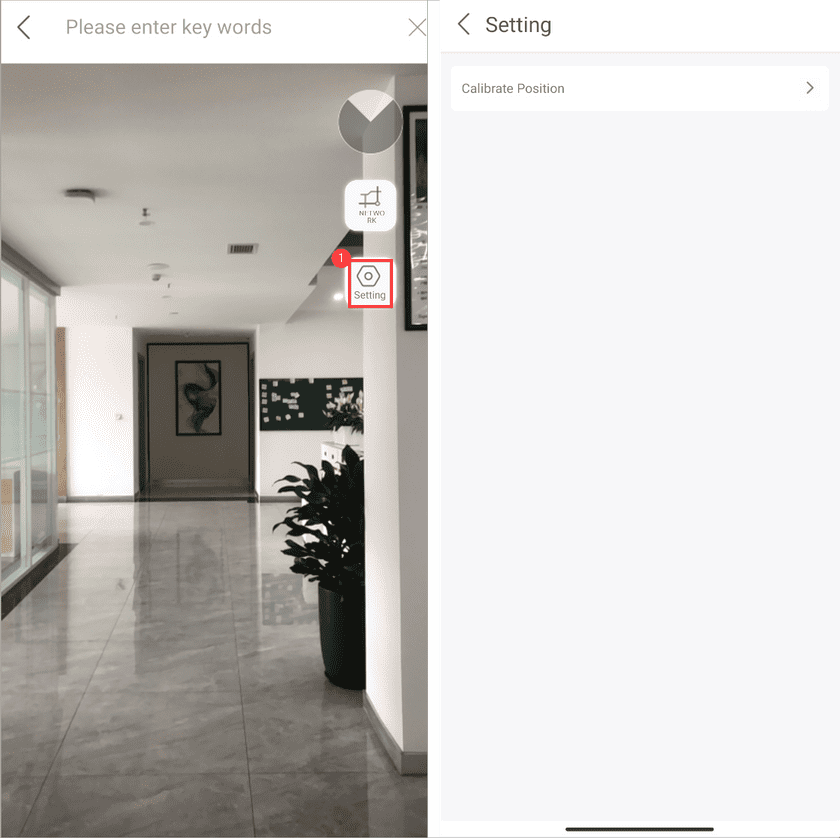
- Calibrate position: click the Setting button > Calibrate Position > AR Location and scan the location code to calibrate the current position.
- After all, you can enter the key words to search the destination.
- AR Navigation: click AR Navigation to navigate according to the searched routes.
