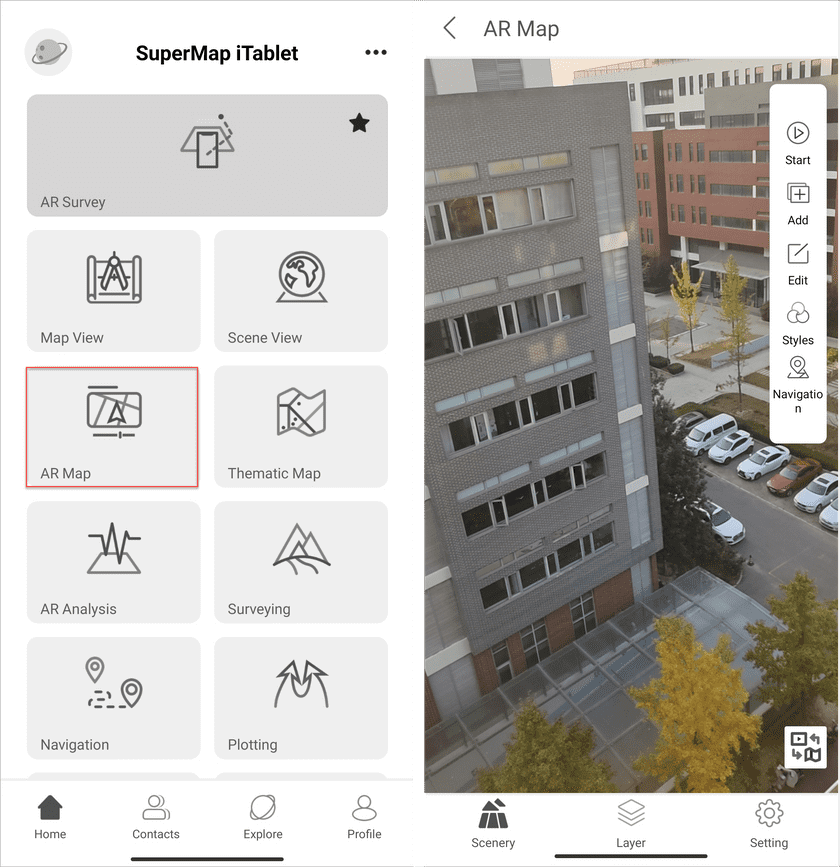
The AR Map module can overlay spatial information and multimedia information on real scene. After adding information, you can set its attributes like positions and sizes.
On the Home page click AR Map to access the module.
Add features
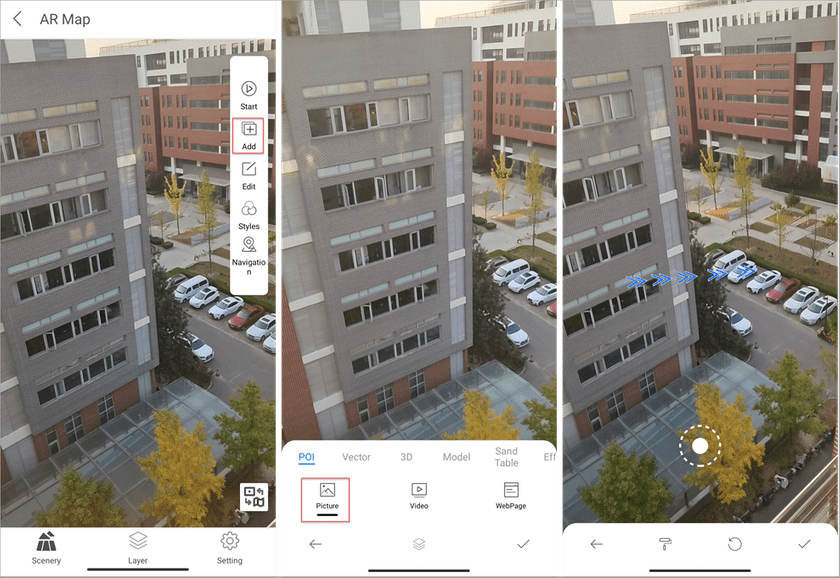
- Click the Add button on the right toolbar and select the type of data you want to add on the real scene. The supportive types include pictures, videos, websites, scenes, text, models, and special effects. Here we take the addition of a picture as an example.
- Click POI > Picture and select a picture. You can add it to the current position of your device directly. Or, you can select a position to place the picture.
Set styles
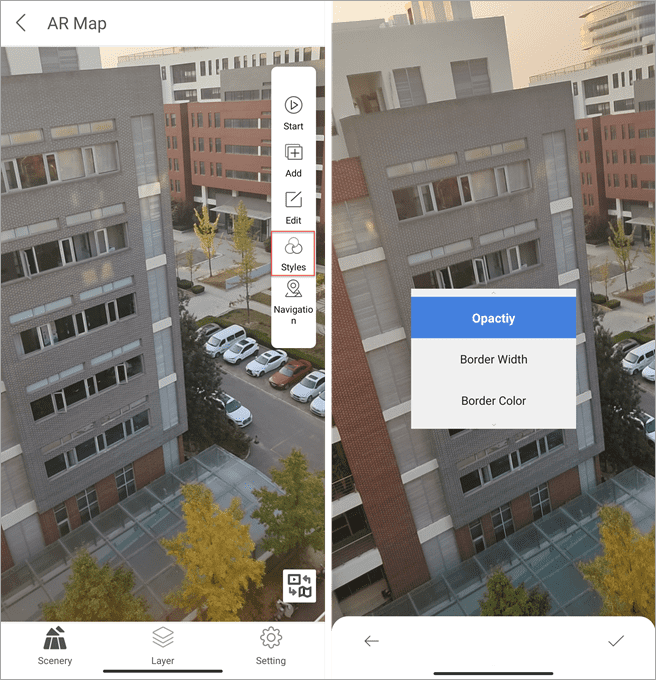
- Click the Styles button on the right toolbar and set parameters including opacity, border color, and border width.
Calibrate position
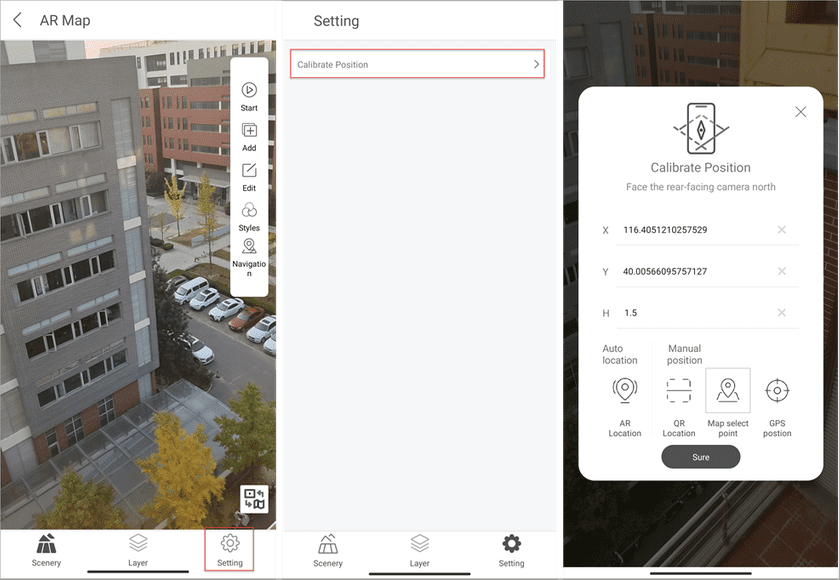
- After accessing AR Map or AR Survey, the app will open the Calibrate Position page. You can click the Setting button on the bottom toolbar > Calibrate Position to open the Calibrate Position page as well. The app provides 4 calibration ways including: AR Location, QR Location, Map select point, and GPS Position
QR Location needs to scan QR code to determine the position. And so we can use the QR code generators to generate QR codes in the format of {“x”:longitude,“y”:latitude,“h”:height} like {“x”:116.394777,“y”:39.995205,“h”:3.6}.


