Template data collection
When collecting data based on a template, the app can record attributes automatically during the procedure.
Create a new template-collection map
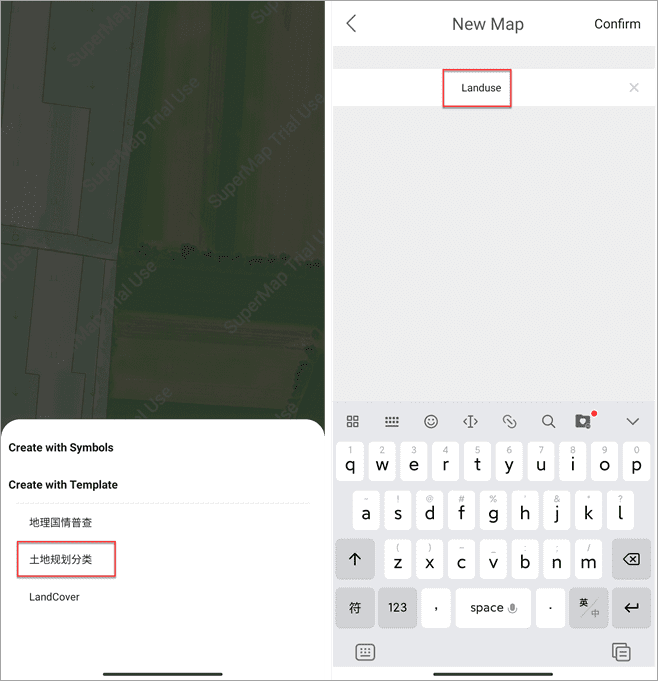
- Click Surveying to access this module. On the Map page click Start > New Map, select a template (here we select Tudiguihua), and enter a name to create a new map.
Collect data
(1). Select elements
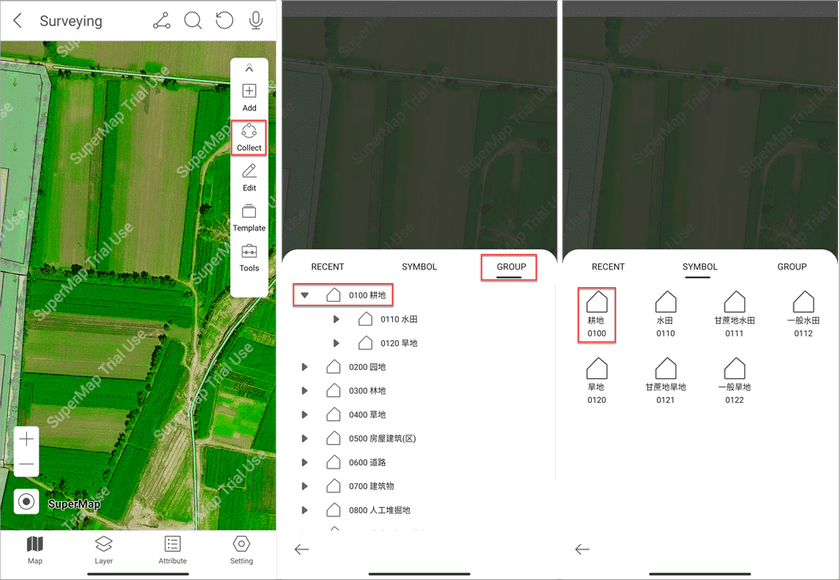
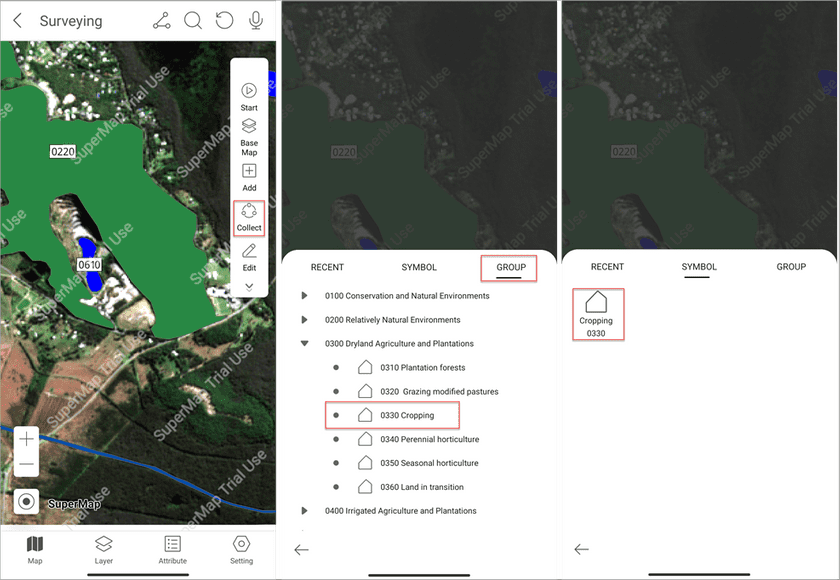
- On the Map page click the Collect button > Group tab, select a symbol group, on the Symbol tab select a symbol, and then draw symbols on the current map.
(2). Select a drawing way
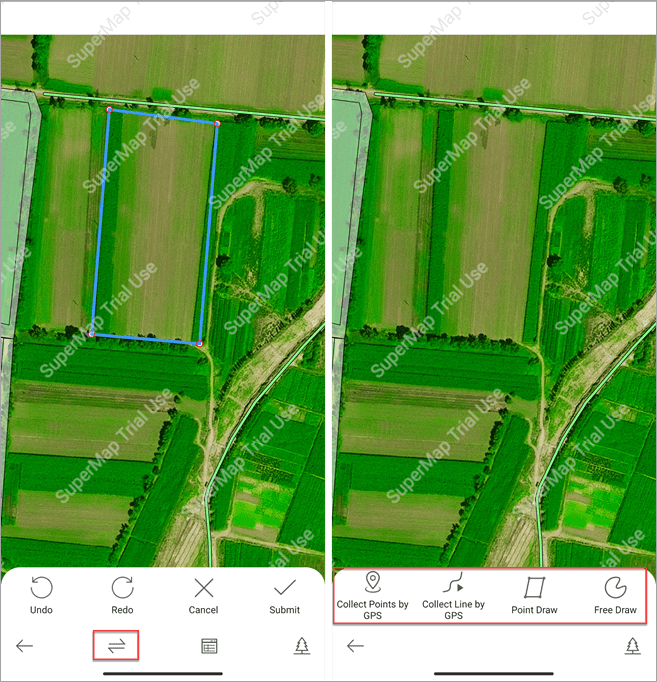
- Click the Draw icon and select a way to draw symbols on the map. The supportive drawing ways include Collect Points by GPS, Collect Line by GPS, Point Draw, and Free Draw.
(3). Collect data
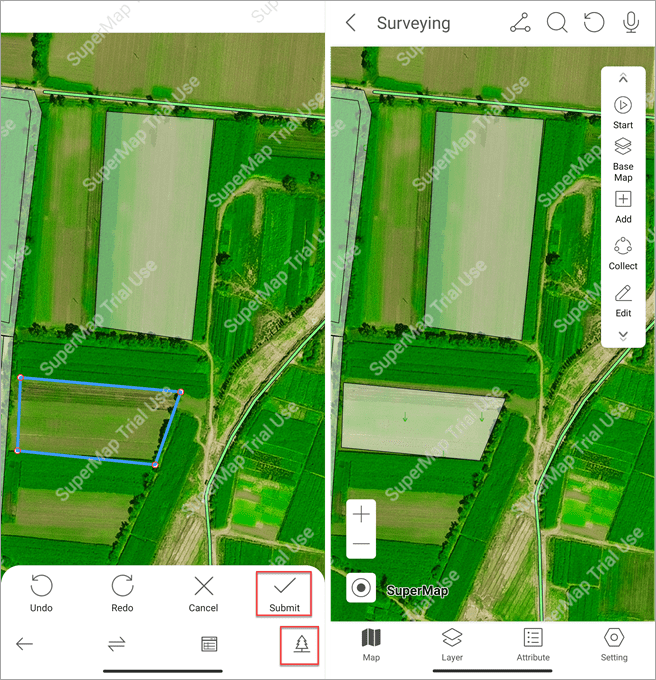
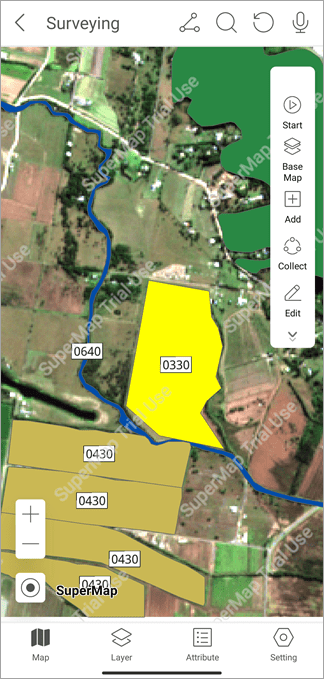
- Draw objects on the current map. During the whole procedure, the app can snap to nodes and lines to help draw objects. Besides, you can click the Collect to switch a symbol. After finishing the drawing, click Submit to save the currently drawing.
Collect multimedia data
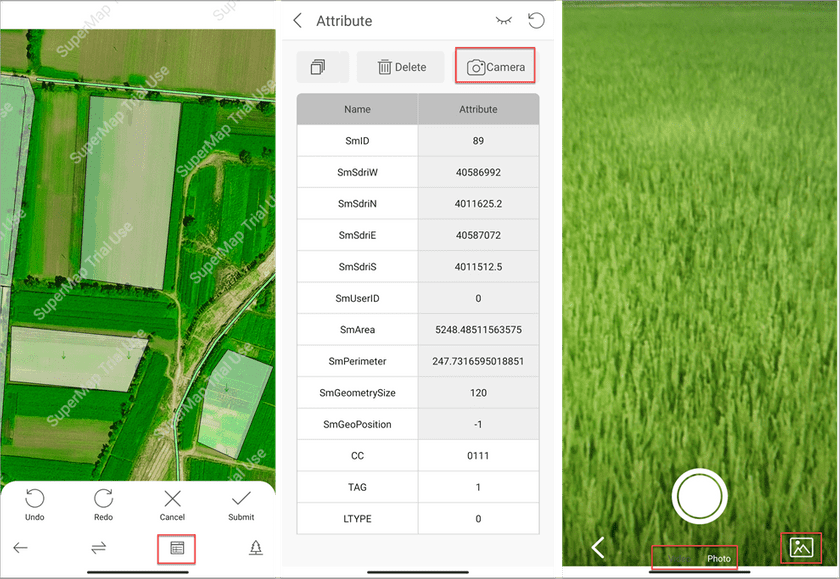
- After submitting an object, click Attribute to open the Attribute page. Swipe the toolbar and click Camera to add multimedia information like images and videos to the current element.
Edit objects
Edit nodes
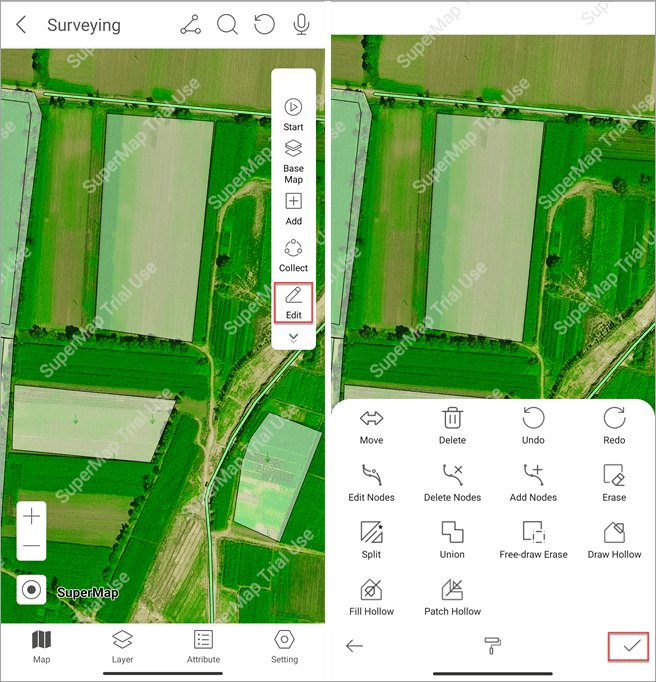
- After data collection, on the Map page click Edit and select an object to edit it. After finishing the operation, click Submit to save the changes.
- You can change, add, and delete nodes.
Topologically edit
- In addition to the node editing function, the Surveying module also provides abilities to topologically earse, split, and merge objects.
- On the Map page click Edit, select an object, and choose a topological editing way. After editing an object, click the Submit icon to save the changes.
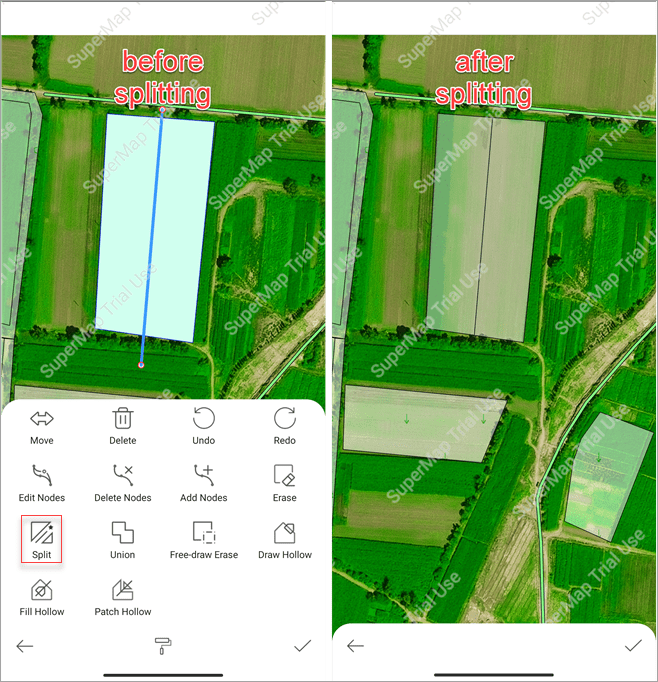
- Split: draw a temporary polyline on an object to split it to two new objects.
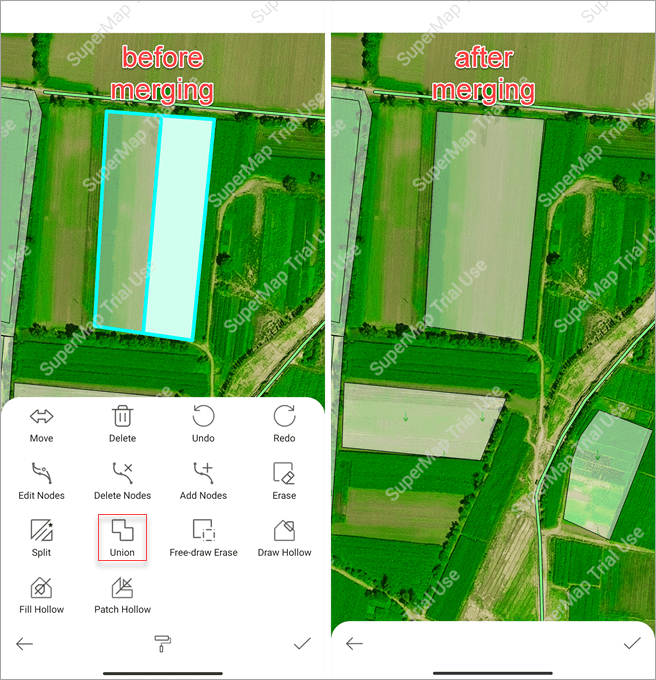
- Union: merge multiple regional objects into one object.
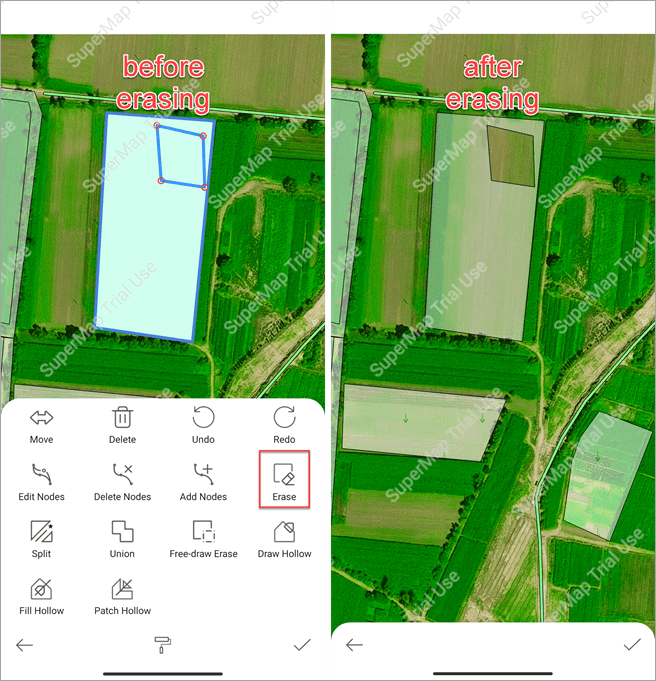
- Erase: draw an erase object by clicking to erase overlaps from the target objects with the drawn object from the current map.
- Free-draw Erase: freely draw an erase object to erase overlaps from the target objects with the drawn object from the current map.
- Draw Hollow: draw objects on the target object to generate hollow objects.
- Fill Hollow: draw a temporary polyline across a hollow object to fill it resulting into a simple region object.
- Patch Hollow: draw a temporary polyline across a hollow object to create a new region object to patch it.
Delete and move objects
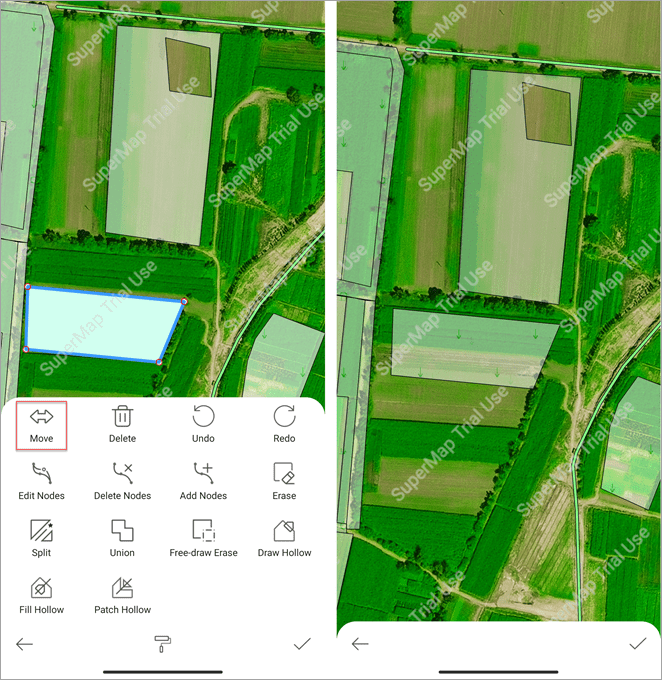
- Move: in the object-editing status, after selecting an object, click Move, and then you can move it. After all, click the Submit icon to save the change.
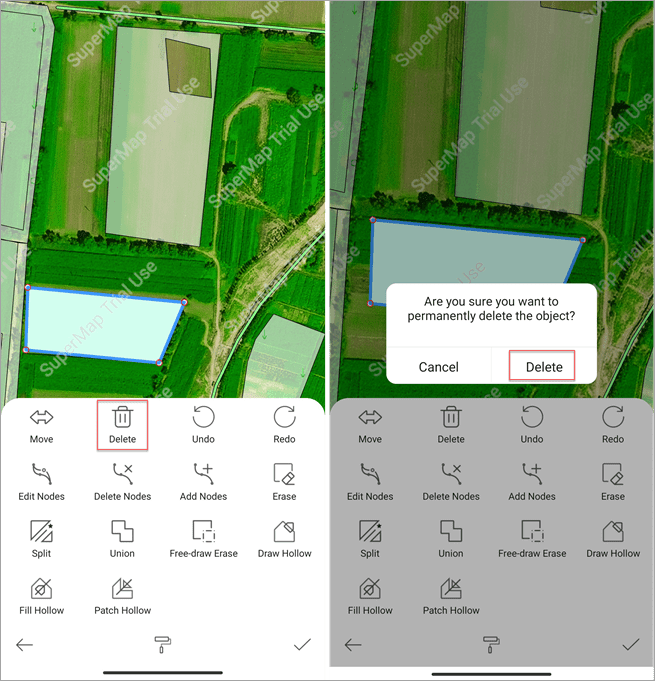
- Delete: in the object-editing status, after selecting an object, click Delete and in the popup select Delete to delete it.
Commonly collect data
The procedure of common data collection is almost the same as the template data collection, and the difference is the created maps.
Create a common collection map
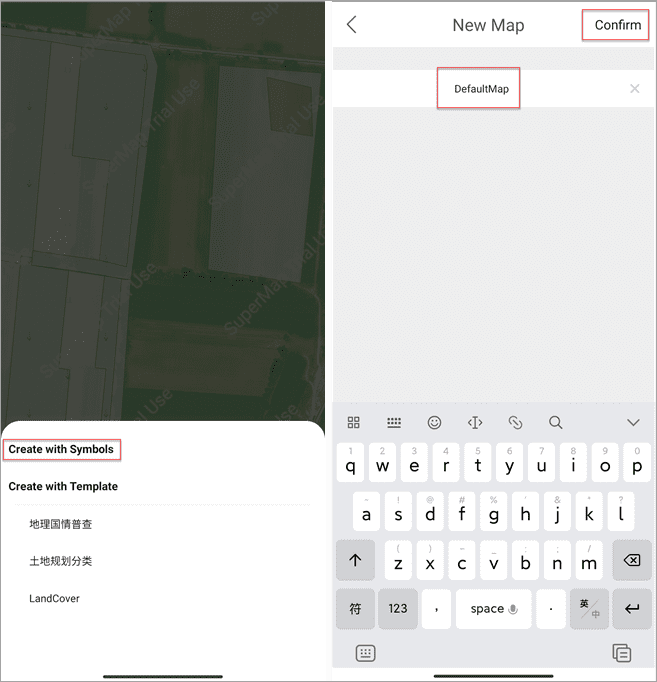
- After accessing the Surveying module, click Start > New Map > Create with Symbols to create a map.
Collect data
(1). Select a symbol
- Click Collect > Group and select a symbol to draw on the current map.
(2). Select a drawing way
Please refer the section Template data collection.
(3). Collect data
Please refer the section Template data collection.
Share data
Share data online
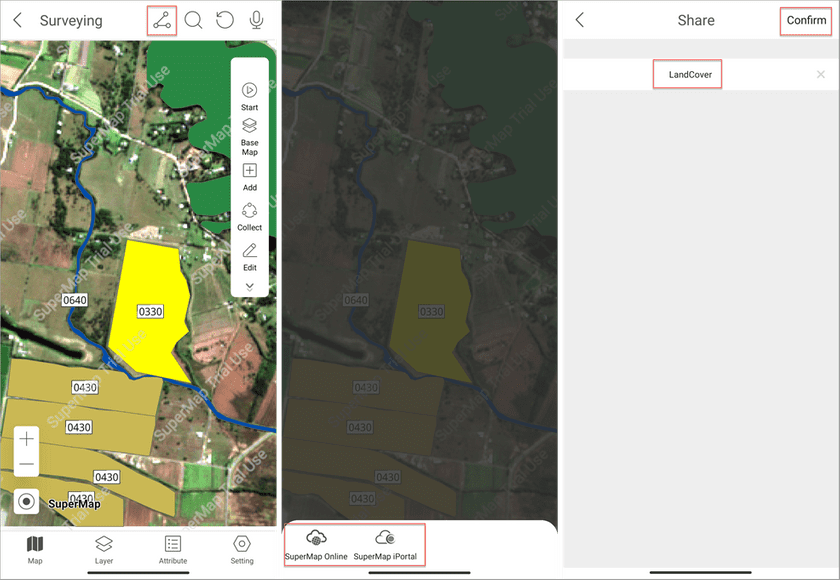
- After data collection, click Start > Save Map to save data.
Offline share data
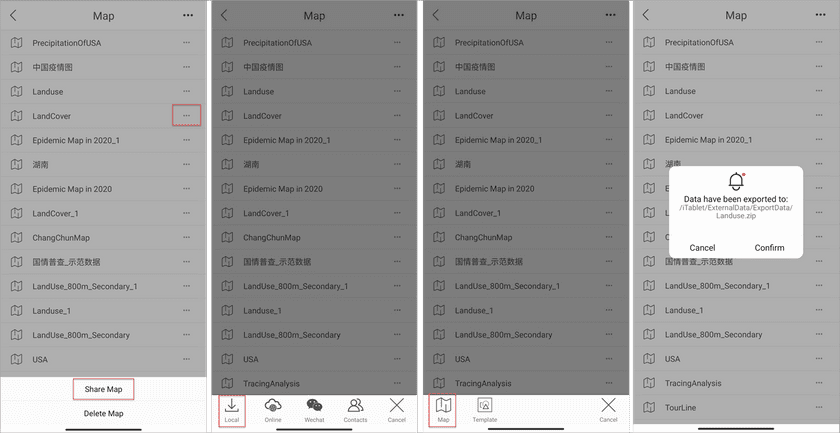
- After saving your map, click Profile on the home page > Map > the three-horizontal-dots icon beside your map, and select Share Map.
