SuperMap iTablet supports multiple thematic maps in the types of unique, range, label, area, stair, polyline, scatter, bar, 3D bar, pie, 3D pie, rose, 3D rose, stack, 3D stack, ring, point density, graduated symbol, raster unique, raster range, and heat.
This article takes “Epidemic Map in 2020” as an example to introduce the whole procedure of creating a thematic map.
Create a thematic map
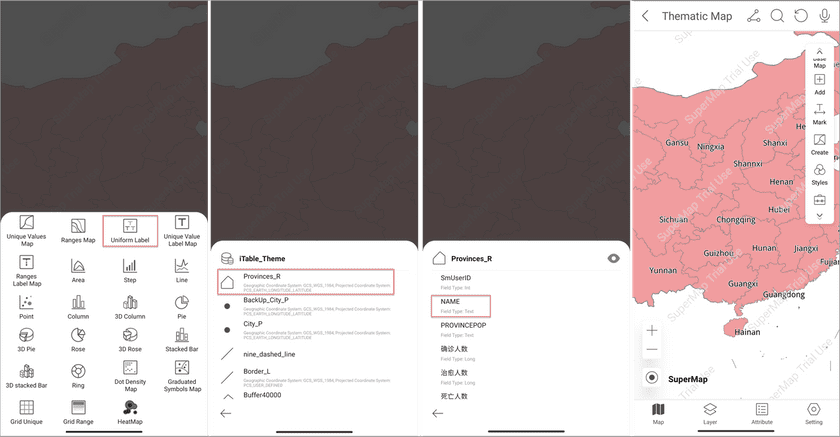
- On the Home page click Thematic Map > Create on the right toolbar to open the thematic-map type panel.
Label thematic map
- In the thematic-map type panel, select Uniform Label, specify the target dataset, and set the expression field to generate a label thematic map.
Range thematic map
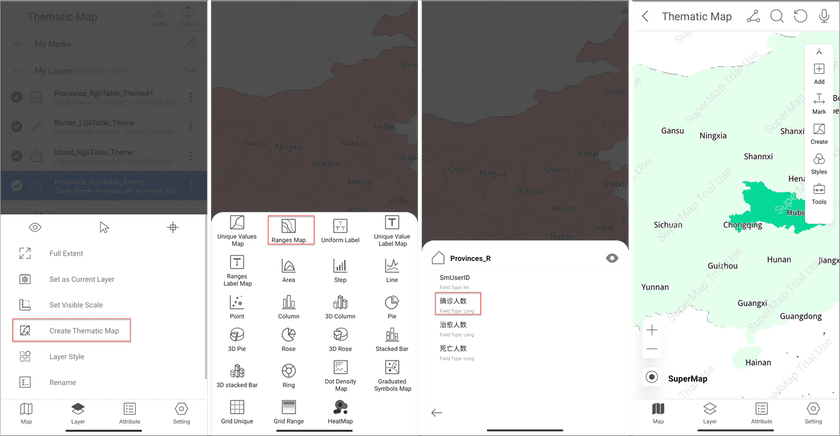
- Besides, you can click the vertical dots beside your layer on the layer list and select Create Thematic Map to open the thematic-map type panel. Here we select Ranges Map, and then specify the field to generate a range thematic map.
Diagram
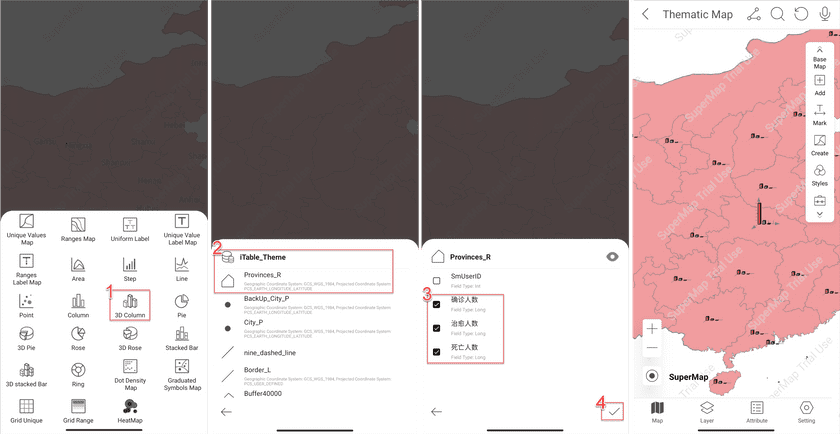
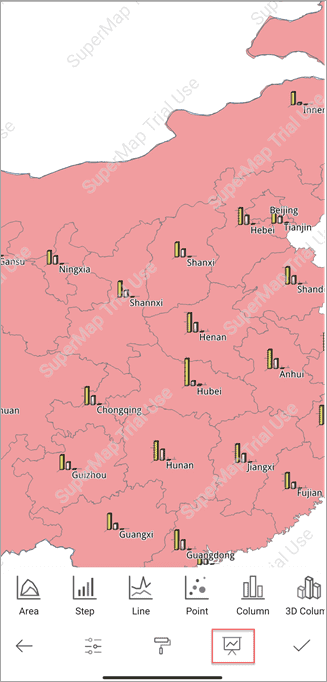
- Select a thematic type (here, we select 3D Column) and specify the target dataset and the expression field. After all, click Submit icon.
Set styles
Set styles of a label thematic map
(1). Specify the current layer
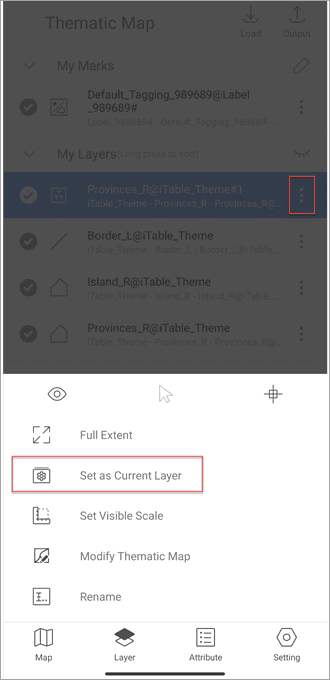
- On the Layer page click the three-vertical-dots icon beside the label thematic map and select Set as Current Layer.
(2). Open the Style Setting panel
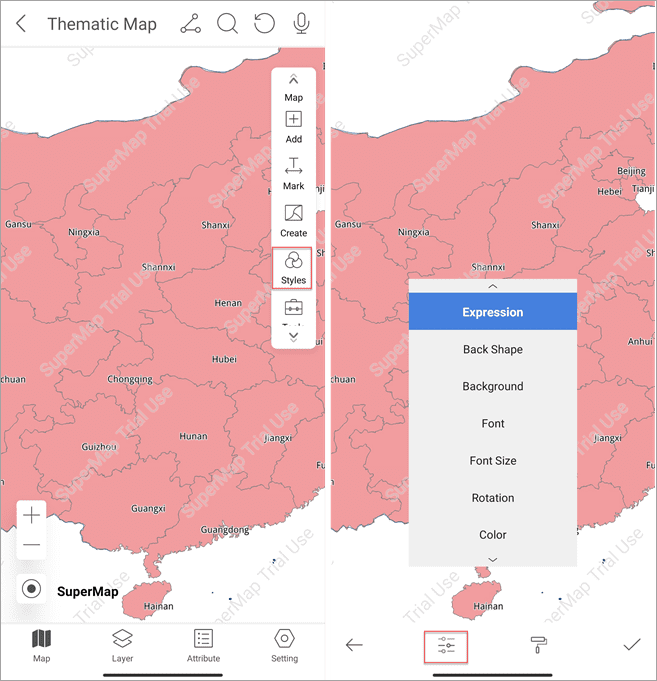
The uniform label thematic map supports setting expressions, background shapes, background colors, font, font-size, rotation, font colors, etc.
- On the Map page click Styles on the right toolbar to open the Style Setting panel. And then you can set the styles of thematic map. On the bottom toolbar click the second icon to hide/show the panel.
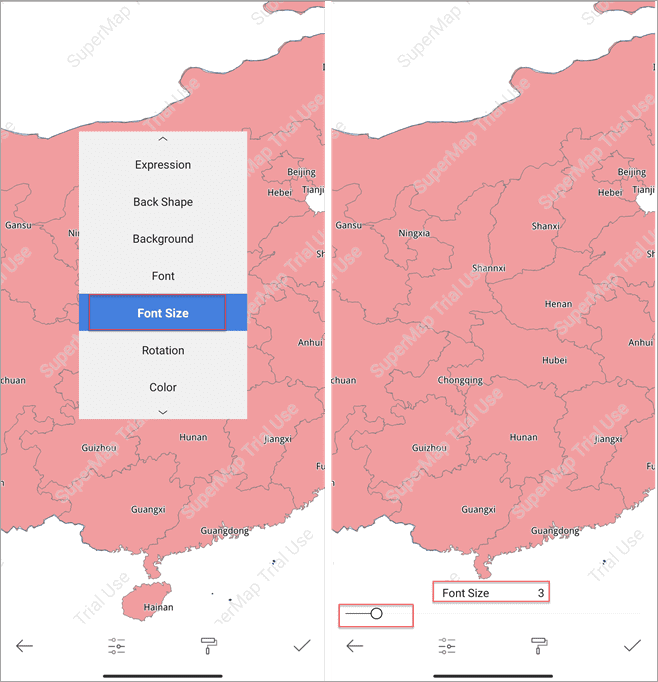
- On the Style Setting panel click Font Size and drag the slider or enter the font size directly.
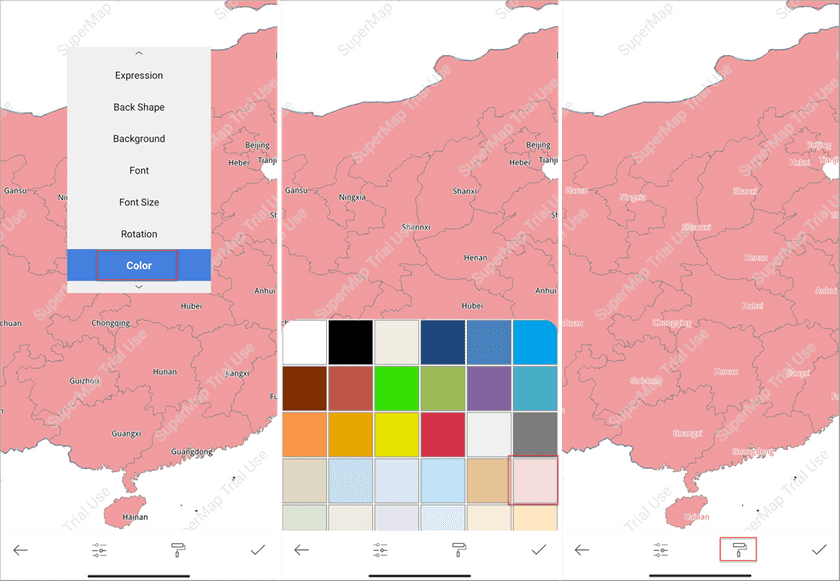
(4). Set font color
- On the Style Setting panel click Color and select a color from the color panel.
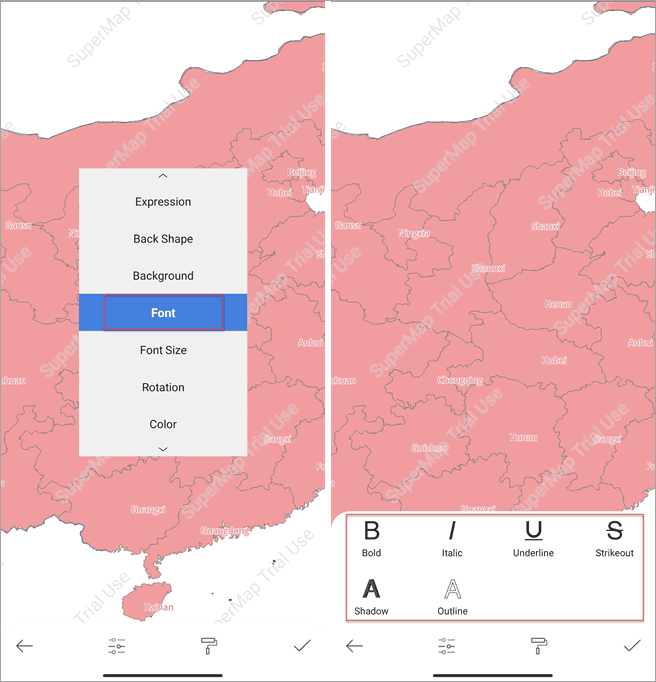
(5). Set font
- On the Style Setting panel click Font to open the font setting panel.
(6). Save settings
- After finishing all settings, click the Submit icon to save them.
Set styles of the range thematic map
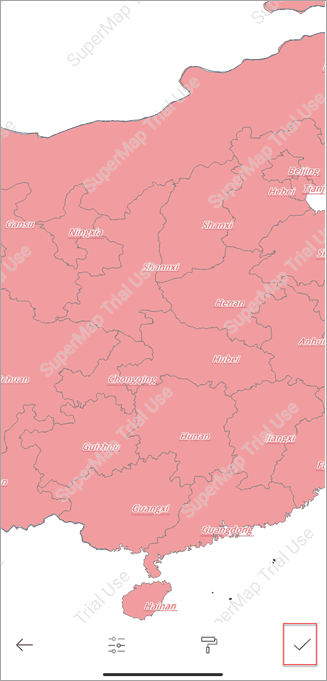
- Set the range thematic map as the current layer, and click Styles on the right toolbar to open the Setting panel.
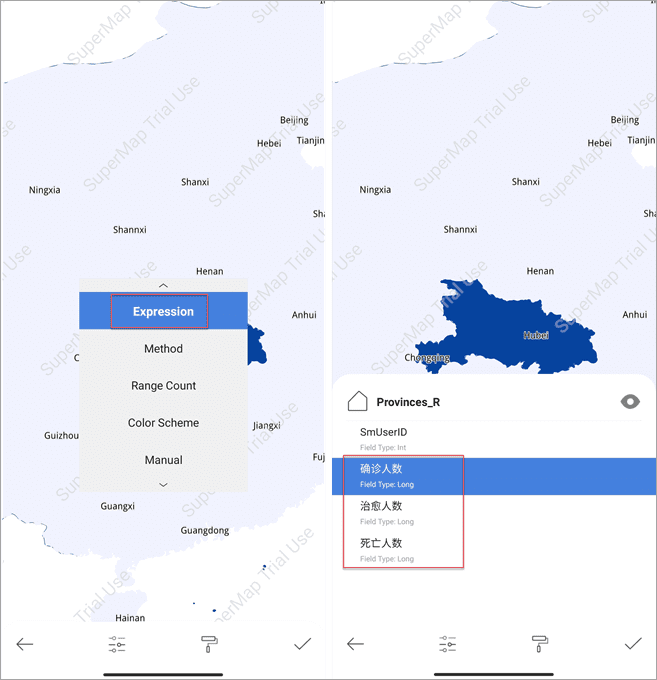
(1). Set the expression
- On the Setting panel, select Expression and specify the required field from the field list.
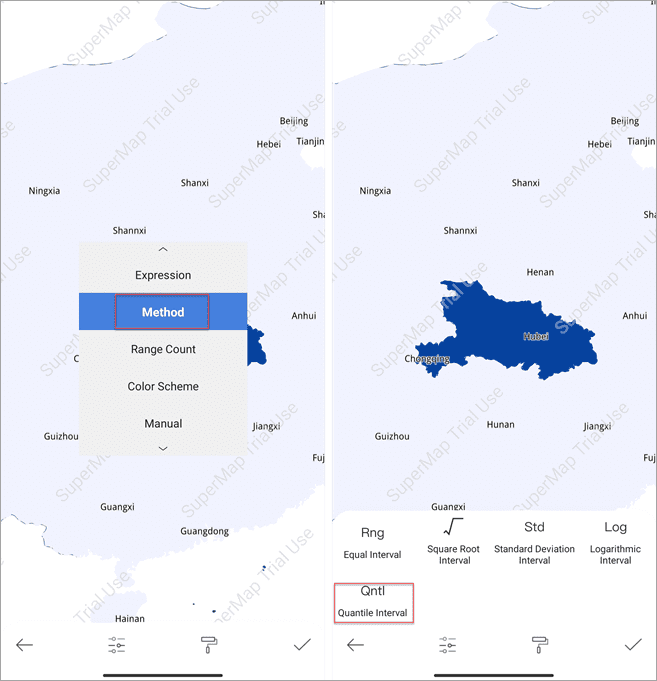
(2). Set the range method
- On the Setting panel, select Method and specify an algorithm.
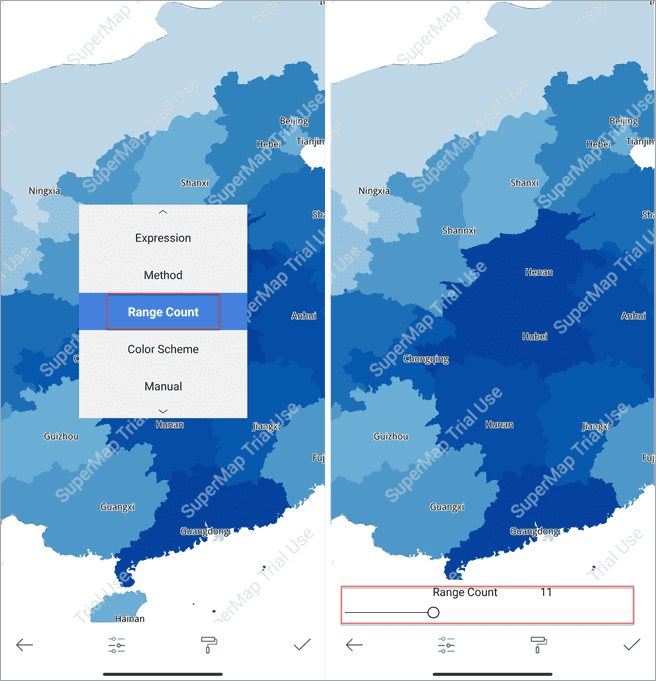
(3). Set the range count
- On the Setting panel, select Range Count and drag the slider or enter the target count directly.
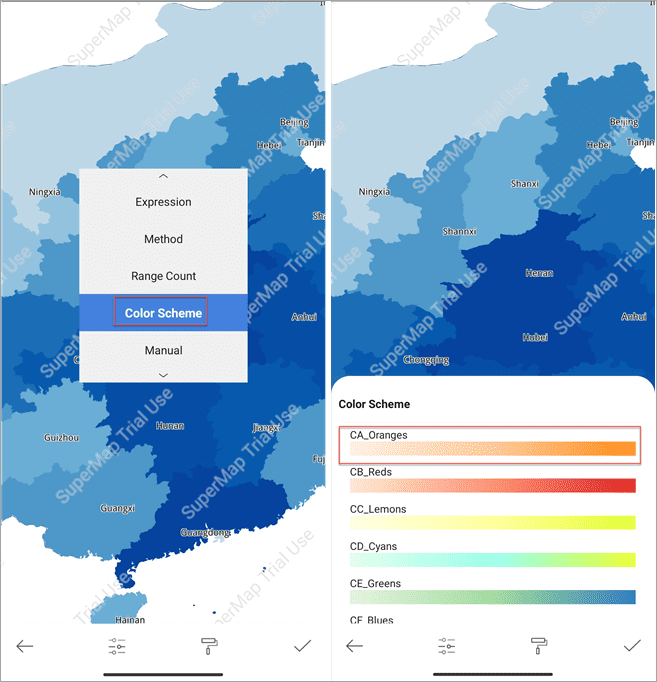
(4). Set the color scheme
- On the Setting panel, select Color Scheme and choose a proper color scheme from the Color Scheme panel.
(5). Customize the ranges
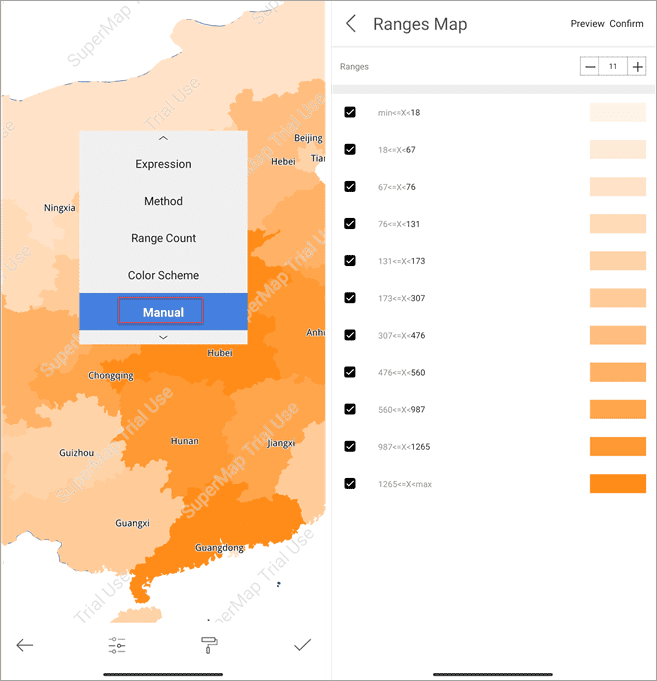
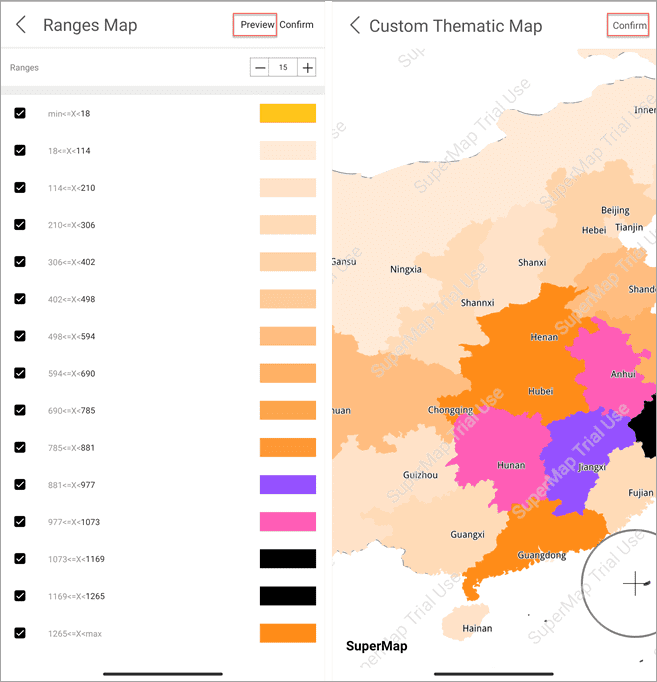
- The app allows to customize ranges of thematic map.
- On the Setting panel, you can click Manual to open the customization page.
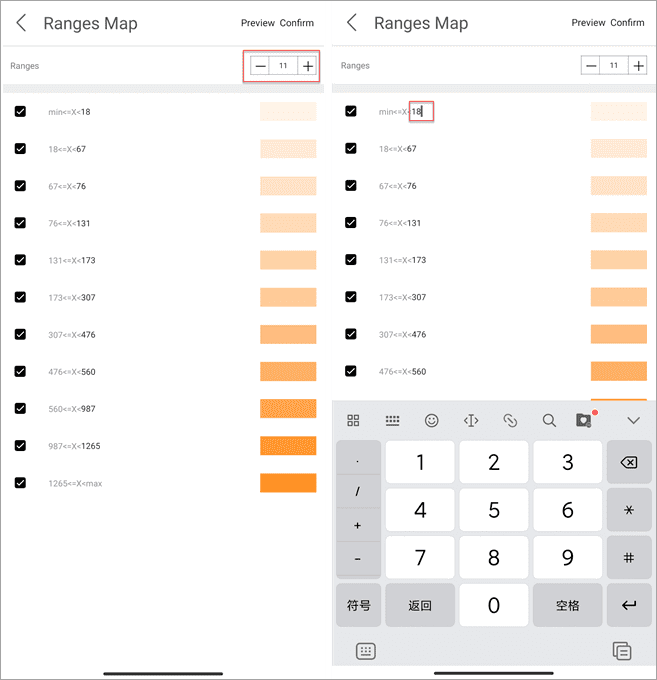
- Set the number of ranges: click the Plus icon or the Minus icon to increase or decrease the number of ranges. You can enter the target number directly.
- Set each range: click the text box of each range and enter the range values directly.
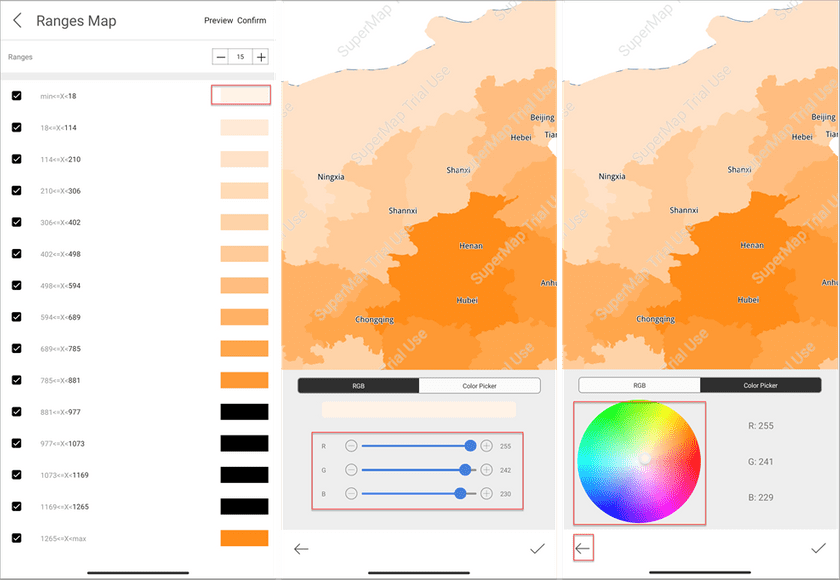
- Configure the color of each range: click the color block beside a range to open the Color Setting page. You can drag each slider to set RGB of each color or pick a color directly from the Color Picker panel. And then click the Back icon to continue other color settings.
- Submit: after all settings, click the OK icon to save all settings. Or, you can click Preview Confirm to preview the map and click Confirm to submit all settings.
Sets styles of the diagram thematic map
- Set the diagram thematic map as the current layer, and click Styles on the right toolbar to open the Setting panel.
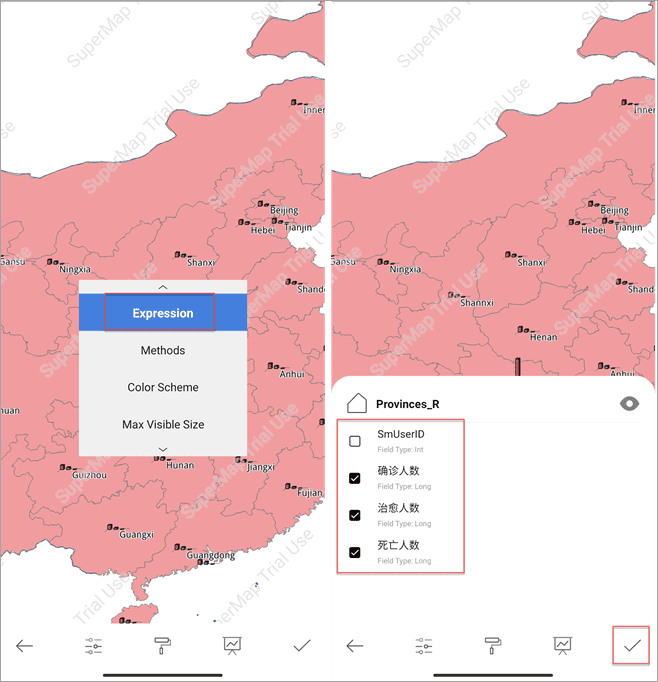
(1). Set the expression
- On the Setting panel, select Expression and specify the required field from the field list.
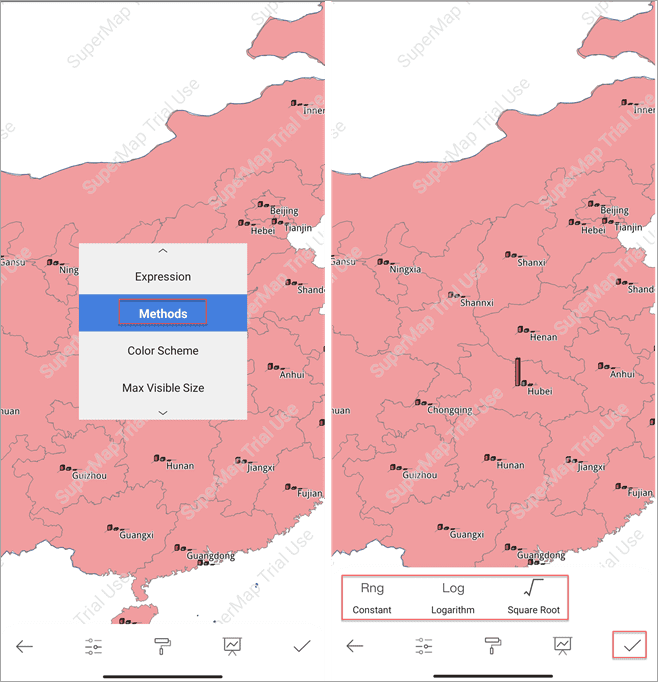
(2). Set the method
- On the Setting panel, select Methods and specify an algorithm.
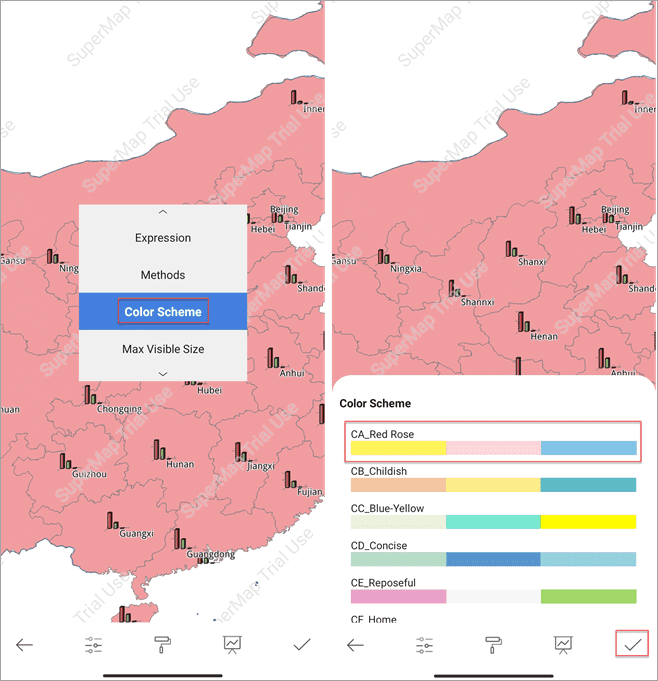
(3). Set the color scheme
- On the Setting panel, select Color Scheme and choose a proper color scheme from the Color Scheme panel.
(4). Switch the diagram type
- Click the Diagram icon and switch another type of diagram.
Create a legend
Create a legend
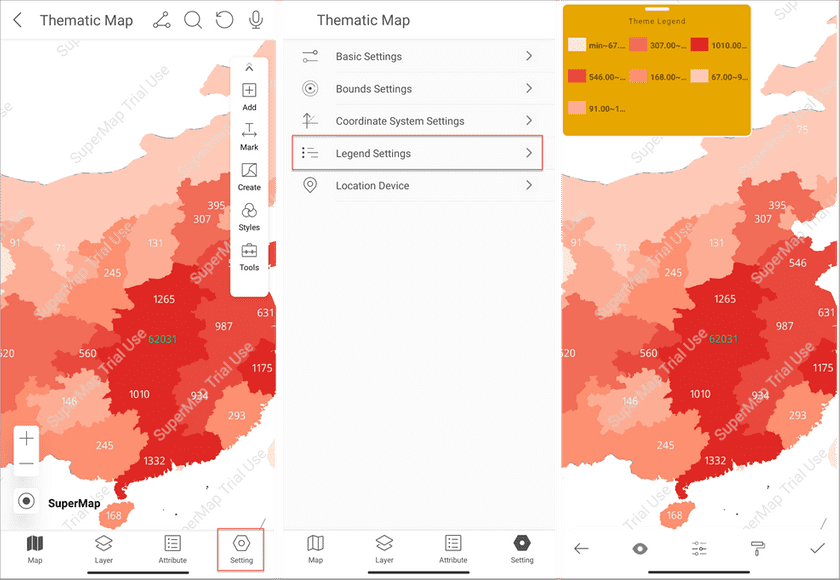
- Click Setting > Legend Settings and the app will generate a legend from the range thematic map.
Set the style of the legend
iTablet supports setting the visibility, filling color, columns, height, width, font size, and icon size.
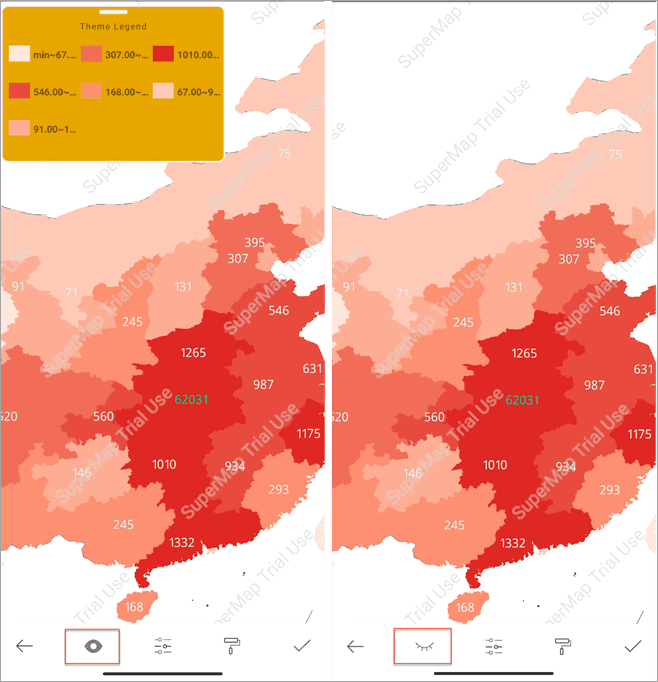
- Set the visibility of legend: click the Visibility icon to hide/show the legend.
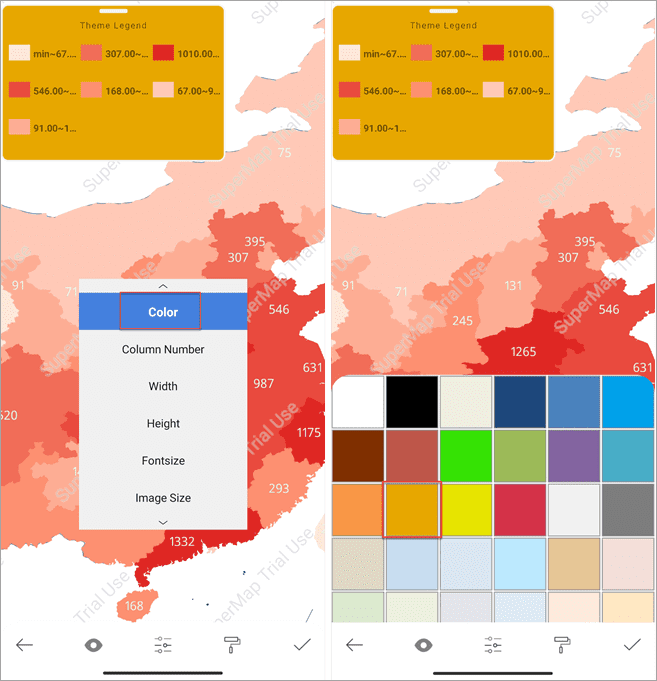
- Set the filling color: on the Style Setting panel select Color to open the color panel, and then we can select a color to fill the legend.
- You can set other parameters like the settings we described above. After all click the Submit icon to save all settings.
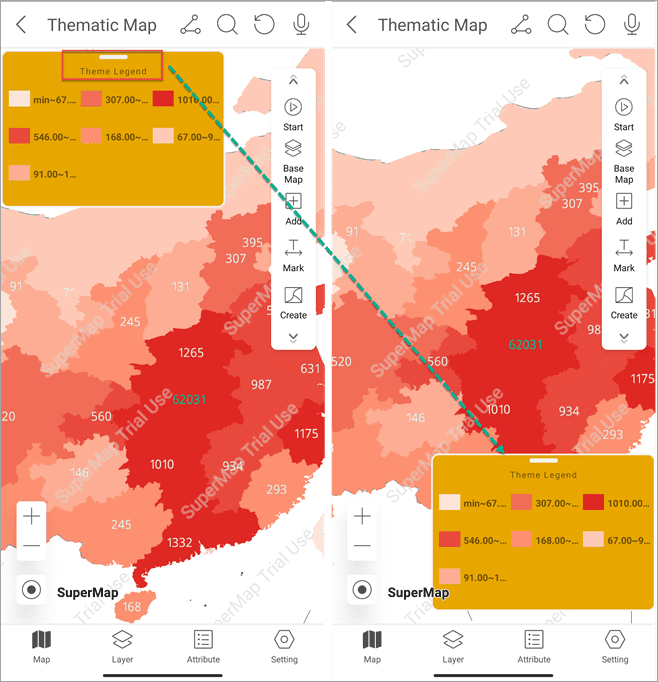
- Move legend: long-press the legend title and drag to the proper position.

