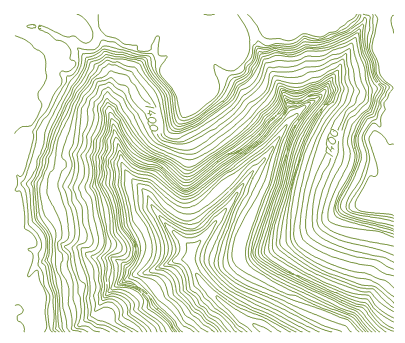
The function can greatly improve the vectorization efficiency, which is suitable for the data with clear line features. The main steps are:
First: Import
Import the raster data to be vectorized. The result data can be grid or image dataset.
Second: Register
If the imported raster data doesn’t have spatial position information, it’s needed to register it to assign the actual spatial positions. In addition, registration can also correct the raster data on some shape distortion. For the function of registration, please refer to the registration theme.
Third: Raster Binaryzation
If the lines are very clear in the data, there is no need for binaryzation processing, otherwise, it is needed to make raster binaryzation: first check the difference between the lines and the background values, second set the threshold, e.g., if the line value is bigger than 10000, the background value is smaller than 10000, then use the algebraic expression Con(dem > 10000, 1,
- to assign the background and the lines to 0 and 1.
Fourth: Automatically Tracing Vectorization
- Click Spatial Analysis>Raster Analysis>Vector Converter>Raster to Vector to open the dialog Raster to Vector.
- Set the raster dataset. If the raster data goes binaryzation processing, you need to select the processed dataset.
- Specify the result datasource, enter the result dataset’s name, and set its type in Result Data area.
- If the result dataset type is line, the following parameters are optional:
- Smooth Method: Valid only when the raster is converted to line dataset. SuperMap provides two smooth methods-”B spline method” and “grinding angle method”. For details please refer to the smooth methods document.
- Smoothness: Valid only when the raster is converted to line dataset and the smooth method is not “None”. When the smooth method is “B spline method”, if the smoothness value is smaller than 2, it will not smooth the data; when the smooth method is “grinding angle method”, it is valid when the smoothness value is larger than or equal to 1, and bigger the value, smoother the result data.
- Refine Raster before Conversion: The thin raster operation can reduce the number of cells that identify the linear features in raster data to improve the velocity and precision of the vectorization. For example, a scanned contour map may use 5 or 6 cells to show the width of a contour line. After the thin raster operation, only one cell is used to express the width. Or, you can thin raster/image data first, and then perform the vectorization of data. Please refer to Thin Raster for the specific operation.
- Set the result datasource and dataset name in Result Data.
- Datasource: Set the result datasource.
- Type: set the result dataset type, which can be point, line or region.
- Dataset Name: set the result dataset name.
-
Convert Specified Value Only: only the pixels with the specified value are processed.
- Grid Value: set the specified pixel value.
- Grid Tolerance: the pixels with the value within the tolerance range of the “Grid Value” value will be processed.
- The parameters in Image Settings part are only valid for image dataset vectorization.
- Background: the pixels with this background will be regarded as background and not be processed.
- Back Tolerance: The tolerance of the background color. The tolerance value corresponds to three values for R, G, B, e.g., if the tolerance is 10, then the pixels with RGB(R±10, B±10, G±10) are background. The tolerance range is (0~255).
- Click OK to start, click Cancel to cancel the operation.

Note: The result of the automatically tracing vectorization generally need adjusting, which can be realized by the tools in Object Editing. For details please see Object Editing.
