


Drawing Maps
Feature Description
The "Map" drop-down button provides the functionality to draw maps in the current layout. Clicking this button opens a drop-down menu, and by selecting items from the menu, you can implement the corresponding functions. The drop-down button menu includes six map fill shapes: rectangle, rounded rectangle, polygon, ellipse, oblique ellipse, and circle.
Access Points
- Features Tab->Objects Group->Map.
Operation Steps
- Click the "Map" drop-down button, and select "Rectangle" from the drop-down menu. The mouse cursor in the current layout changes to the drawing state. (You can also click buttons for other fill shape types in the drop-down list to draw a map with the selected fill shape.)
- At the desired location for drawing the map, click and drag the mouse to draw a rectangular frame for map filling in the current layout, similar to drawing a rectangle.
- After completing the rectangular frame, the Select Map dialog box appears. Select a map, click the drop-down button on the right of the Select Map label, and choose an existing map from the current workspace for filling.
- After clicking "OK", the selected map will be drawn using the rectangular fill method.
- Besides the rectangular fill frame, you can choose other map fill shapes from the "Map" drop-down list, such as rounded rectangle, polygon, ellipse, oblique ellipse, or circle, to draw maps in the layout with different fill shapes. The effects of filling maps with various shapes are shown in the figure below.
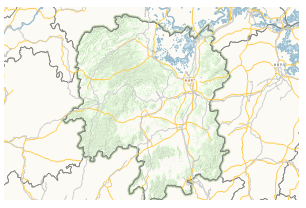
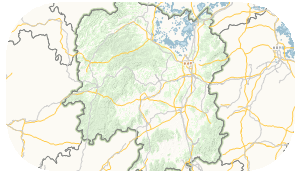
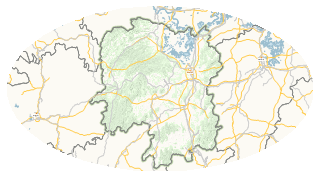
Figure: Rectangular Fill Figure: Rounded Rectangle Fill Figure: Ellipse Fill - Modify Map Properties: Double-click the map to modify its properties; or select the map, right-click, and choose "Properties" from the context menu to open the Layout Object Properties window. This provides the Basic tab and Geo tab. The Geo tab is used to set the map's size and position. For details, refer to: Layout Object Geo Tab. The parameters in the Basic tab are described below:
- Map name: The drop-down button on the right of the "Map name" label in the Basic tab displays and sets the associated map for the current fill frame. Click the drop-down button on the right of this label to select any map from the current workspace as the associated map for the fill frame. After selecting a map, the map displayed in the fill frame will change accordingly to the specified map.
- Scale: The display scale of the current map in the layout. You can set an appropriate scale based on display needs. After setting, click "Lock Map" to display the map at the set scale.
- Rotation: Rotate the current map in the layout by specifying an angle. After setting, click "Lock Map" to rotate the map according to the specified angle.
- Map Center Point: The center coordinates of the current map area are displayed on the right of the X and Y labels, supporting copy and paste of the layout center point.
- Graticule: Add a uniformly sized grid to the map in the layout, providing graticule and kilometer grid types. It supports grid addition, styling, and labeling settings. For detailed information on map grids, refer to: Map Grid Settings.
- Borders: Sets whether to display the map's border. After checking, you can configure the border display style. For specific settings, refer to: Border Settings.
- After drawing a map in the layout and adding layout elements like legends, north arrows, or scale bars based on that map, modifying the original map will not automatically change the associated legends, north arrows, or scale bars.
- The method for drawing map fill shapes is identical to drawing polygon features in map and layout.
- If you need to replace an existing map with another map, select the map to modify, and reassign the map in the "Map" group of the "Layout Style" tab.
Related Topics
How to Draw Map Fill Shapes in Layout?