Instructions
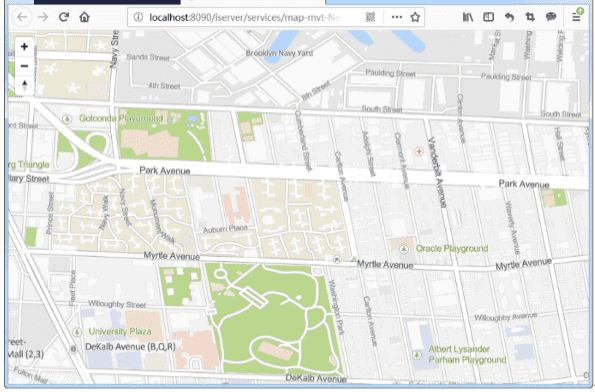
supports generating vector tiles (.mvt), that follow the MapBox MVT specification, from vector maps. Tile data contains geometric shapes and attributes of all features, while the MapBox standard style file (style.json) describes their styles. Compared with raster tiles, vector tiles can zoom continuously, modify feature styles, and are small in data size, which can better meet flexible and diverse web map applications. On the contrast of vector tiles and vector tiles, please refer to types of map tiles. This article describes the following contents:
How can we generate vector tiles?
Vector tiled styles
The vector tiles generated by SuperMap will be displayed on the SuperMap
iClient client based on the MapBox style file, and the client will render the
vector tiles using MapBox GL or OpenLayers. Point, line, polygon, and text
layers in SuperMap maps can be used for generating vector tiles (if the map
contains other layers, such as images, raster layers, these unsupported layers
are ignored when generating vector tiles). Layer styles, etc. will generate
tile style files according to the style specification of MapBox GL version 8.
For MapBox styles, please consult: https://www.mapbox.com/mapbox-gl-style-
spec. With MapBox GL version
upgrading, MapBox style will have a corresponding update.

Generate vector tiles
The application can create one task or multiple tasks to generate vector tiles and raster tiles. The following content introduces how to create vector tiles by multiple tasks.
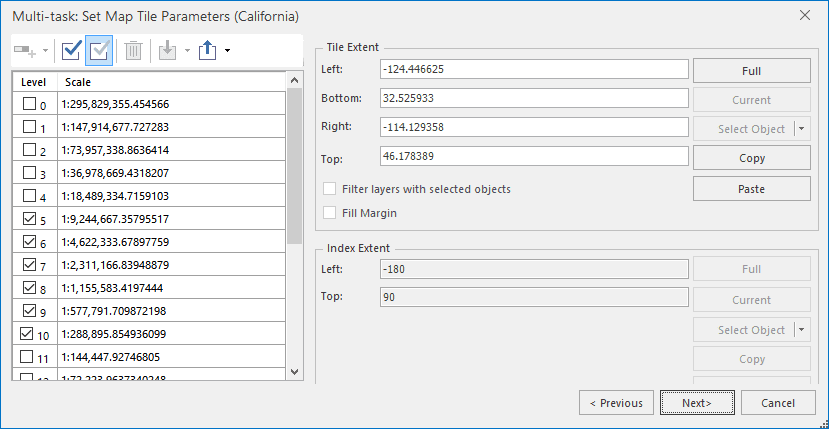
- Right-click on your map and select Map Tile(Multi-task) > New Multi-task Tiles to open the dialog box Multi-task: Set Map Tile Parameters where you need to set the following parameters.

- Tile Type : set Tile Type to Vector Tile.
- Select Scales : Select the tile scales to be generated in the Scale list.
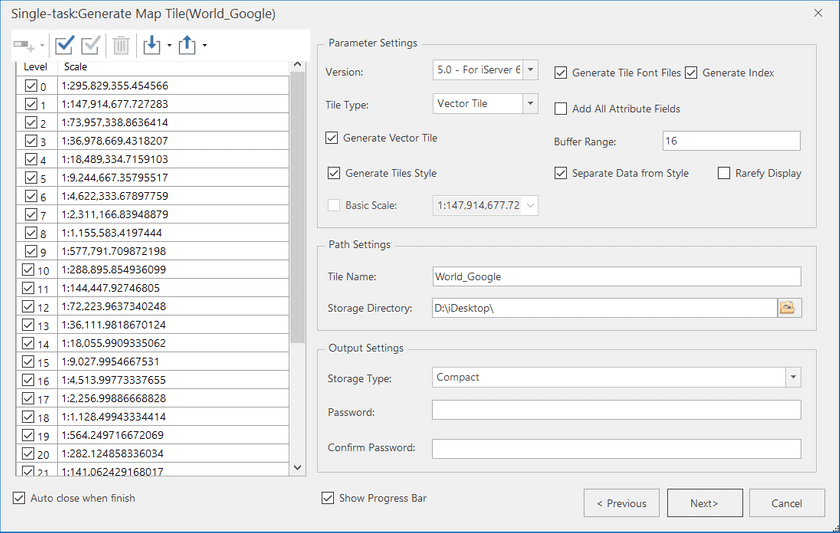
- Other Parameter Settings : Check Generate Vector Tile , Generate Tile Style , and Separate Data from Style to generate or update vector tiles, tile styles, and tile fonts independently. The generation of font files depends on tile styles, which means you must check Generate Tile Style once selecting Generate Font Cache Files**. But if you want to generate tile styles only, unselecting Generate Font Cache Files is suggested to save the operation time.
- Generate vector tiles : The result tiles are .mvt files which will be stored in the “tiles” folder.
- Generate tile style : Produce some *.json files containing the style corresponding to the map transformation, and the json files are saved in the two folders “sprites” and “styles”.
- Generate Tile Font Files : Produce a file recording the map fonts and it is saved in the “fonts” folder.
- Add all attribute fields : In the produced *.mvt files, all non system fields of objects are inclusive.
- Buffer Range : Set a tile buffer range, and then each tile will contain the data in the buffer range. The meaning of setting the buffer range is that when browsing tiles, the boundaries of adjacent tiles can be seamlessly connected.
- Generate Index : if there are vector regions in the resulting tiles (*.mvt), the feature will turn them into triangulation networks to speed up the loading of WebGL.
Note
- If you create one single task to generate tiles, you can check Generate Vector Tiles , Generate Tiles Style , or Generate Tile Font Files separately.
- But if you create multiple tasks to generate tiles, Generate Vector Tile and Generate Tiles Style will be checked by default and can not be modified.
- If a map layer uses filter expressions or labels which have backgrounds, we don’t suggest generating or updating vector tiles and style files separately in case the resulting tiles result in wrong styles.
- Path settings : Set up the tile name and storage directory.
- Set storage type : Supportive storage types are: Original, Compact, MongoDB. For more contents about storage types, please consult Map tile types.
- Set tile bounds : Click Next to head to the next page where you can set the full bounds of tiles.

- Click Next to open the dialog box Multi-task Generate Tiles where you can specify how many tasks you want to open. For details, please refer to Run Map Tile(Multi-task).
- Click OK to start the operation. You can click Refresh to check the generating progress.
Notes :
- The application doesn’t support generating tiles from a map which uses the plane coordinate system. If your map uses another coordinate system but there is a layer using the plane coordinate system, you should modify the layer’s coordinate system.
- The application doesn’t support setting the “Fill Margin” for vector tiles.
- The application doesn’t support updating, appending, resuming, or restoring vector tiles.
- The application can generate only tiles 5.0 by multiple tasks.
Resulting vector file directories
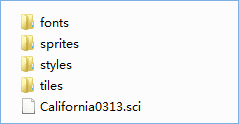
After all tiles are generated successfully, following folders and files are produced under the output path.

* fonts : Font files used by vector tiles.
* sprites : Resources relevant to icons’ styles.
* styles : Style description files.
* tiles : Vector tile data which is saved in different folders according to relative scale levels. Names of folders under the folder “tiles” corresponds to the levels of globe subdivision. The first level is 0. Names of folders under the level folders are column number of globe subdivision, and vector tiles whose names are row number of globe subdivision are saved under these folders in format .mvt.
- sci : A meta information description file which records information like the data projection, geographic bounds, scales, and so on.
Generate Vector Tile Style
You can modify the display of your tiles by updating their styles.
SuperMap supports generating styles for tiles without changing tile data. The detail operations are introduced below.
- Open your vector map, right click on the map window, and select Vector Tile Style…
- In the popup dialog box specify a folder to save the resulting tile data.
- There are three folders in the results including fonts (recording files used by tile data), sprites (recording icon-related information), and styles (recording style description information).
- Update your tile data with the newly created style. And then your tile data will be shown as the new style.