


Models can be saved in Workspace, and basic operations such as opening, saving, deleting, and renaming are provided. Detailed descriptions are as follows:
Open
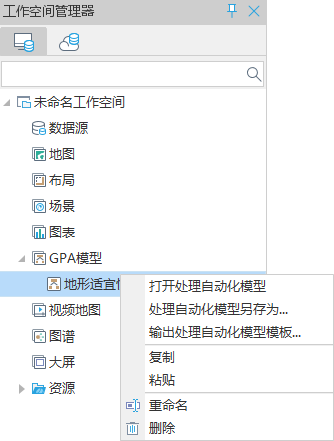
In the GPA Model node of Workspace Manager, double-click the model node to be opened, or select the model node, click the right mouse button, and select the Open GPA Model option. It opens in the Geo-Processing Automation (GPA) modeling window.
Browse
In the automatic modeling window, when the model flow chart is too long, Eagle Eye Diagram is provided to quickly locate the position of the tool displayed in the window in the model workflow.
To do this: On the Geo-Processing Automation (GPA) tab, in the View group, select the Eagle's Eye check box to quickly locate the location of the tool displayed in Current Windows in the workflow.

Preservation
Models in the Geo-Processing Automation (GPA) modeling window can be saved to Workspace for subsequent use and modification. After saving, you can view the Geo-Processing Automation (GPA) model under the Workspace Manager Model node.
Operation procedure: On the Geo-Processing Automation (GPA) modeling window, right-click and select the Save Model option, and enter the Geo-Processing Automation (GPA) Model Name in the pop-up dialog. Click the OK button to save it.
Save as
If you modify a Geo-Processing Automation (GPA) model that is already saved in Workspace, you can save the model as a new Geo-Processing Automation (GPA) model using the Save As function.
Procedure: After modifying the workflow template saved in Open Workspace, right-click on a blank space in the Geo-Processing Automation (GPA) modeling window and select Save as Model. Enter the Geo-Processing Automation (GPA) Model Name in the pop-up dialog box, and click the OK button to save it.
Edit Model
Support to save the current Geo-Processing Automation (GPA) model to the toolbox in the form of a tool, and save the parameters set by the tool. Modify the model and adjust the parameters through Edit Model and Edit Model parameters.
Operating procedure: On the Geo-Processing Automation (GPA) tab, click the Save As Tool button, set the group and name of the Model tool in the pop-up dialog box, and click OK to view the saved Model tool in the toolbox.

Further select Edit Model in the Model toolContext Menu, expand the Model tool to edit, select Edit Tool Parameter to Edit parameters names and descriptions, and hide parameters in batch. Hide the parameters that do not need to be set or modified to simplify the Parameter Settings in the Model toolParameter panel and improve the usability of Model tool.

Delete
Select one or more Geo-Processing Automation (GPA) models in Workspace Manager, right click, and select Delete Model in the pop-up Context Menu, or directly press the Delete key to delete; Prompt dialog box pops up to ask whether the user really wants to delete it. Click the Confirm button in the dialog box to delete the selected model; click the Cancel button to cancel the deletion.
Rename
The rename function can be used to modify the name of a Geo-Processing Automation (GPA) model.
Operating Steps: Select the Geo-Processing Automation (GPA) model to be renamed, right-click and select Rename or press F2. At this time, the Show Name of the model node is editable. Enter a new name. Click anywhere in the Application interface or press the Enter key to complete the modification of the Model Name.
Add to Tab
The Add to Tab feature supports both desktop-provided tools and custom tools.
Operation steps: Select a tool, click the right mouse button, and select Add to Tab to display the added tool in the Toolbox tab.
There are two ways to cancel a tool on the tab:
- View tab-> Customize-> Environment Design-> Work Environment Design, Find the added tool in Ribbon-> Basic Functional Area-> Toolbox under Work Environment Designer, and delete it with the right mouse button.

- Open the "/workEnvironment/Default/" SuperMap. Desktop. WorkflowView. Config "file under the root directory of the product package, search for the name of the added tool, and then delete the corresponding code block.

Create Label
Click the right mouse button in the blank area of the canvas or after selecting a Model tool and select Create Label to Add a label for the model to enhance the readability of the model.
Model search
Model search refers to the search of tools, variables, outputs, etc. involved in model creation in the canvas window. When the model involves more nodes, it can quickly locate the location of the search content.
 Related topics
 Geo-Processing Automation (GPA) Overview