


To facilitate secondary development, SuperMap iDesktopX provides an extension development sample template project SampleCode. After installing development tools and JDK 1.8 on your computer, you can implement extension development by simply configuring UI settings in the configuration file.
Environment configuration steps:
2. Development Project Configuration
Detailed instructions for environment configuration:
1. Software Installation
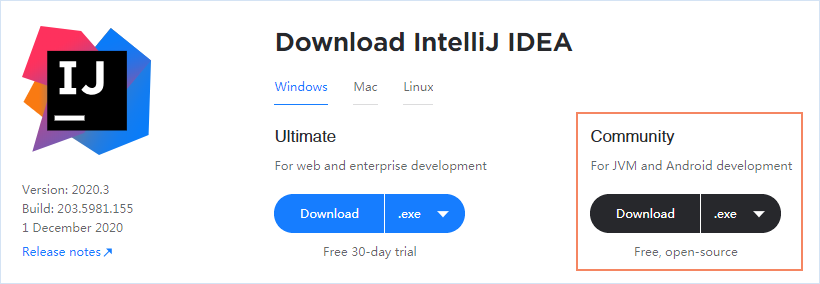
Step1: Install IDEA
We recommend using IDEA 2020.2.2 or newer versions as the development tool. Download the Community Edition from the IDEA official website, then double-click the *.exe file in the installation package to install.
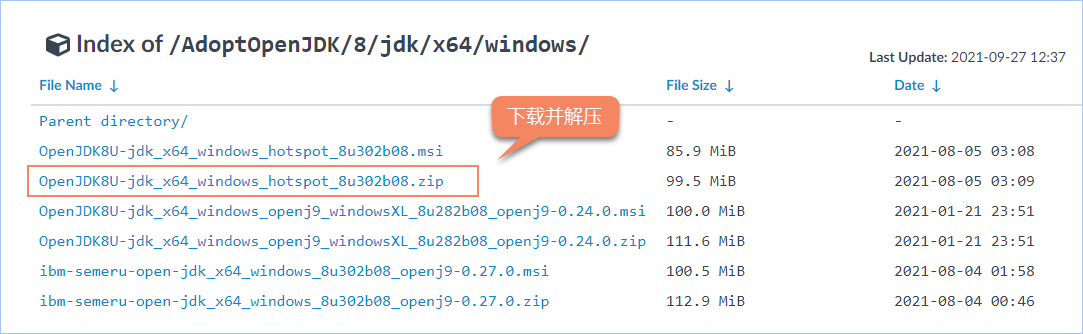
Step2: Install JDK
Download OpenJDK8 and extract it to a specified directory, then add its path to system environment variables.
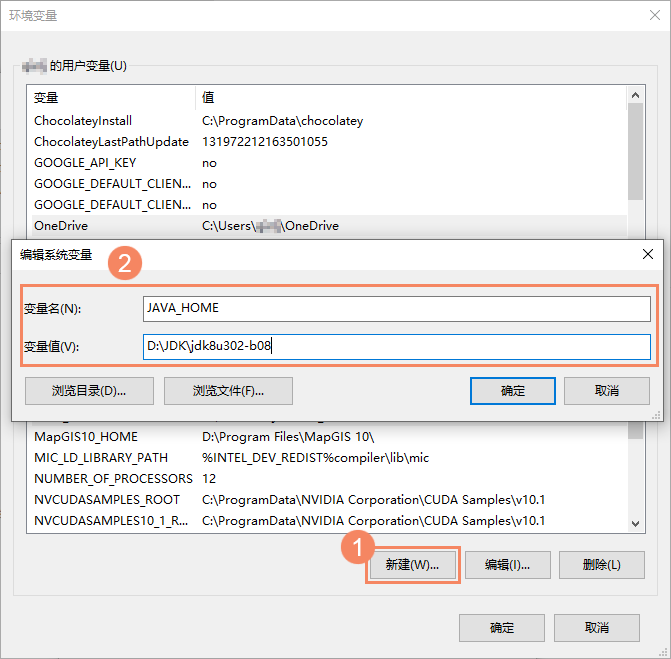
- Create a JAVA_HOME variable with the value %JDK installation path%, e.g.: If JDK is extracted to "D:\jdk\jdk8u302-b08", configure as shown:
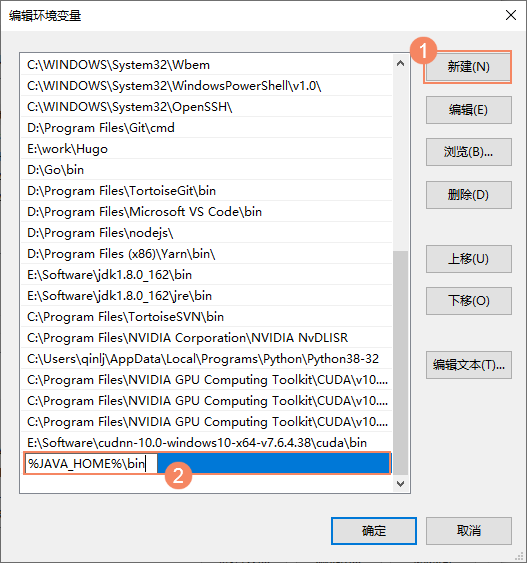
- Append %JAVA_HOME%\bin to the Path variable.
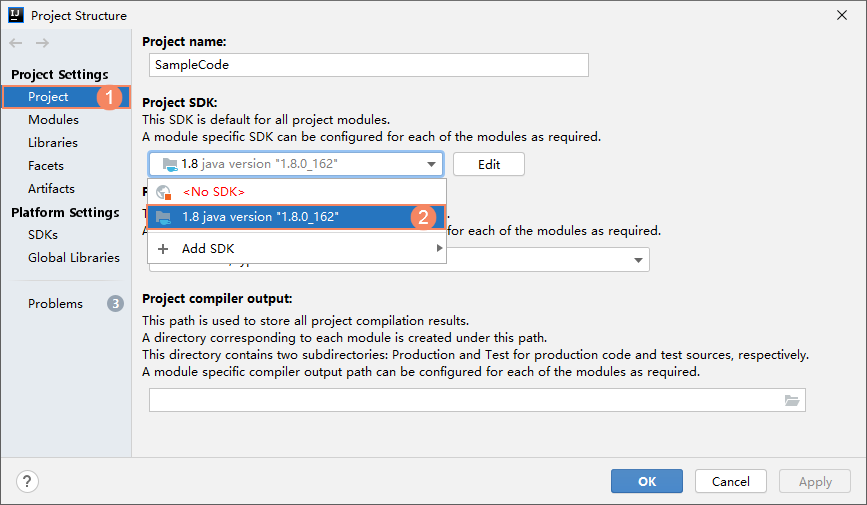
- Set Project's JDK environment to 1.8 via: File->Project Structure->Project->Project SDK->Select 1.8 from dropdown.
2. Development Project Configuration
SuperMap iDesktopX provides two methods for configuring extension development projects:
- Recommended method: Directly build secondary development projects through the "New Custom Development Project" function in the View tab. This efficient approach automatically handles desktop dependencies, allows custom project parameters and storage paths, and enables importing sample code for rapid development.
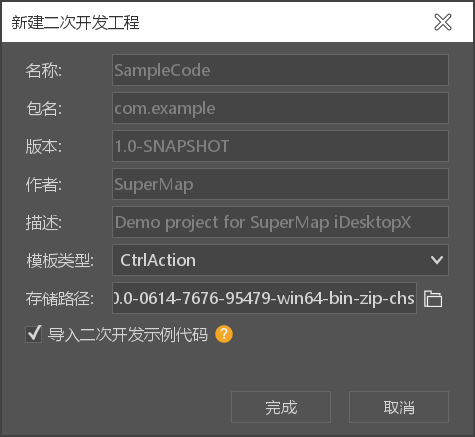
- New Custom Development Project: Click View Tab->Custom Group->New Custom Development Project. In the dialog, set project name, package name, version, author, description, select extension template type (CtrlAction for basic functions/GPA for toolbox tools), and specify project path.
Note: Checking "Import Secondary Development Sample Code" will load sample templates into the project, adding an "Example Code" tab when launched.
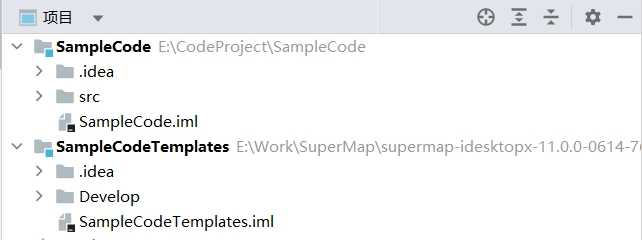
- Open Project in IDEA: After creation, click "Open the Project" in output window to launch in IntelliJ IDEA. The SampleCode directory contains the new project. With sample code imported, SampleCodeTemplates directory will be included.
- Compile: Click Run/Debug to compile and auto-launch SuperMap iDesktopX. Successful compilation adds:
- CtrlAction Group or GPA Example Group in Ribbon
- GPA Example Tools (Delete Duplicate Points/Set Coordinate System) in Toolbox if using GPA template
- Example Code Tab with common functions (Swing Controls, Basic Operations, Map/Scene/Layout Operations) when sample code is imported
Note: Upgrade IDEA to 2020.2.2+ if auto-launch fails.
- New Custom Development Project: Click View Tab->Custom Group->New Custom Development Project. In the dialog, set project name, package name, version, author, description, select extension template type (CtrlAction for basic functions/GPA for toolbox tools), and specify project path.
- Alternative method: Use sample template projects with manual dependency configuration.
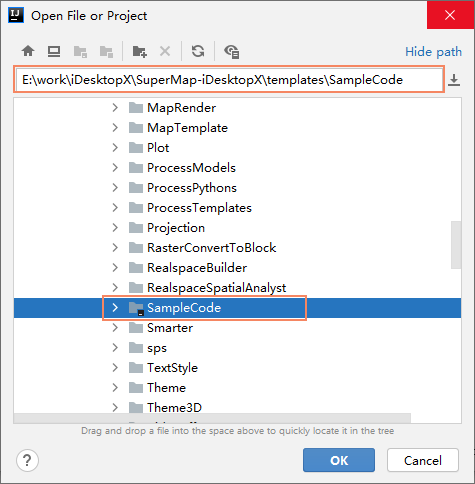
- Open Template Project: In IDEA, select File->Open->Navigate to %Product Package%\templates\SampleCode.
- Add Desktop Dependencies: File->Project Structure->Libraries->Add->Java, then select:
- %Product Package%/bin/
- %Product Package%/bundles/idesktop_bundles/
- %Product Package%/bundles/require_bundles/
- %Product Package%/lib/
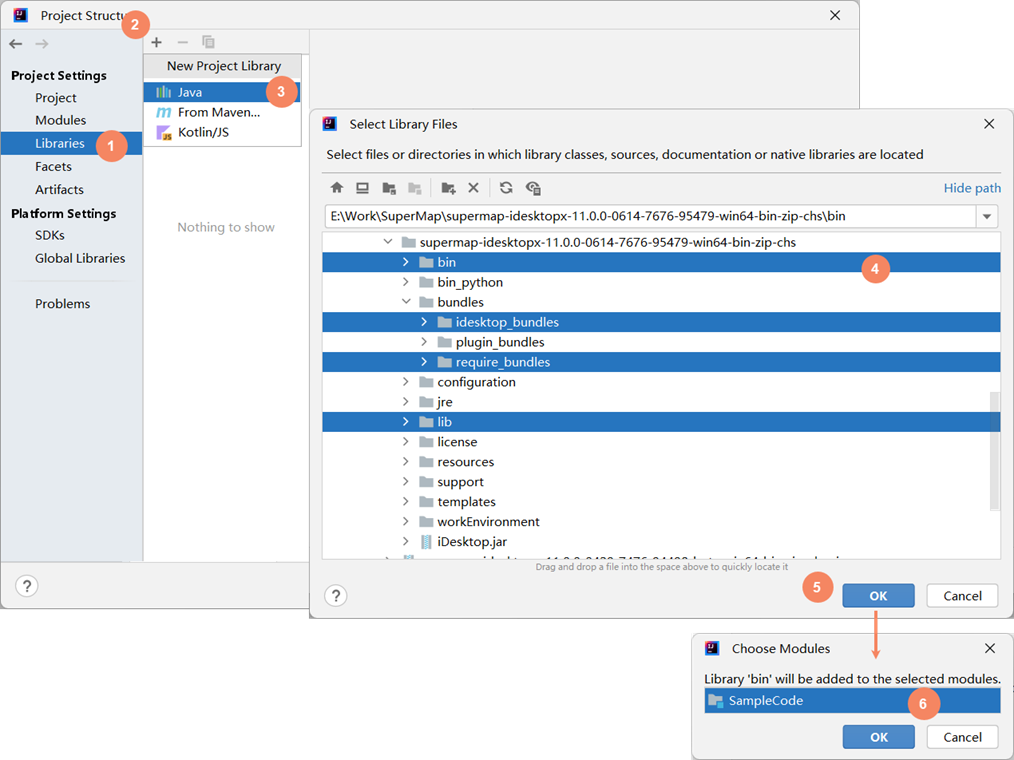
- Compile: Run/Debug to launch SuperMap iDesktopX. Successful compilation adds "Custom Dev" tab with function buttons (Check Result Storage/Delete Duplicate Points).
Note: Upgrade IDEA to 2020.2.2+ if auto-launch fails.
- Open Template Project: In IDEA, select File->Open->Navigate to %Product Package%\templates\SampleCode.
Related Topics