Align Edges
Instructions for use
The Align Edges tool is used to close gaps between edges that share two topological nodes, allowing for quick repair of gaps between two objects.
The function becomes available only after checking the Topology Editing option.
Function Entry
- Features Tab -> Feature Editing Gallery Control -> Topology Editing Group -> Align Edges.
Operating Steps
- In the Features Tab -> MapEdit Group, check the Topology Editing checkbox to enable topology editing for the current map. Checking Topology Editing will automatically enable multi-layer editing and activate the editing state for all visible 2D line and polygon layers in the map.
- In the Features Tab -> Feature Editing -> Topology Editing Group, click the Align Edges button.
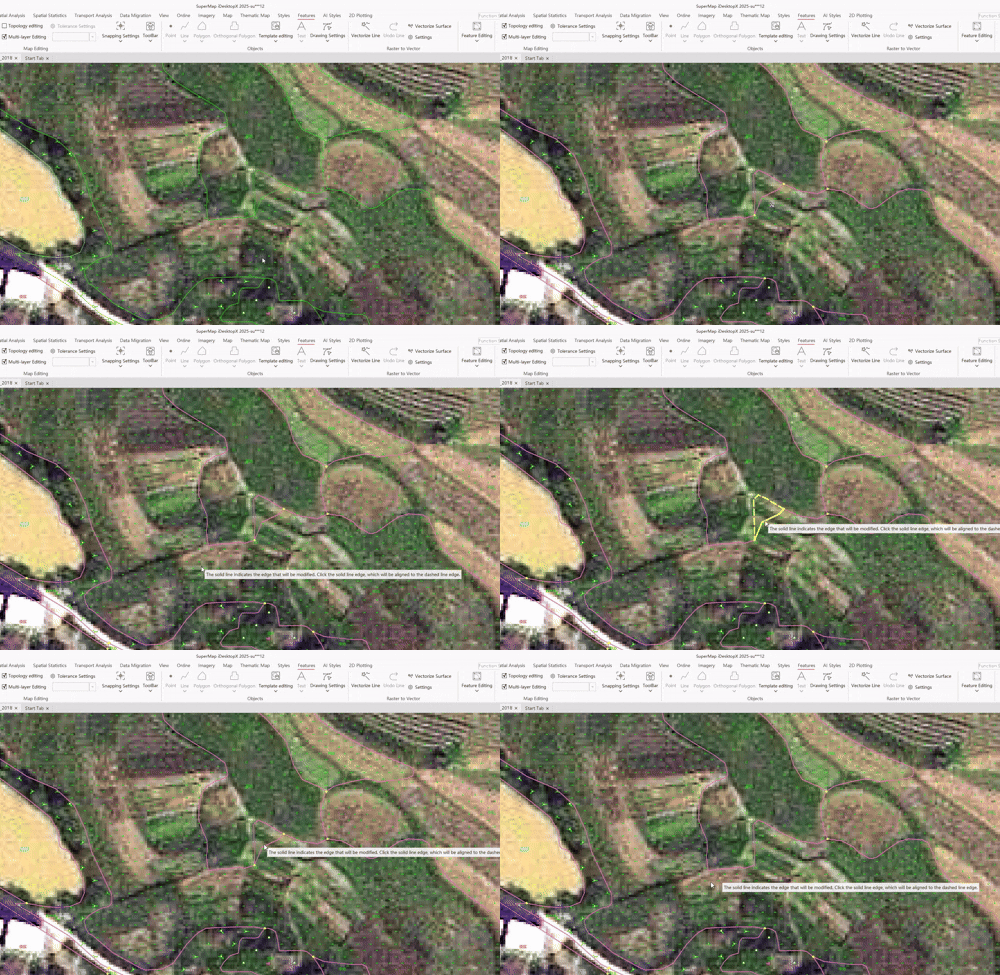
- Move the mouse over the map. A prompt will appear: The solid line indicates the edge that will be modified. Click the solid line part, and this edge will align to the dashed edge.
- Hover the mouse over the edge to be edited; the edge to be edited will be highlighted with a solid line.
- Click the edge highlighted as a solid line, and it will automatically align to the edge highlighted with a dashed line.

 Note:
Note:- Supports setting the topology edit tolerance. Tolerance refers to the distance between object nodes; within this distance, edges and nodes are considered coincident and share the same location.
- By default, the system automatically calculates the minimum tolerance value based on the data. It is generally recommended to use the default value.
- If modification is needed, click the Tolerance Settings button to manually adjust it in the popped-up Topology Edit Tolerance dialog box. After modification, click the Reset button behind the input box to revert to the default value.
Related Topics


