


Feature Description
Template editing allows for quick editing based on the current map template. On this basis, you can further modify the style and attributes of different categories of objects within the template, dynamically adjusting template parameters. Objects drawn based on the template have the same style and attributes as the template, enabling rapid editing and data updates.
When you need to update data based on the style and attributes of the current map, or when you need to batch create geographic features that adhere to consistent style specifications (e.g., land use data where the same land type requires the same style) or standardized property fields (e.g., the encoding field of land use data), you can edit data based on the template.
Template editing is applicable to point, line, polygon layers and their unique value thematic map layers. After enabling template editing, the editing state of all visible editable point, line, polygon layers and their unique value thematic map layers in the map will be automatically turned on, and auto-cut polygons will be enabled.
Function Entry
- Edit Data tab ->Basic editing group ->Template editing button.
- Edit Data tab ->Basic editing group ->Template editing drop-down item ->Template editing.
- Map tab ->Template editing group ->Template editing button.
- Map tab ->Template editing group ->Template editing drop-down item ->Template editing.
Operation Steps
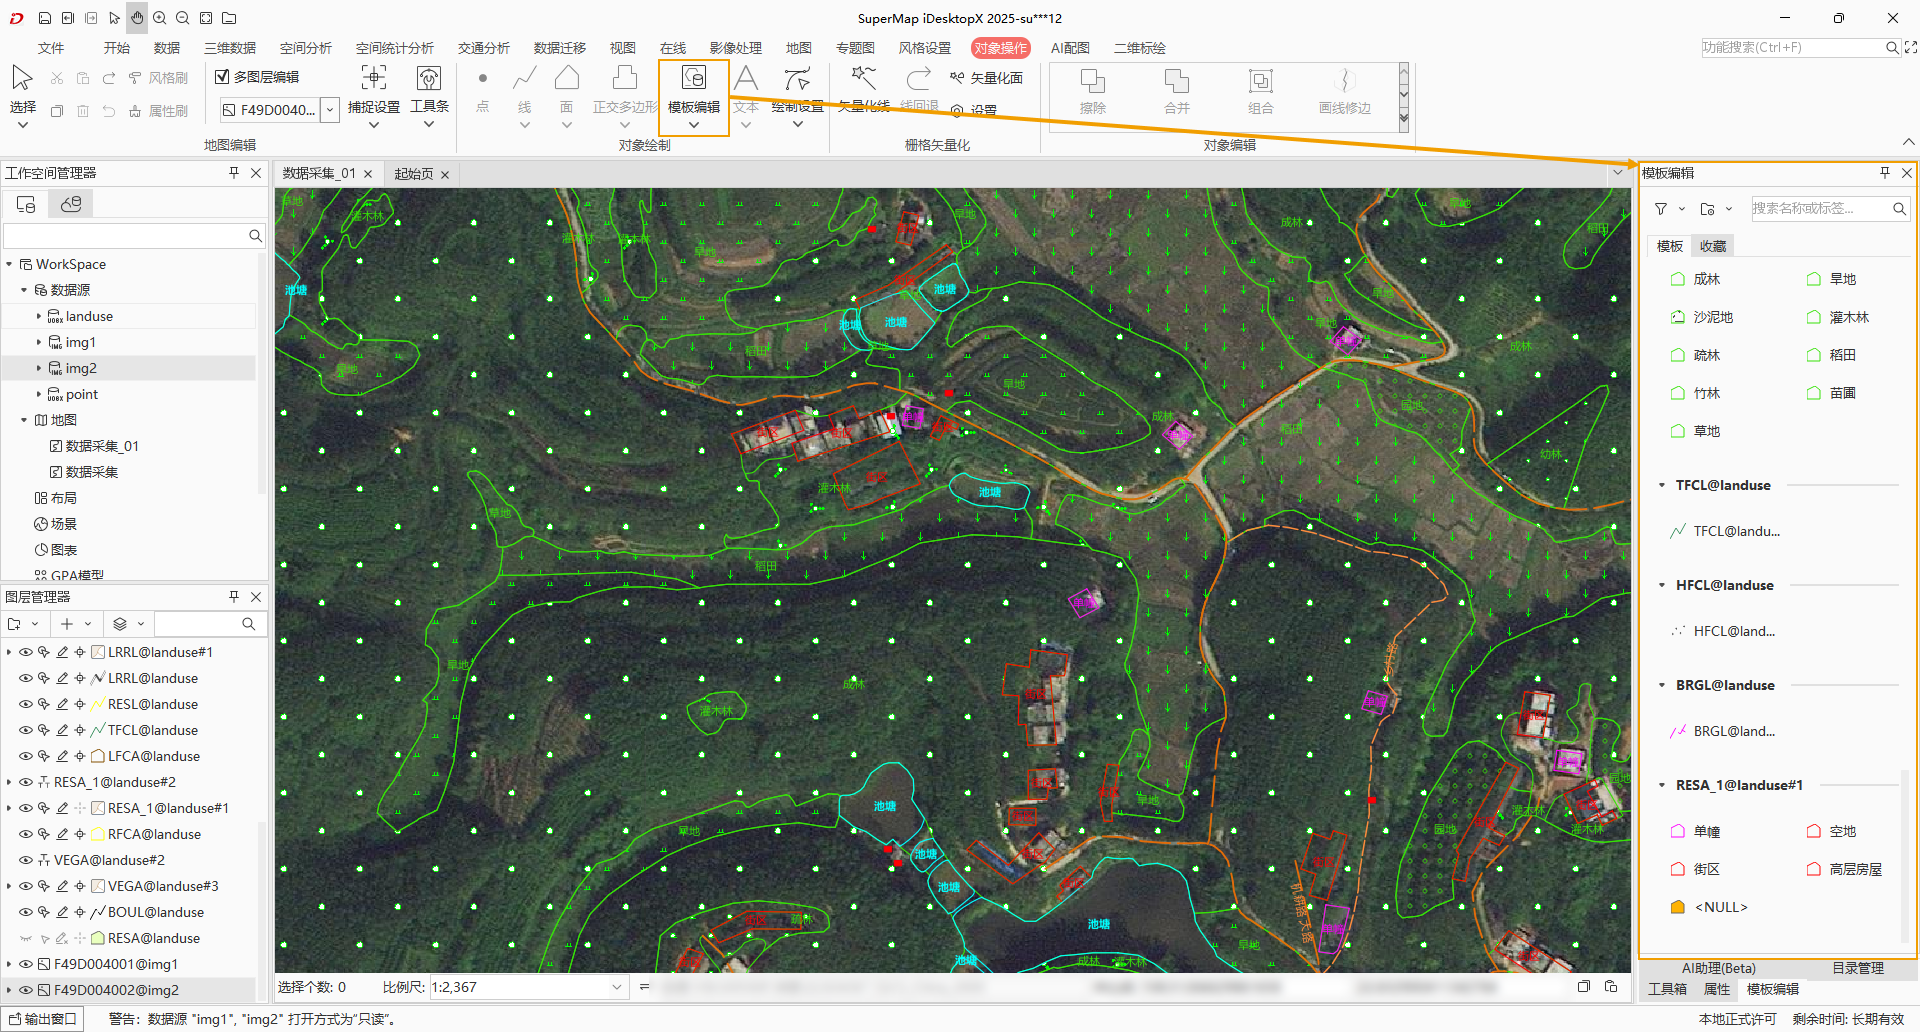
- Enable template editing: Open an existing map or add data to the map, then click the Template editing button through any of the above function entries.
- The program will generate a template based on the current map, and the Template editing panel will pop up on the right side of the window. In the Template editing panel, object categories under each layer are listed grouped by layer by default. For a regular symbolized layer, the layer group has only one category by default, with the marker style consistent with the layer style; for a unique value thematic map layer, the group lists the single-value subitems separately.
- If the default grouping by layer does not meet your needs, you can click the drop-down button in the upper left corner of the panel to reselect the grouping method. Three grouping methods are provided: by layer, by geometry type, and by usage frequency.
- Layer: This is the default option, listing categories by layer group.
- Geometry Type: Select this option to group by geometry type, i.e., list all categories of objects grouped by point, line, and polygon geometry types.
- Usage frequency: Select this option to group by usage frequency into high-frequency and low-frequency groups. The top ten most used categories in the template are placed in the high-frequency group, while the rest are arranged in descending order of usage frequency in the low-frequency group.
- If there is too much content in the Template editing panel, you can quickly locate the desired category by searching or filtering:
- Enter the name or tag directly in the search box to search. After searching, the panel will only display categories matching the input keyword.
- You can also click the drop-down button in the upper left corner of the panel to select a filtering method. Four filtering methods are provided: Point, Line, Polygon, and Layer. Selecting point, line, or polygon will filter and display only categories with geometry types of point, line, or polygon; selecting layer will pop up the Filter templates by layer dialog box, which lists all layers in the template. You can deselect layers here to filter them. After setting a filter method, if you need to show all, click the Clear filter button.
- In the Template editing panel, select a category and right-click to open the context menu. The context menu provides related operations such as delete and favorite:
- Delete: Click this item to delete the selected category.
- Favorite: Click this item to favorite the selected category, and it will be displayed in the Favorites tab.
- Rename: Click this item or double-click to rename the selected category.
- Properties: Click this item to open the Properties Panel, where you can set the name, marker style, attributes, etc., of the selected category.
- Manage the current template:
- When the grouping method is by layer, you can delete unused layer groups. Move the mouse over the layer group node, and a Delete button will appear at the back of the node. Click this button to remove the layer from the template.
- The management button drop-down options provide Add Layer and Management Template functions:
- Management Template: Modify the marker style, attributes, etc., of different categories in the template, and add or delete categories in layers.
- Add Layer: Used to add a layer to the current template. Click the Add Layer button to pop up the Add Layer dialog box. In the Select Layer list of the dialog box, layers that have not been added previously or have been deleted will be displayed. You can select the layers to be added via checkboxes; for a unique value thematic map layer, you can further select the categories to be added in the Select Categories list. After selecting, click the OK button to add the selected layers.
- In the panel, click to select a category. The mouse cursor changes to a crosshair, and the Feature Property panel appears at the bottom of the panel. You can draw on the map while modifying the attributes of the drawn objects. The newly drawn object will have the same marker style and attributes as the selected category.
Related Topics