


Feature Description
When data in the mosaic dataset changes (e.g., deleting images, adding new images, or images with clip bounds), click this function to rebuild the mosaic dataset's bounds.
Feature Entry
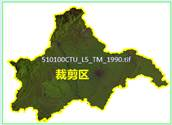
Imagery Panel -> Other Datasource -> Specific Datasource Context Menu -> Modify Mosaic Dataset -> Rebuild Bounds.
Parameter Description
The Rebuild Bounds dialog provides three update options: Rebuild Footprint, Rebuild Boundary, and Rebuild Clip Bound. Users can select one or multiple bounds to update.
- Rebuild Footprint: Check this box to reconstruct the mosaic dataset's footprint.
- Rebuild Boundary: Check this box to reconstruct image boundary bounds. Three methods are available:
- Auto Calculation of Boundary Bounds: System automatically calculates boundary bounds based on image data.
- Select Dataset Bounds: Use a region dataset from selected datasource as rebuild bounds.
- Custom Bounds: Define update scope through drawing bounds or selecting objects. Click the dropdown button to choose Draw Bounds or Select Object.
- Rebuild Clip Bound: Check this box to rebuild clip bounds. Three clip modes available:
- Use Footprint Bounds
Constructs clip areas based on image footprints and updates clip sub-dataset.
Check Complex Polygon for irregular valid areas. For convex polygons, this option isn't required but can still produce correct results.
When footprint-determined clip areas contain NoData edges, set Clip Offset to shrink bounds inward by specified pixels.
- Auto Calculation of Clip Bounds:
Image valid areas typically fall into two categories: convex polygons or irregular shapes (non-convex polygons). The figure below shows a regular parallelogram (convex polygon) valid area.
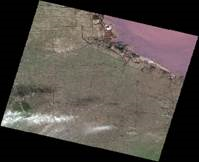
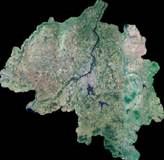
Figure: Convex Polygon Effective Area Figure: Irregular Shape Effective Area Enable corresponding settings based on valid area shape before auto calculation.
Check Complex Polygon for irregular shapes. This option remains optional for convex polygons.
Checking Exact Clip calculates clip areas using original images for precision. Unchecked mode uses image pyramids for faster computation with slightly reduced accuracy.
Auto clip calculation identifies non-NoData pixels as valid areas. Tolerances=0 (default) treats only exact NoData as invalid. Non-zero values filter near-NoData edge pixels.
Original Image Files Auto-Calculated Clip Results Support Status 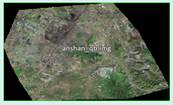
3-band 8-bit unsigned IMG
NoData: 0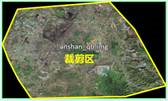
Original Image Precision √ Pyramid-based Calculation √ 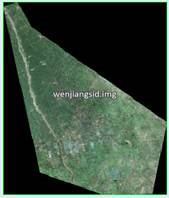
3-band 8-bit unsigned IMG
NoData: 0
Original Image Precision √ Pyramid-based Calculation √ 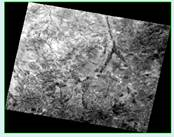
Single-band 8-bit unsigned IMG
NoData: 0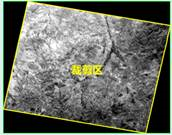
Original Image Precision √ Pyramid-based Calculation √ 
3-band 8-bit unsigned IMG
NoData: 0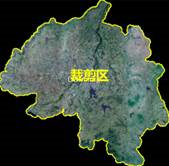
Original Image Precision √ Pyramid-based Calculation √ 
7-band 8-bit unsigned TIFF
CRS: EPSG:4326
Size: 238MB
NoData: 255
Special Features:
[1] Enclave with single-pixel connection


[2] Isolated enclave

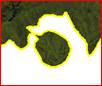
Correct enclave clipping

Small enclave ignoredOriginal Image Precision √ Pyramid-based Calculation √ 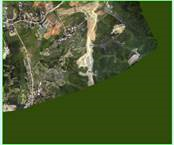
3-band 8-bit unsigned TIFF
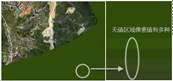
Multiple NoData valuesAuto calculation not supported for multiple NoData values Original Image Precision -- Pyramid-based Calculation -- - Add Clip File:
This method applies when clip polygons exist in separate .shp files matching image filenames.
Clip files can also be added during image import. Images without .shp files default to footprint bounds.
Suitable for images with non-unique NoData values outside valid areas, which prevent auto extraction.
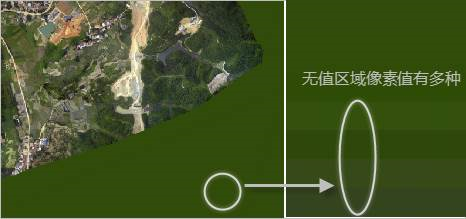
Figure: Non-Unique NoData Values After obtaining clip areas, set Crop Type to Dataset Clip in image layer properties to display imagery within valid ranges.
- Use Footprint Bounds
 Note:
Note:Since overviews use clip bounds, consider rebuilding overviews after clip bound updates if needed.
Related Topics