


↵
A linear symbol is essentially a composite line type, consisting of multiple sublines. The creation of a linear symbol involves adding sublines and configuring their virtual-real mode, type, and style to construct the desired linear symbol.
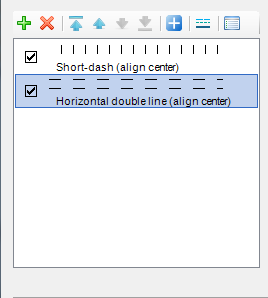
When creating a new linear symbol, the linear symbol editor opens with an empty subline list in the subline management area, requiring users to add sublines step by step. When editing an existing linear symbol, the subline list in the subline management area displays all sublines composing that symbol. Each item in the list corresponds to one subline.
The subline management toolbar provides tools such as Add, Delete, Bring to Front, Move Up, Move Down, Bring to Back, Append Symbol, and Property Settings. In the linear symbol editor's subline management area, you can effectively manage the sublines composing the linear symbol, as shown below.
Creating a New Subline
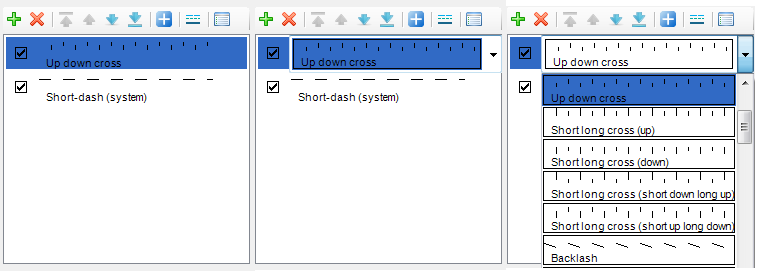
In the linear symbol editor, the first step in creating a new linear symbol is to add a new subline. Click the Add button on the subline management toolbar to add a subline, with the default type set to short dash (system line type).
Users can double-click the subline or click the drop-down button on the right to open the subline type list and select a new type for the subline.
 |
Deleting a Sublines
- In the subline list within the subline management area, select the subline to delete. You can select multiple sublines simultaneously by holding the Shift or Ctrl key.
- Click the Delete button on the subline management toolbar to delete the selected sublines. Deleted sublines cannot be recovered, so exercise caution when deleting.
Adjusting Subline Order
In the subline management area, the order of sublines in the list determines their stacking sequence in the linear symbol. The topmost subline in the list is on the top layer, while the bottommost is on the bottom layer. Use the Bring to Front, Move Up, Move Down, and Bring to Back buttons on the toolbar to adjust the order, thereby changing the hierarchical sequence in the symbol.
- In the subline list within the subline management area, select the subline(s) to move. You can select multiple sublines by holding the Shift or Ctrl key.
- If you click the Bring to Front button, the selected subline(s) move to the top. If multiple sublines are selected, they all move to the front of all others, maintaining their relative order.
If you click the Move Up button, the selected subline(s) move up one layer, placing them before the subline immediately above. For multiple selections, they all move up one layer together, preserving their relative order.
If you click the Move Down button, the selected subline(s) move down one layer, placing them after the subline immediately below. For multiple selections, they all move down one layer together, preserving their relative order.
If you click the Bring to Back button, the selected subline(s) move to the bottom. If multiple sublines are selected, they all move to the end of all others, maintaining their relative order.
Appending an Existing Linear Symbol
Sublines in a linear symbol can not only be newly created but also imported from existing linear symbols, which are added as sublines to compose the current symbol.
- Click the Append Symbol button on the subline management toolbar.
- The Linear Selector dialog opens, displaying a line symbol library similar to the symbol library manager. By default, it shows the current line symbol library. Select the linear symbol(s) to import from the list; use the Ctrl key to select multiple symbols.
Since the Linear Selector dialog displays the symbol library like the symbol manager, you can perform similar library management operations. Users can add other line symbol library files via the Symbol Library Management menu in the dialog to select symbols for import.
- After selecting the linear symbols to append in the Linear Selector dialog, click the OK button. The selected symbols are appended to the current symbol's subline list as their sublines (not as the symbol itself), allowing further editing.
Setting the Subline Type
The linear symbol editor offers a variety of subline types for symbol creation. You can set the subline type in two ways.
- In the subline list within the subline management area, select the subline whose type you want to set.
- Click the Line button on the subline management toolbar. This changes the selected subline to a drop-down list state, displaying multiple available subline types. Select the desired type to apply it.
An alternative way to set the subline type:
- In the subline list within the subline management area, select the subline whose type you want to set, then double-click it.
- The selected subline changes to a drop-down list state. Click the drop-down button on the right, and from the list of available types, select the desired one to apply it.
Setting Subline Properties
Here, subline properties mainly refer to style and appearance attributes, such as color, line width, offset, and line cap style.
- In the subline list within the subline management area, select the subline(s) to configure properties. Use the Shift or Ctrl key to select multiple sublines for batch property settings.
- Click the Properties button on the subline management toolbar to open the Properties dialog. Configure the subline properties there; for details, refer to: Setting Sublines Styles.
- After completing the styles, click the OK button in the Properties dialog.