


iServer Manager provides registration of different data sources into iServer. Based on data storage locations, iServer currently supports two registration methods:
- User-managed storage registration: Also called iServer Registration Data. Use the Data Registration feature on the iServer service page to register local directories, HDFS directories, and databases into iServer, enabling services provided by iServer to access and utilize these data.
- SuperMap-managed storage registration: Associate iServer with the DataStore package. When configuring relational data storage in DataStore, a PostgreSQL database will be automatically created to store datasets. Access data through iServer big data services for downloading, uploading, and analysis operations.
iServer Registration Data
Users can register owned databases or data file directories into iServer, enabling services to access and utilize these data. iServer data registration supports four storage types: Big data shared directories, spatial databases, distributed tile storage, and machine learning models. When data is ready, iServer will automatically list datasets meeting analysis criteria when creating various big data analysis tasks.
Register big data file sharing
iServer distributed analysis services provide processing and analysis capabilities for CSV data and UDBX datasets. You can register network-shared/local directories or HDFS directories into iServer. CSV files, index files, UDBX dataset files and subfolders in these directories will be used for distributed analysis services.
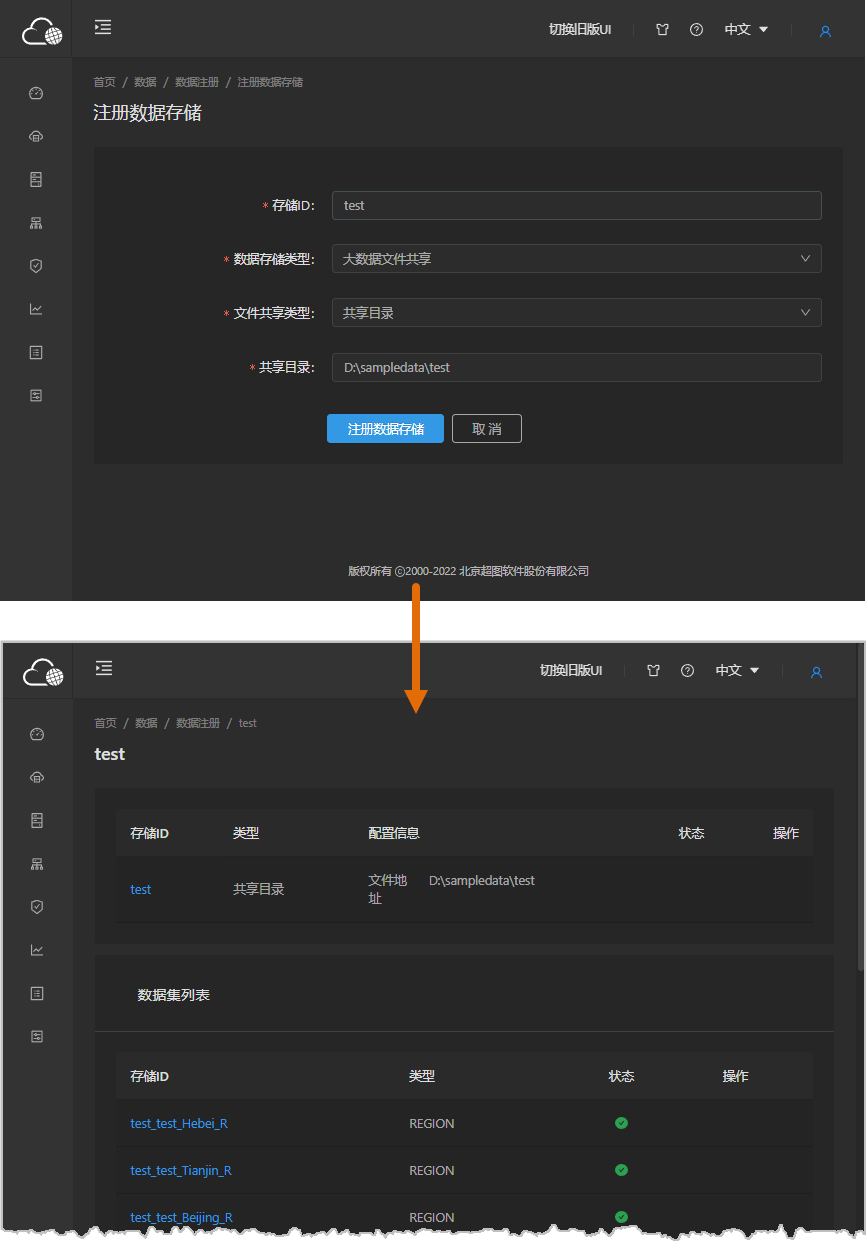
- On iServer management page, navigate to Data→Data Registration→Register Datasource. In the registration panel, set Datasource Type to Big Data File Sharing.
- Select file sharing type:
- Shared Directory: Register locally stored or network-shared CSV/UDBX data into iServer for distributed analysis or machine learning. Registered CSV data supports data type modification.
- HDFS Directory: For large-scale GIS applications, HDFS (Hadoop Distributed File System) is recommended. iServer supports registering CSV data (with type modification support) and index files stored in HDFS.
- Input shared path in Shared Directory or HDFS path in HDFS Directory.
- Click Register Datasource to complete registration.
Register spatial database
In service manager, navigate to Data--Data Registration. The datasource list shows all registered datasources. Click storage ID to view detailed configurations.
Configuration details:
- Storage ID: Create unique identification for database
- Datasource Type: Select Spatial Database
- Database Type: Supported types include HBase, HDFS, Oracle, PostgreSQL, PostGIS
- Server Address: Database connection address
- Database: Target database name
- Username: Database owner's username (except HBase/HDFS)
- Password: Database owner's password (except HBase/HDFS)
-
Allow Editing: Currently supported for HBase, HDFS, PostgreSQL, PostGIS. When unchecked, the database cannot be used as storage node for uploading relational data via catalog service. When checked:
- If multiple editable databases exist, the one with fewest datasets is prioritized
- If both editable databases and iServer DataStore exist, editable databases take precedence following dataset count principle
- If only DataStore exists, it becomes storage node
Note: When registering HBase data, ensure HBase cluster nodes' IPs/hostnames are added to iServer host machine's hosts file if they're on different machines.
Alternatively, modify data catalog configuration file iserver-datacatalog.xml to add spatial database:
<datastore>
<datastoreType>SPATIAL</datastoreType>
<name>postgresql2</name>
<type>POSTGRESQL</type>
  <connectionInfo>
    <dataBase>postgres2</dataBase>
    <engineType>POSTGRESQL</engineType>
    <password>iserver</password>
    <server>192.168.17.116</server>
    <user>iserver</user>
    <connect>false</connect>
    <exclusive>false</exclusive>
    <openLinkTable>false</openLinkTable>
    <readOnly>false</readOnly>
  </connectionInfo>
</datastore>
Required parameters: datastoreType, name, type; In connectionInfo: dataBase, password, server, user.
Distributed tile storage
To store map tiles distributively, register distributed tile storage to iServer before creating distributed tiling tasks. Supported types: MongoDB, OTS. MongoDB registration process:
- On iServer management page (http://supermapiserver:8090/iserver/manager), navigate to Data→Data Registration→Register Datasource
- Storage ID: Custom unique identification
- Datasource Type: Select Distributed Tile Storage
- Tile Storage Type: Select MongoDB. Click Add MongoDB Server Address
- Server Address: Format {ip}:{port}
- Replica Set: If checked, creates data replicas for automatic failover
- Database Name: Tile storage database (default: smtiles)
- Username: Authorized database user
- Password: Set password
- Click Register Datasource to complete
Machine learning model
iServer machine learning services provide regression prediction for vector datasets in UDBs, image classification and object detection for raster datasets. Register model files for these services.
On iServer management page, navigate to Data→Data Registration→Register Datasource:
- Storage ID: Custom name
- Datasource Type: Select Machine Learning Model
- Model File Path: Directory containing SDM files, e.g., /home/supermap/model/binary_building
Click Register Datasource to complete.
iServer DataStore
iServer DataStore is an application for quickly creating data storage and associating it with iServer. When configuring relational storage in DataStore, a PostgreSQL database is automatically created. Access data via iServer big data services for download/upload/analysis.
Environment Setup
DataStore default port is 8020. Configure firewall to allow this port. For Windows installation, ensure vcredist 2013 is installed (available in DataStore package\support\vcredist\vcredist_x64-2013.exe).
- Start service in DataStore package's bin folder
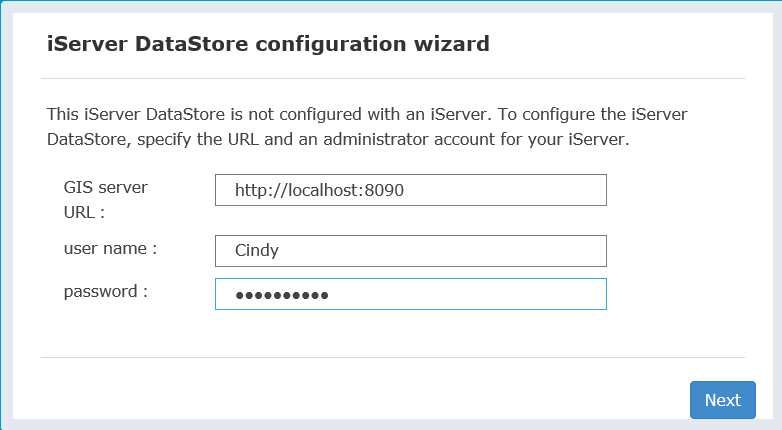
- Access DataStore configuration wizard at http://{ip}:8020. Input iServer admin credentials
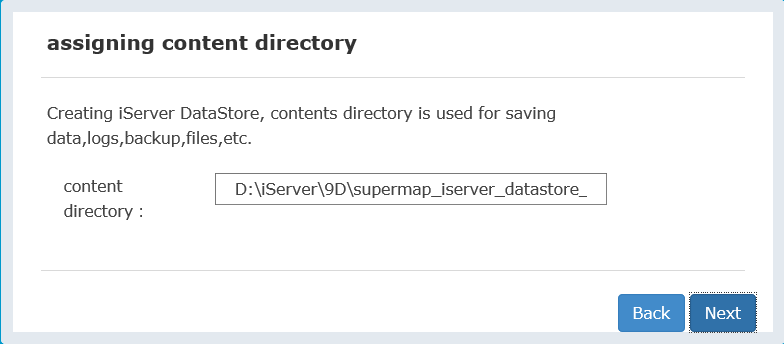
- Specify content directory (avoid Chinese characters/spaces). Default: [Installation Directory]\data
- Select data type (relational, binary files, tile cache, spatio-temporal data). Binary/tile storage requires local MongoDB installation
- Click Complete and wait for configuration
- After success, click "Data Catalog Service" in status page. After login, select "Data Import" for upload
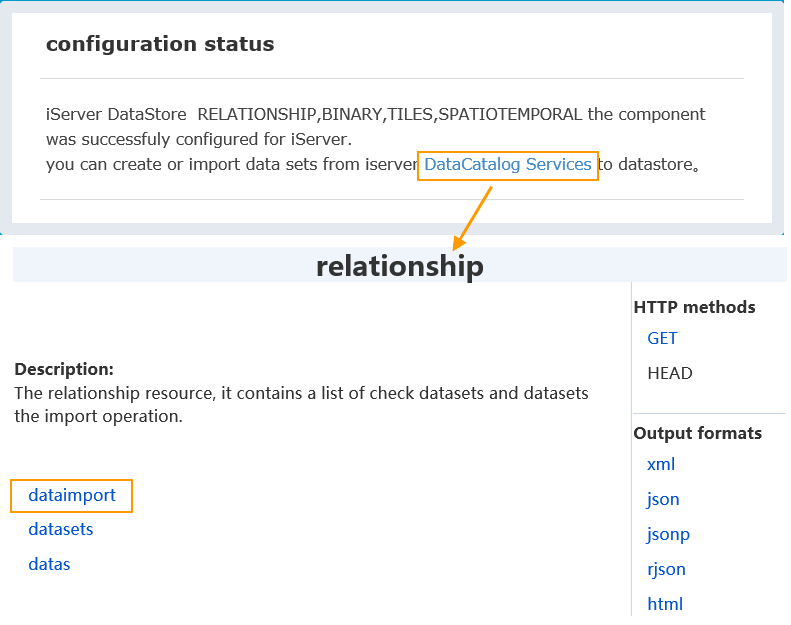
- On data import page, select data (UDB datasources, CSV, workspace, Excel, GeoJSON; UDB/workspace must be *.zip) and click "Upload"
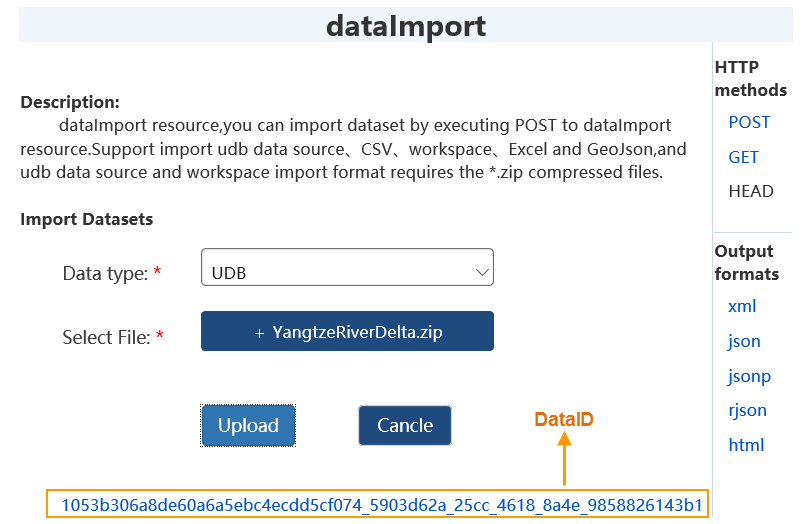
- Uploaded datasets receive unique dataID. Click dataID for details. Datasets appear in relationship/datasets resource list

- After upload, view data via desktop application using configured DataStore datasource
Related Topics