


Solution Description
SuperMap iDesktopX provides an AI-integrated LOD 2.0 building modeling solution that enables automatic and rapid generation of city-level LOD 1.3 and above 3D building models using oblique photography 3D models as source data. The solution involves functions such as DOM, binary classification, raster to vector, building boundary regularization, roof classification, extract elevation, and construct buildings with roofs. The specific workflow is shown in the figure below:
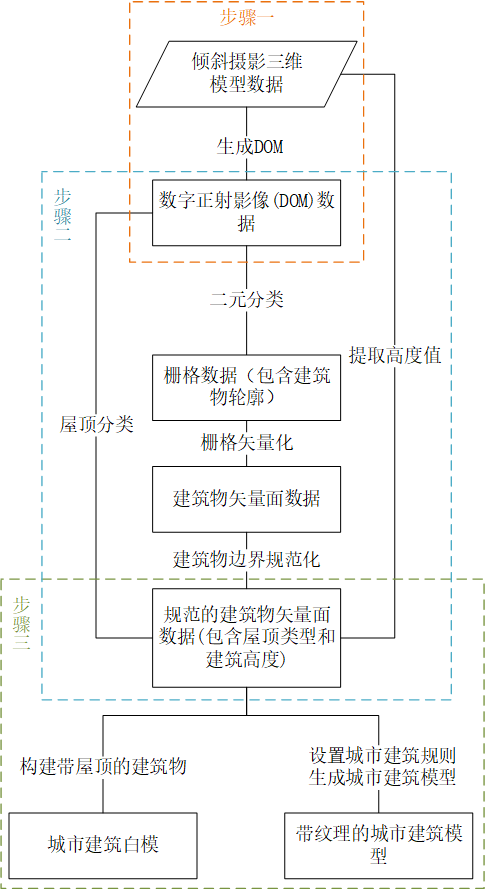
Workflow
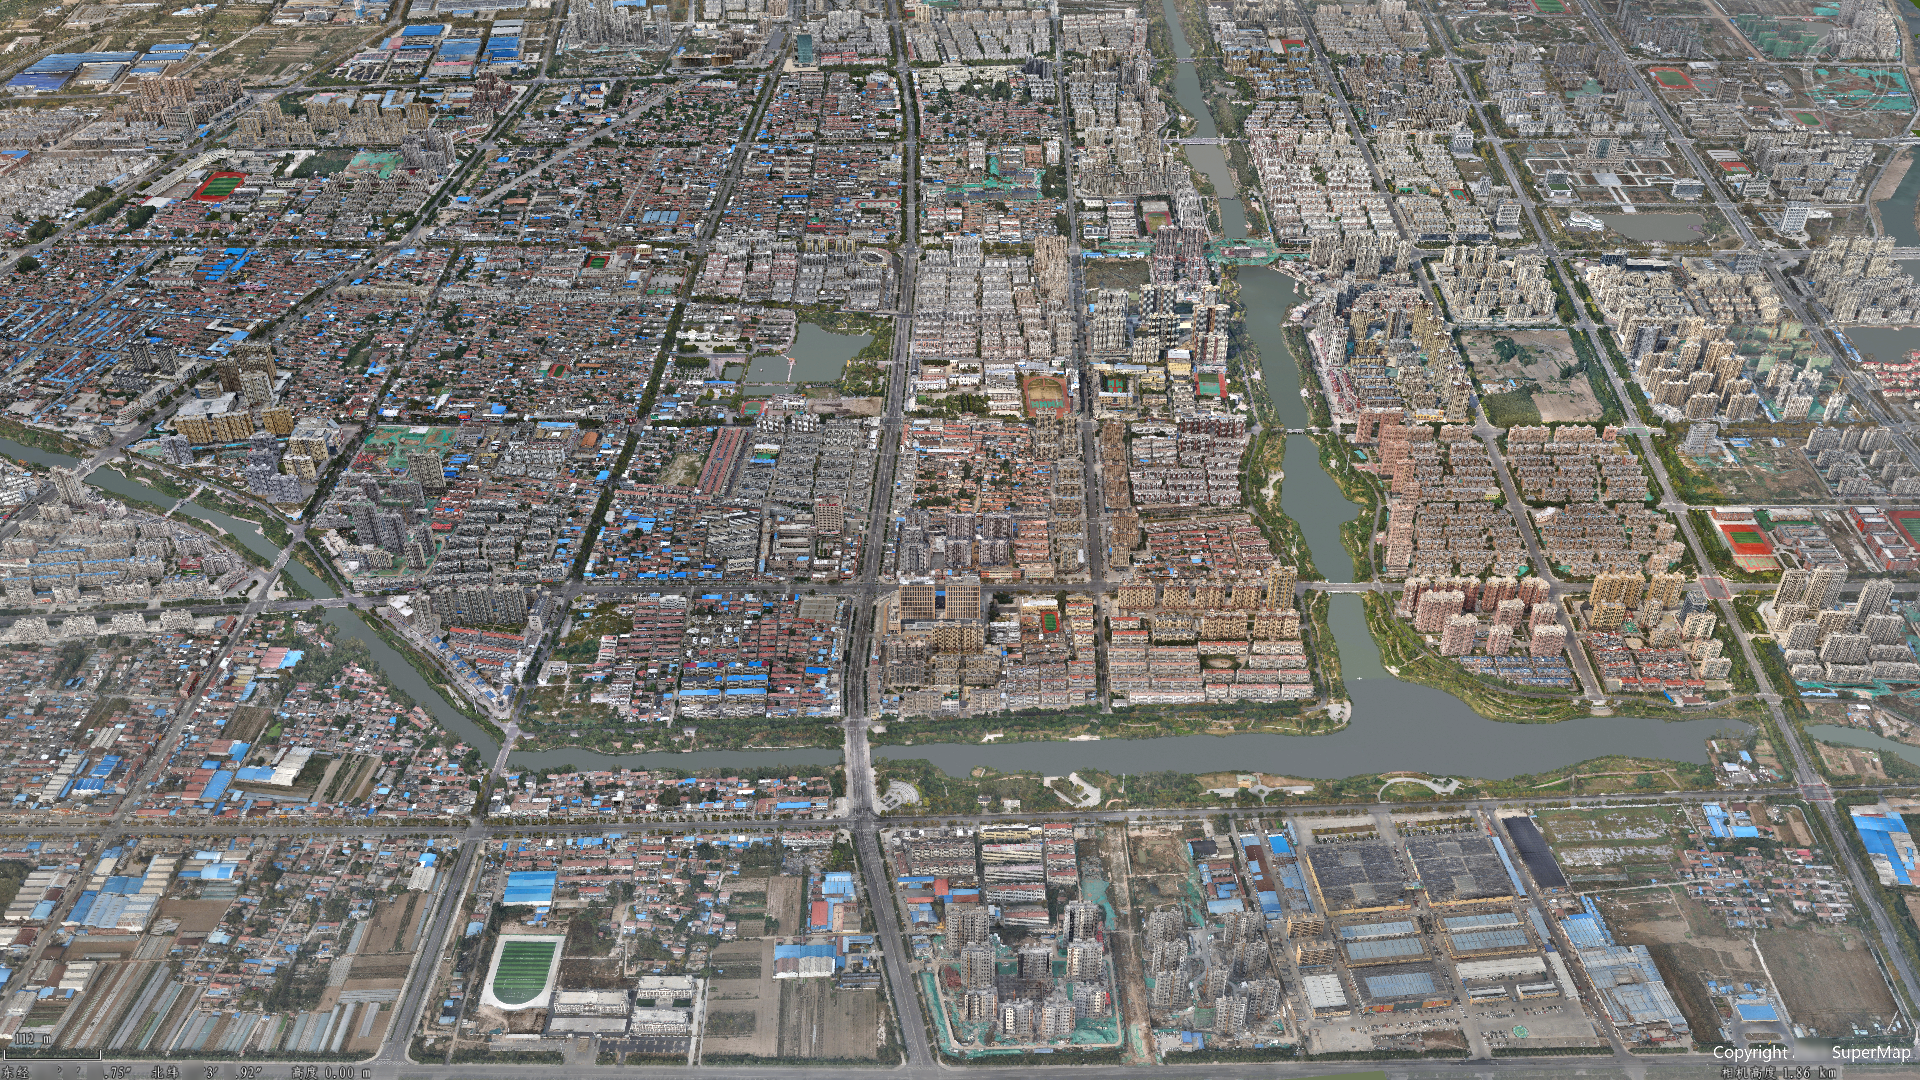
Here, using the oblique photography 3D model shown in the figure below as an example, we provide an overview of the modeling solution workflow:
1. DOM
This step achieves the generation of digital orthophoto map (DOM) data in *.tiff format from oblique photography 3D model data.
Implementation method: Load oblique photography 3D model tile data in the opened 3D scene, and use the DOM function to generate it. In the DOM function, it is recommended to set the resolution of the result data to 0.3~0.5 meters.
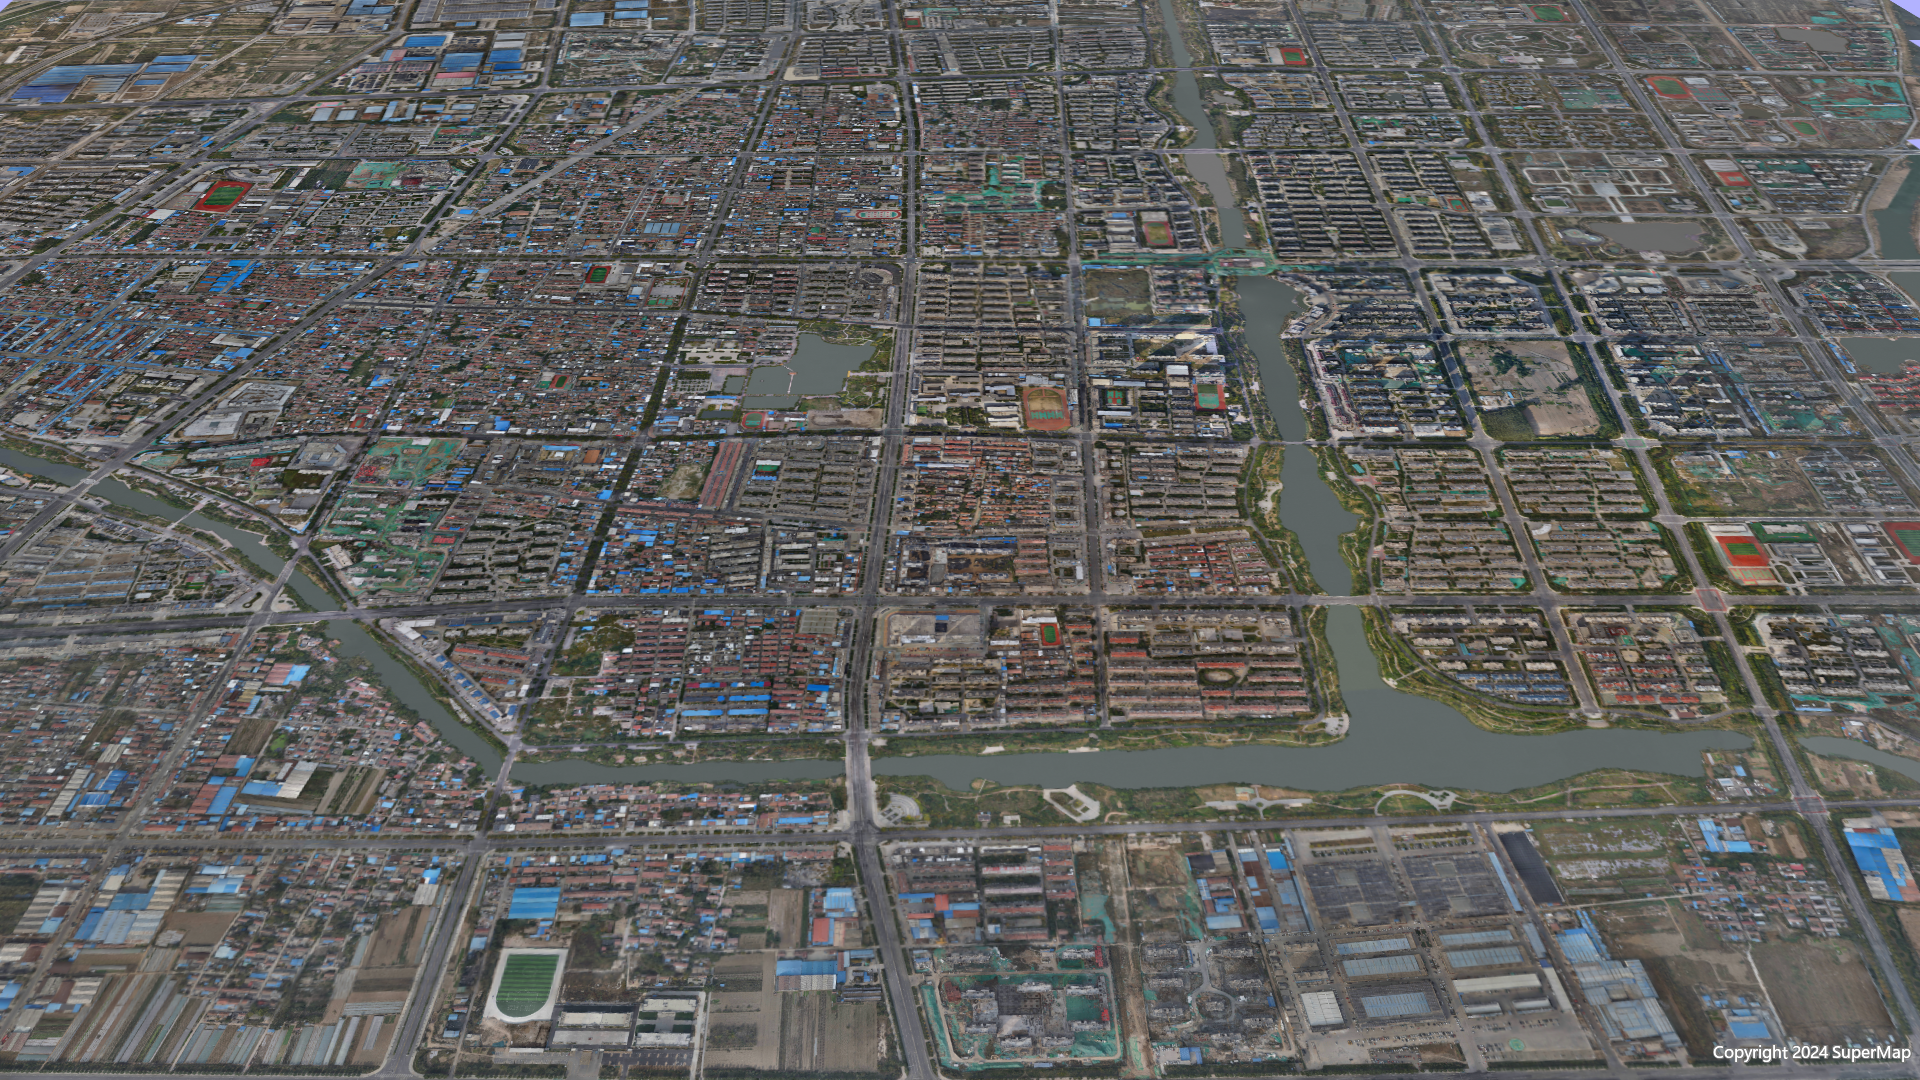
The figure below shows the result DOM data (coordinate: 4326).
2. Data Preparation
Step 2 uses the DOM data obtained in step 1 as source data to generate standardized building vector polygon data (with attributes such as building height and roof type) through operations including binary classification, raster to vector, building regularization, roof classification, and extract elevation.
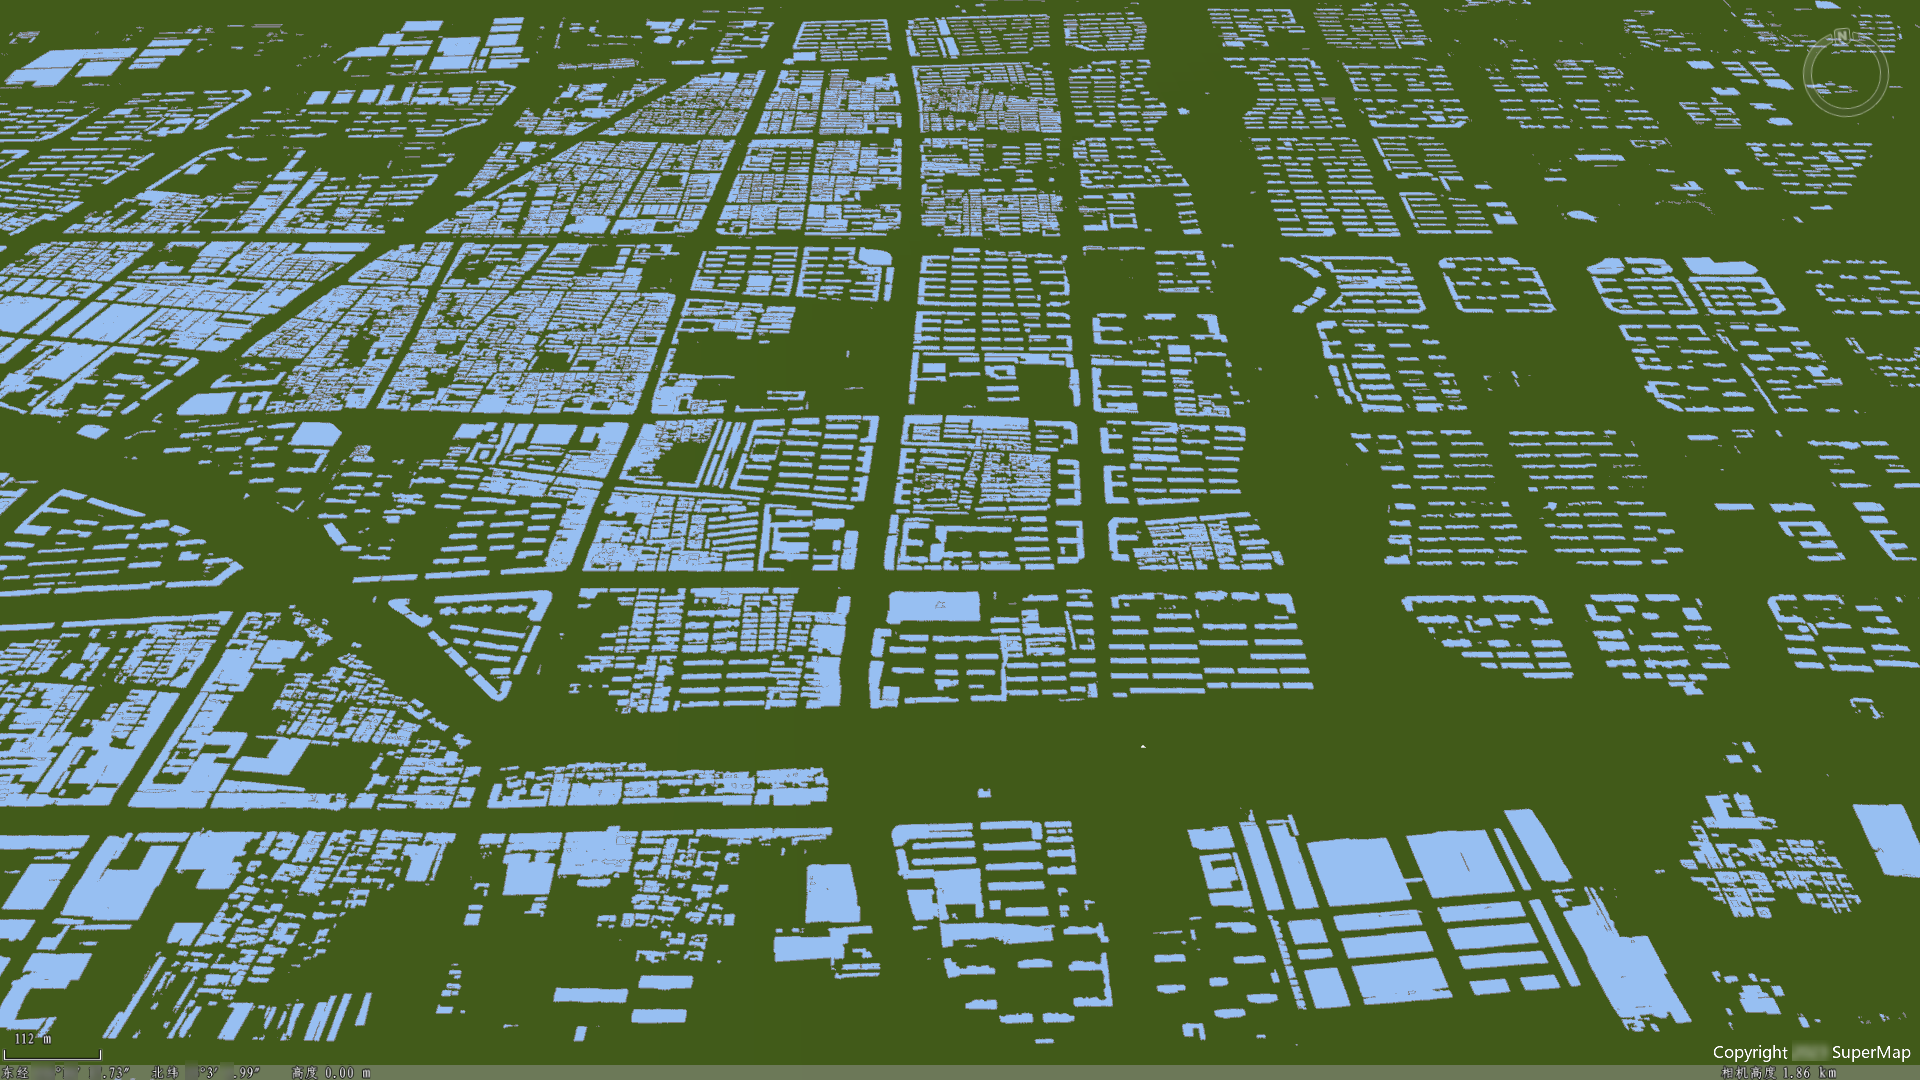
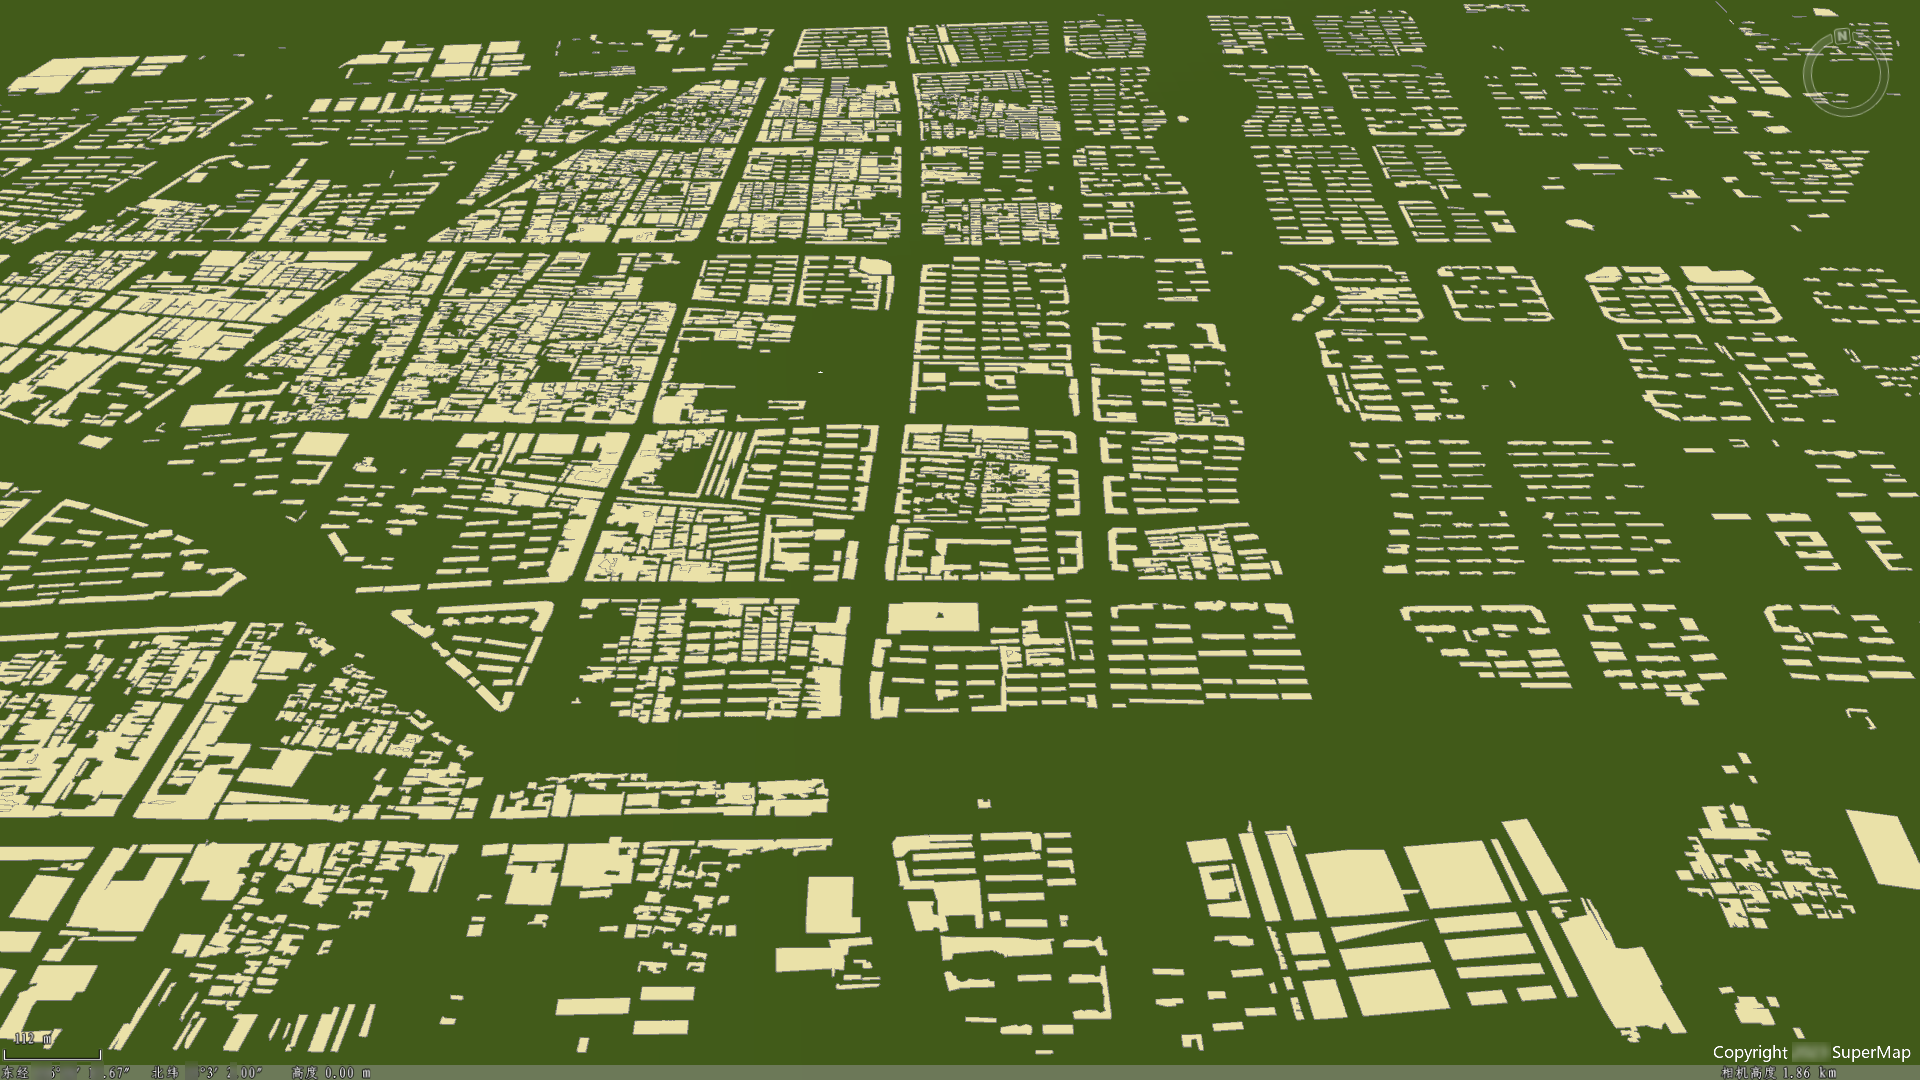
- Extract building contours: Use the Binary Classification tool with the DOM data from step 1 as source data to extract building contours, obtaining a result raster dataset.
- Obtain building vector polygon data: Use the Raster to Vector function to convert the raster data from the previous step into a 2D vector region dataset.
The figure below shows the 2D building vector polygon data (coordinate: 4326).
- Building boundary regularization: Use the Building Boundary Regularization tool to remove irregular objects from the building vector polygon data, such as holes and redundant points. Additionally, manually optimize the building vector polygon data obtained in the previous step: browse the attribute table of the 2D vector polygon data to delete non-building objects and eliminate small-area anomalies, and directly edit to correct errors or omissions.
The figure below shows standardized building vector polygon data.
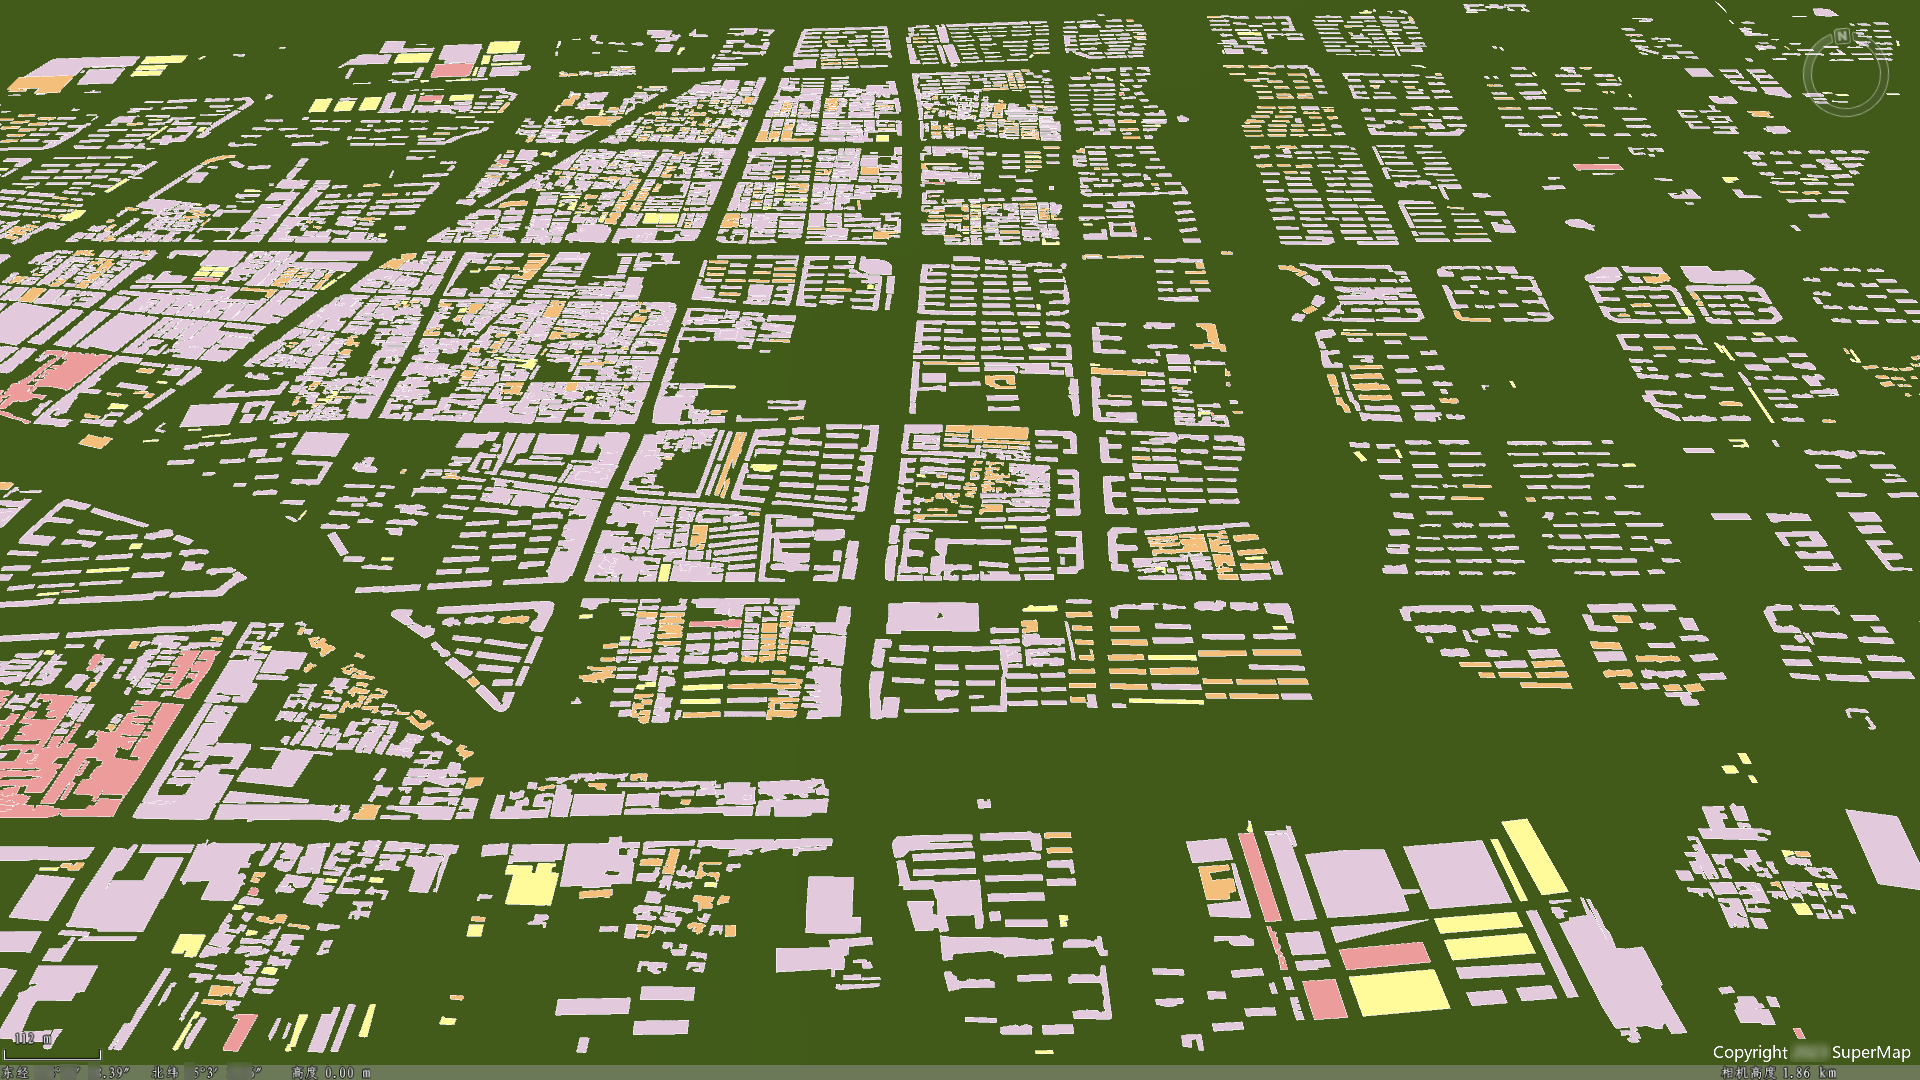
- Roof classification: Use the Roof Classification tool with the DOM data from step 1 as source data to automatically identify building roof information, storing the extracted information in the building vector polygon data from the previous step.
The figure below shows a building vector polygon unique value thematic map generated based on roof types.
- Extract building height: Use the Extract Elevation tool with oblique photography 3D model data as source data to extract building height values, storing the height information in the building vector polygon data from the previous step.
The figure below displays building vector polygon data containing building heights using Stretch Mode.
3. Generate City Building Models
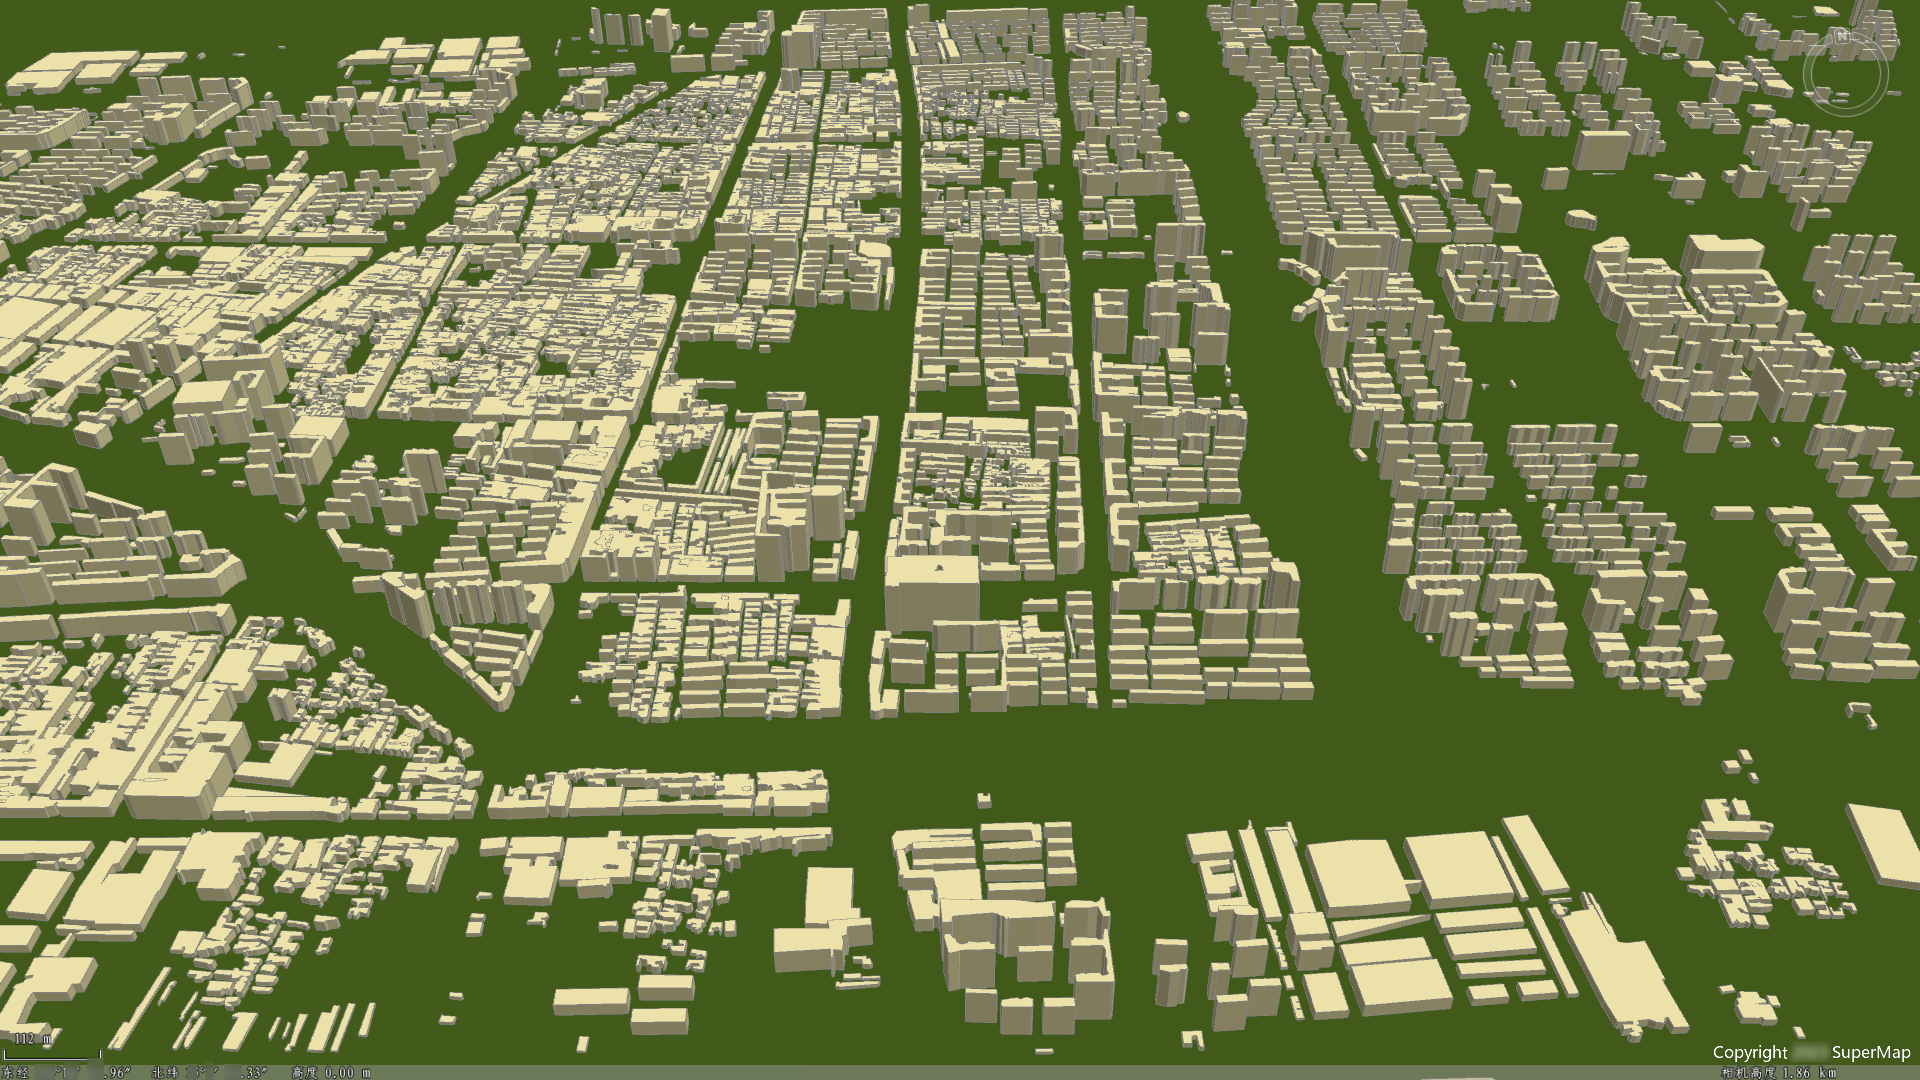
Step 3 uses the building vector polygon data obtained in step 2 as source data to generate city building white model data via the construct buildings with roofs tool. Additionally, the procedural modeling toolkit developed based on underlying interfaces can be used to generate textured city building models. Data preparation: If the building vector polygon data from step 2 contains numerous objects (over 10,000), it is recommended to perform a Rebuild Spatial Index operation on the building vector region dataset to improve modeling speed.
- Construct city building white models: Use the Construct Buildings with Roofs tool to batch-build city building white model data based on the building vector polygon data from step 2.
- Construct textured city building models: Use the Procedural Modeling Toolkit (access path: SuperMap Tech Hub -> Auxiliary Resources -> New 3D Features -> 2024 -> AI + Procedural Modeling Toolkit, click the blue text to access) to batch-build textured city building models based on the building vector polygon data from step 2.