This page describes the main elements of SuperMapGIS components and their roles.
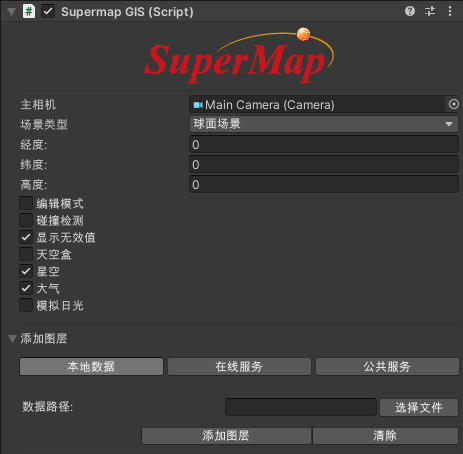
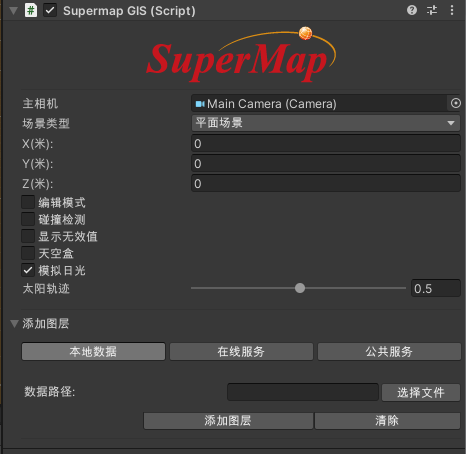
SuperMapGIS component is mainly used to set up scenes before running, mainly including scene type selection, adding local layer, adding iServer service layer, adding public service layer, deleting layer, insertion point position, geographical origin setting, etc.
Click the object on which the SuperMapGIS component is mounted to see the details of SuperMap GIS(Script) appear in the Inspector on the right. The details are as follows:


Language settings
Including settings: Chinese (simplified), English, Japanese three languages. After switching, SuperMapGIS details panel, UI interface text after running, will display the language text. However, the editor language is not modified.
Main camera
The main camera selects the Main Camera of the current scene by default. If it is not selected, you can manually drag the Main Camera into this box. The camera has a roaming function attached to the plug-in script, and the mouse can control the position of the camera when running. It should be noted that the user will bind the existing operation method to the Main Camera. At this time, it is necessary to carry out secondary development such as operation fusion and shielding on the camera operation to avoid operation conflicts caused by different operation modes of the camera at the same time.
Scene type
This product offers two scene types: planar and spherical.
Different scenes support different coordinate systems. Spherical scenes support geographic coordinate system data; planar scenes support planar coordinate system data and projected coordinate system data.
Set Coordinate Offset\Geographic Origin
After selecting the planar scene, X (m), Y (m), Z (m) are displayed for coordinate offset setting. Function: Offset the loaded large coordinate data to the zero position of Unity coordinates, so that the placed objects and coordinate operations are within accuracy.
Operation steps: If the loaded data is model tile data, the position value in the data configuration file (*.scp) can be used as the insertion point coordinate value. If the terrain tile data is loaded, it is recommended to refer to the Bounds value in the data configuration file (*sct) and use the center point of the Bounds as the x,y coordinates of the insertion point.

Geographic origin
After selecting the spherical scene, the latitude and longitude value setting pops up, which is used to set the geographical origin. Function: The sphere will be rotated so that the vertical direction of the latitude and longitude position is parallel to the Unity y-axis direction, which is used to ensure that Unity objects, weather effects, falling objects, etc. can be used normally at the latitude and longitude position.
Operation steps: Scenes generally have main display positions. The geographical coordinate value of the specified position can be obtained through SuperMap iDesltopX, and the specified latitude and longitude coordinate value can be set as the geographical origin.

Edit mode
When enabled, it supports displaying loaded GIS data in Unity editing state. Easy to add Unity models, effects and more based on GIS data.
Collision detection
When turned on, loaded GIS data can collide with collision-enabled objects in Unity, and flat scenes are turned on by default.
If you want to use the Material Substitution feature of the model data, you need to turn on Collision Detection.
Show invalid values
Mainly used to control whether terrain invalid values are displayed. Flat scene is unchecked by default. If only image data is loaded in flat scene, this value needs to be checked to ensure normal display of data; spherical scene is unchecked by default, and the spherical skin will disappear after unchecked.
Starry sky
In spherical scenes, this feature is enabled by default, and the skybox background will change to a starry sky effect.
Atmosphere
Turn on this function in spherical scenes, zoom in on the ground and you can see the atmospheric effect of the sky.
Simulated sunlight
You can use this feature in both spherical and planar scenes, dragging the slider to simulate the sun's trajectory.
Add layer
This product offers three modes: Local Layer, Online Service, and Public Service. For more information, see Loading GIS data with the SuperMap Editor component.
Layer management
This module is mainly used to display and manage the layers added to the scene, including: displaying the layer list, controlling the layer visibility, positioning to the layer, deleting the layer, and opening the layer file location (the file box will be opened for local data; the corresponding URL will be opened for online data).


