This page describes how to create a new scene and set its parameters.
After starting Unity and opening the corresponding project, the steps for creating a new scene are as follows:
New checkpoint
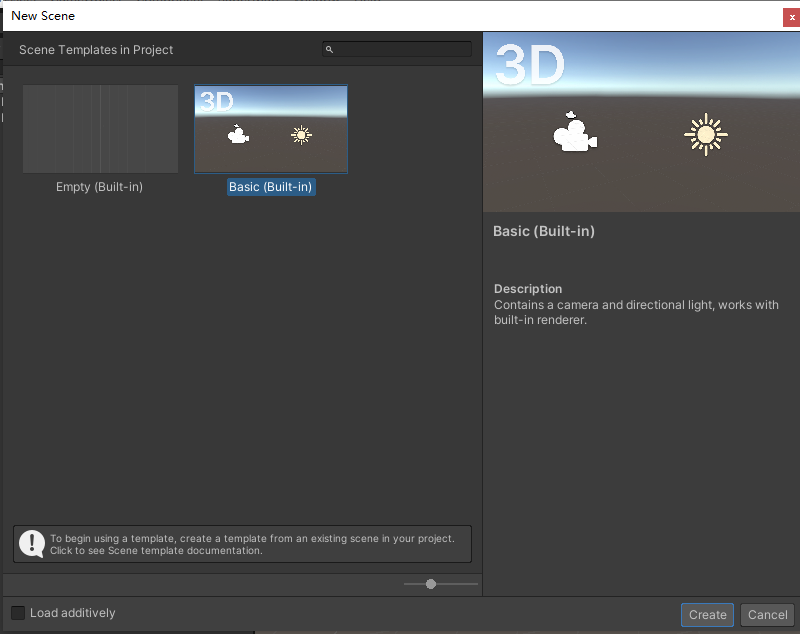
- ClickFile-New Scenein the menu barto pop up the "New Level" dialog box.
- In the pop-up dialog box, select Create Blank Level or Basic Level.
|
You can choose any level type according to your needs. This page takes Basic level as an example to explain. After creating Basic level, there are two objects by default: Main Camera and Directional Light. If there is a blank level, you need to manually create these two objects. |

Mount SuperMapGIS components

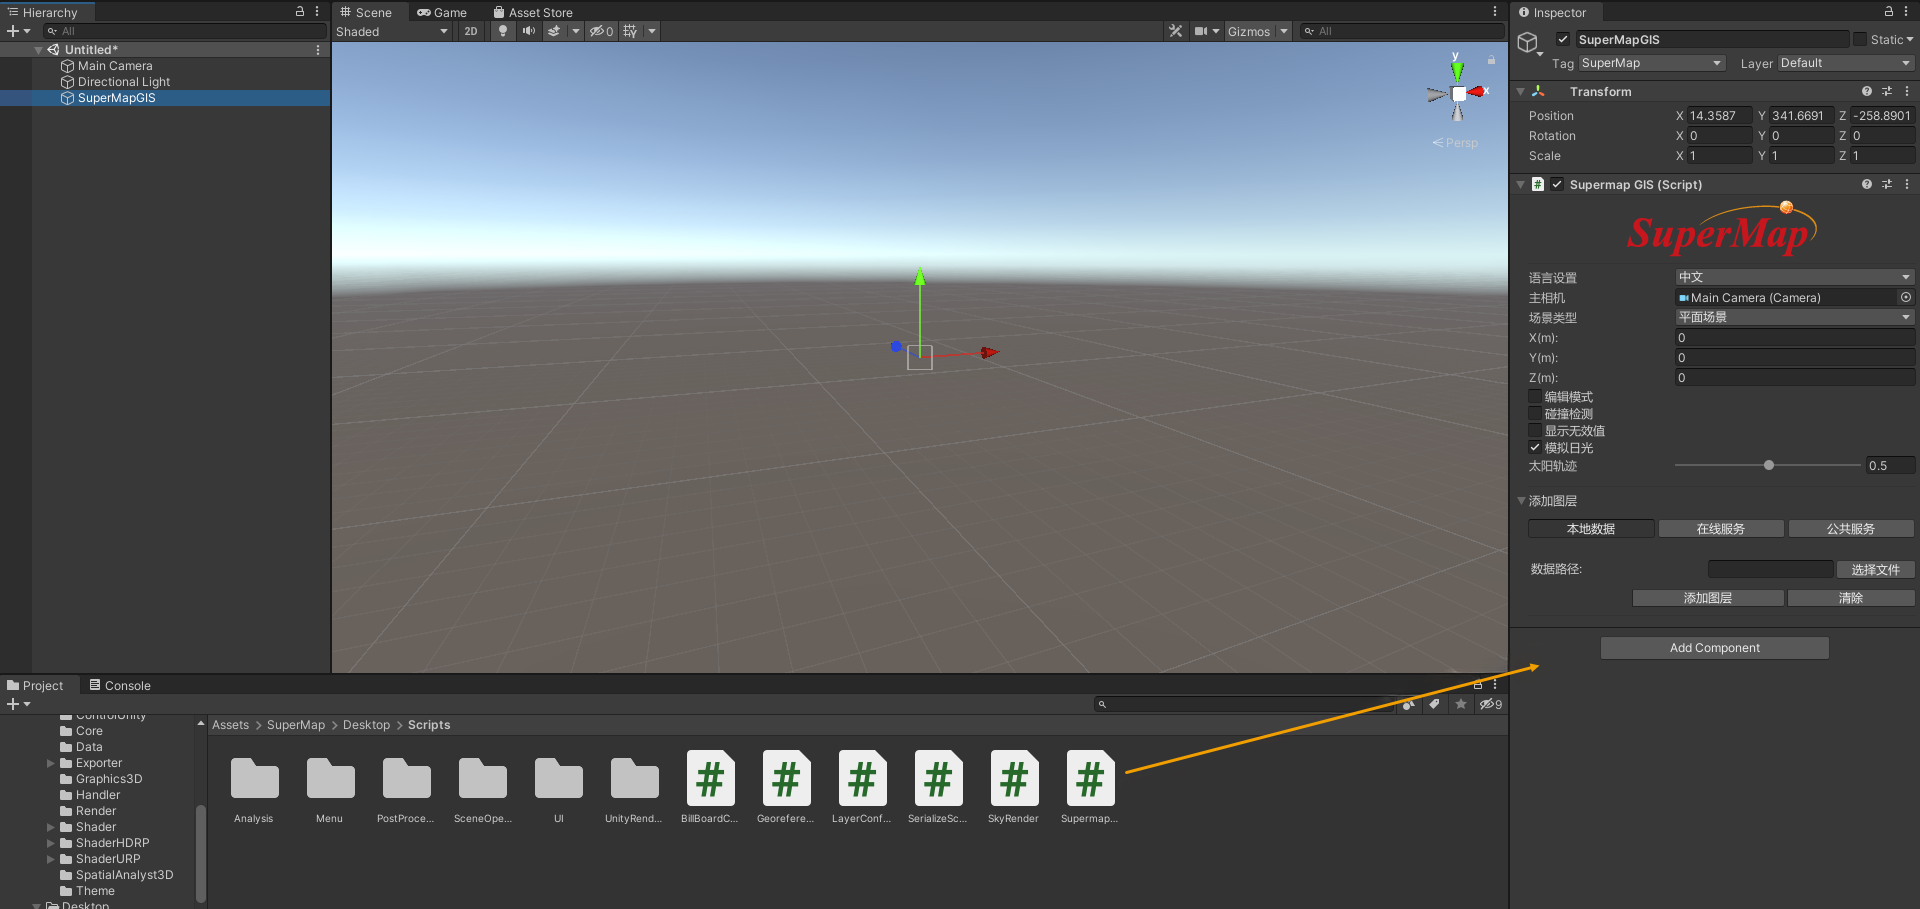
- In the Hierarchy panel on the left, create an empty object under this scene (you can name it yourself, in the example it is SuperMap GIS);
- Click Tag on the object details panel to create SuperMap tab and select Use;
- Locate the SuperMapGIS.cs script under the Assets folder/SuperMap/Desktop/Scripts folder and drag it under New Objects;
- SuperMapGIS component can use scene selection, layer loading, layer management, collision detection, skybox, set insertion point, set geographic origin and other functions. SeeUnderstanding SuperMapGIS Components to learn how to use them
Drag and drop SuperMap Desktop preforms

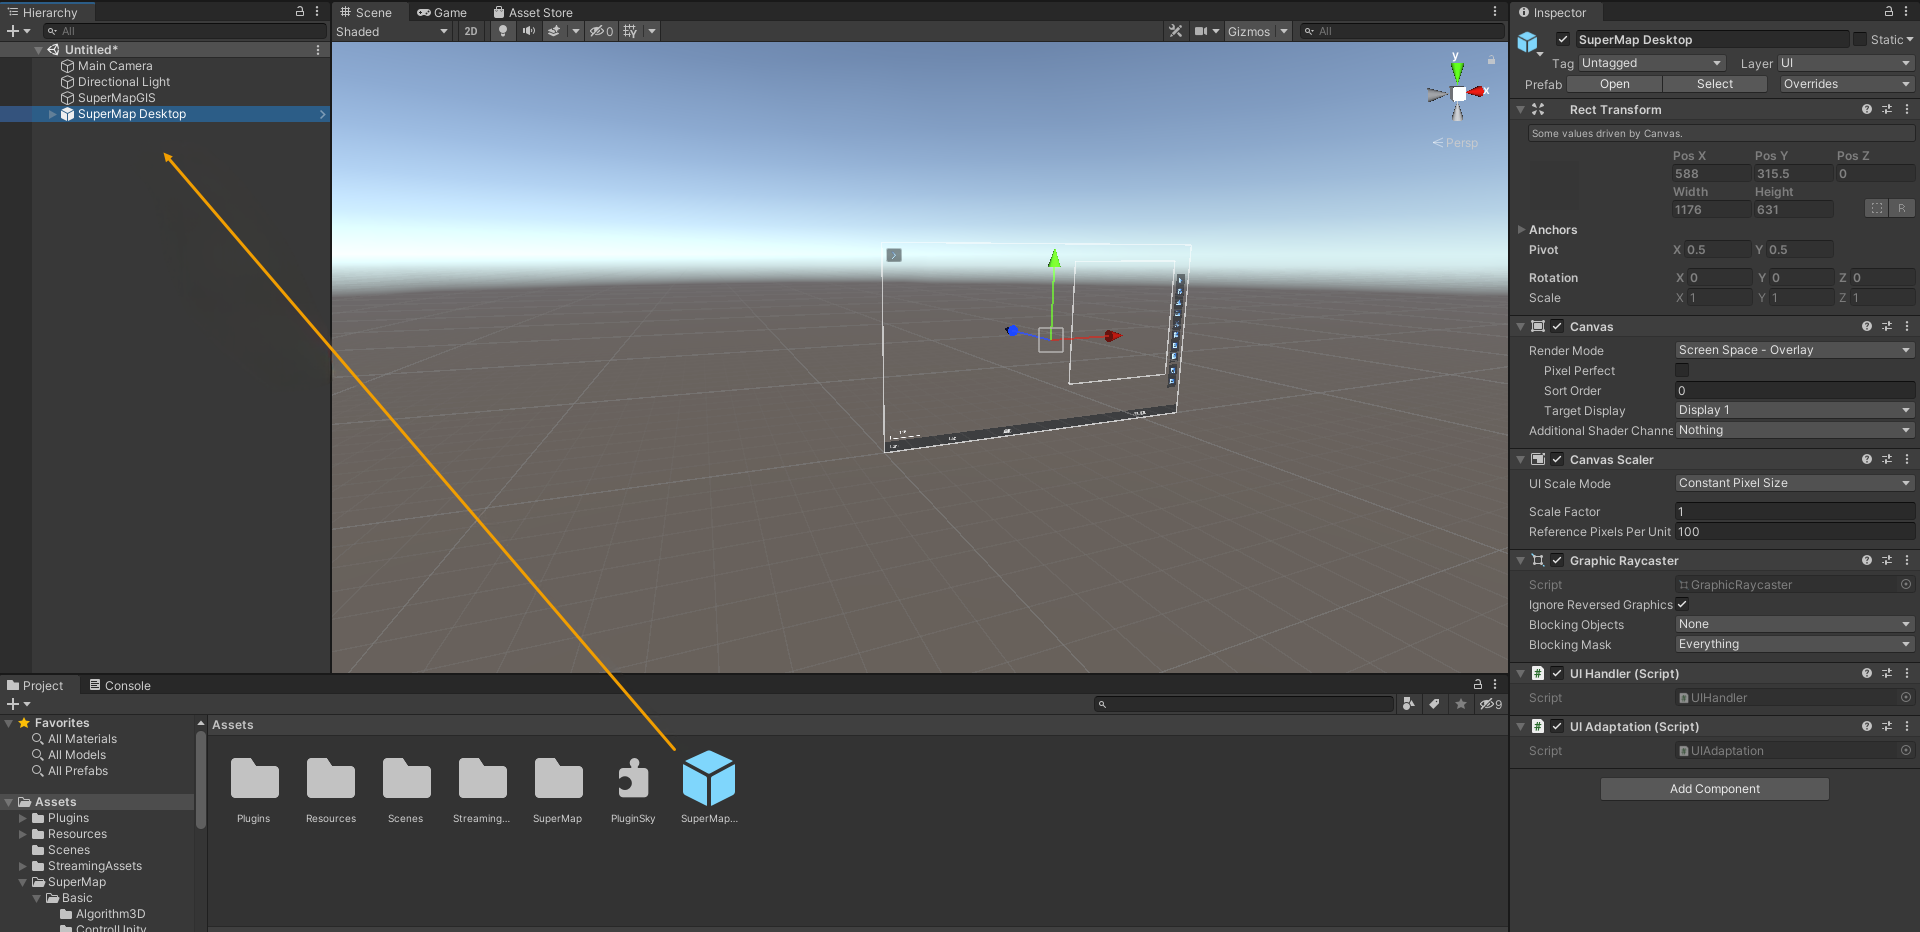
- Locate the Assets folder Assets/SuperMapDesktop.prefab, drag and drop into the scene (or drag and drop under the Hierarchy pane).
- SuperMap Desktop Prefab is a run-time interface that contains various 3D GIS features now supported in the SDK, such as data loading, 3D analysis, interaction and manipulation, and more. How to use the function under operation, please checkthe operation mode.
Scene setup, data loading, etc. are implemented usingSuperMapGIS componentsbelow.
|
It should be noted that SuperMapGIS components and SuperMap Desktop preforms are created to facilitate users to directly use the various functions of the SDK and experience the combination of GIS and game engines. Users can refer to secondary development. |


