


The stroke style settings for point symbols are configured through corresponding dialogs. As point symbol strokes are categorized into point, line, polygon and text types, the stroke style dialogs contain different content accordingly, mainly divided into: Line Style, Fill Style and Text Style.
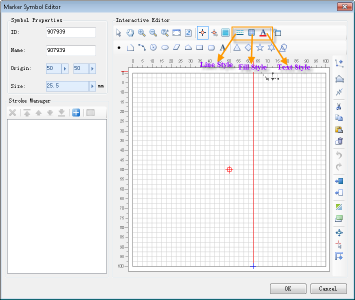
Accessing Stroke Style Dialogs
- In the Marker Symbol Editor's Stroke Manager area, select one or multiple strokes in the stroke list (multiple selections allow batch stroke style settings). Then click the Properties button on the Stroke Manager toolbar, or right-click and select Properties from the context menu to open the Properties dialog. This dialog serves as the interface for modifying existing stroke styles, with content varying depending on stroke type.
- In the Marker Symbol Editor, use the buttons on the toolbar shown below to open style dialogs for specific stroke types. These dialogs allow configuration of point, line, polygon and text styles to define the appearance of drawn elements.
Polygon Stroke Styles (Including Borders and Fill Styles)
For existing polygon stroke styles, configure through the "Properties" dialog as shown below:
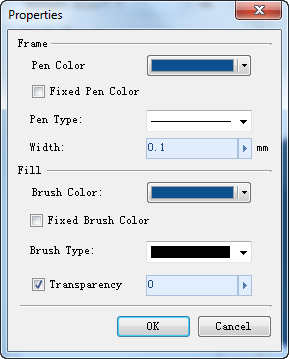
The Border section configures polygon border line styles.
- Pen Color: Sets line color.
- Fixed Pen Color: When checked, the specified line color becomes immutable, meaning it cannot be altered through the Marker Symbol Selector during map symbolization. Unchecking allows color modification via the Marker Symbol Selector.
- Pen Type: Specifies line pattern.
- Width: Determines line thickness in millimeters.
The Fill section configures polygon fill styles.
- Brush Color: Sets fill color.
- Fixed Color: When checked, the fill color becomes immutable during map symbolization. Unchecking allows color modification via the Marker Symbol Selector.
- Brush Type: Specifies fill pattern.
- Fill Transparency: Controls fill transparency from 0 (opaque) to 100 (fully transparent). Adjust via direct input or increment/decrement buttons.
In addition to basic styles, gradient fill styles can be applied to polygon strokes using two-color gradients. The start color is defined by Brush Color, while the end color is specified in Gradient Background. The start color's editability during symbol application is controlled by the Fixed Color option, while the end color remains immutable once set.
- To enable gradient fill, select a Gradient Mode. By default set to None (no gradient), available modes include Linear, Radial, Conical and Square.
- Gradient Background: Specifies gradient end color.
- Gradient X-Offset/Y-Offset: Determines horizontal/vertical offset percentage of gradient center relative to fill area center.
- Gradient Angle: Controls color transition direction, affecting Linear, Square and Conical modes (not Radial).
Polygon fill style configuration resembles gradient fill operations for map polygon objects. For detailed descriptions, refer to the Gradient Fill section in: Setting Fill Marker Styles.
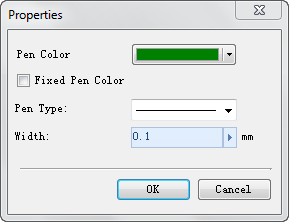
Line Stroke Styles
Configure existing line stroke styles through the "Properties" dialog as shown below:
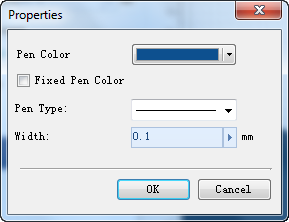
- Pen Color: Sets line color.
- Fixed Pen Color: Controls color editability during map symbolization.
- Pen Type: Specifies line pattern.
- Width: Determines line thickness in millimeters.
Point Stroke Styles
The Marker Symbol Editor only allows style modification for existing point strokes, not preset styles for future drawings. Select target point strokes and open the "Properties" dialog, which shares the same interface with line stroke styles:
- Pen Color: Sets point color.
- Fixed Pen Color: Controls color editability during map symbolization.
- Width: Determines point size in millimeters.
Text Stroke Styles
Configure existing text stroke styles through the "Properties" dialog as shown below:
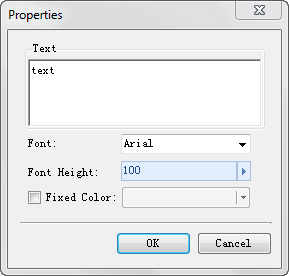
- Text: Edits text content. Note: This field is editable when modifying existing text strokes, but unavailable for preset text styles.
- Font: Selects typeface from dropdown list.
- Font Height: Specifies text size through direct input or increment/decrement buttons. Font height measures from the top of ascenders to bottom of descenders, ensuring consistent sizing across map scales compared to point-size measurements.
- Font Color: Selects text color from dropdown. Text stroke colors remain fixed during map symbolization and cannot be modified via Marker Symbol Selector.