


Line Symbol Style Settings
Feature Description
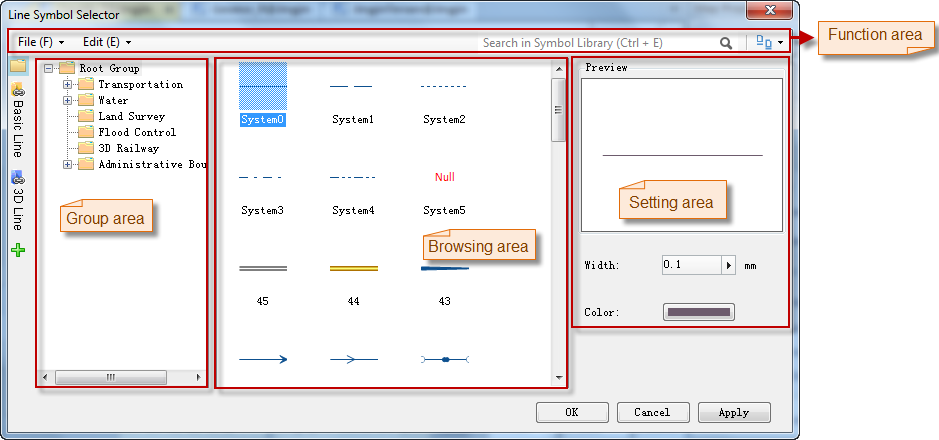
In the Line Selector, you can view and select the style of line symbols to be applied, including width, color, etc.
As shown below, the Symbol Library Window (Styles Window) currently loads the line symbol library. The Preview area in the Symbol Style Settings section previews the marker style set by the user. In the Symbol Style Settings section, you can set the style for the selected line symbol.
Function Entrances
- Workspace Manager->Resource Node -> Marker Symbol Library.
- Point Layer Style Panel -> Settings Button.
- Styles Tab -> Point Style Group -> PointSymbol Drop-down Box -> More Symbols Option.
Operation Steps
- Select Line Symbol: In the Line Selector, select the desired symbol.
- Set Symbol Display Style:
- Line Width: Set the thickness of the line. Users can enter a value in the number display box on the right to set it, or click the increase and decrease buttons on the right side of the number display box to adjust the line width.
- Line Color: Set the color of the line symbol. Click the drop-down button on its right, and users can select a default color from the pop-up color panel or customize another color.
- After setting, click the OK button in the Symbol Library Window to apply the symbol settings.
 Tip:
Tip:- When setting the layer style for vector tile layers, only 3D symbols are supported.
Related Topics
Point Symbol Style Settings (Map and Layout)
Point Symbol Style Settings (Scene)