


Feature Description
Map swipe includes three capabilities: Swipe, Twinkle, and Gradient.
Feature Entry
Map Tab->Map Swipe Group->Map Swipe.
Steps
Using Swipe
The swipe operation allows comparison between top-layer data and underlying data. Applicable layers include any vector layer, raster layer, image layer, or tile layer.
 Note:
Note:To enhance map swipe performance, the system defaults to processing layers as snapshots. Therefore, adding new layers during swipe operations may not refresh in real-time. It is recommended to avoid such operations.
The specific steps for Swipe are as follows:
- In the Select Layer dropdown list of the Map Swipe dialog, choose the layer for swipe analysis. Supported layers include any vector layer, raster layer, image layer, or tile layer under a layer group. Layer groups cannot be selected; it is recommended to select the topmost layer.
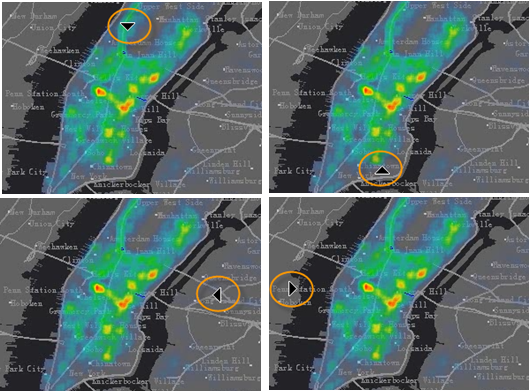
- Click the Swipe button to activate it. As shown below, different arrow states will appear based on mouse positions in the window.
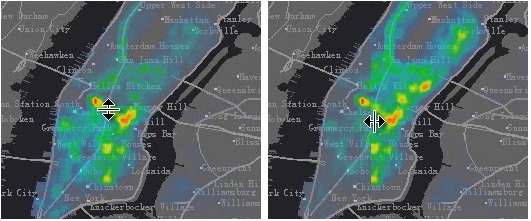
- Move the mouse to the starting position and hold. The cursor will change as shown below. Swipe vertically or horizontally to complete the operation.
Using Twinkle
Twinkle refers to the process of hiding a layer at specified time intervals and then displaying it again. It can be used for comparing historical data with current data.
After selecting a layer in the Map Swipe dialog, set the Twinkle Interval duration and click the Twinkle button.
Using Gradient
Gradient refers to the process of gradually hiding a layer at specified time intervals and then gradually displaying it again. The difference from the Twinkle function is that the hiding and displaying processes occur slowly over time.
After selecting a layer in the Map Swipe dialog, set the Gradient Interval duration and click the Gradient button.
Related Topics