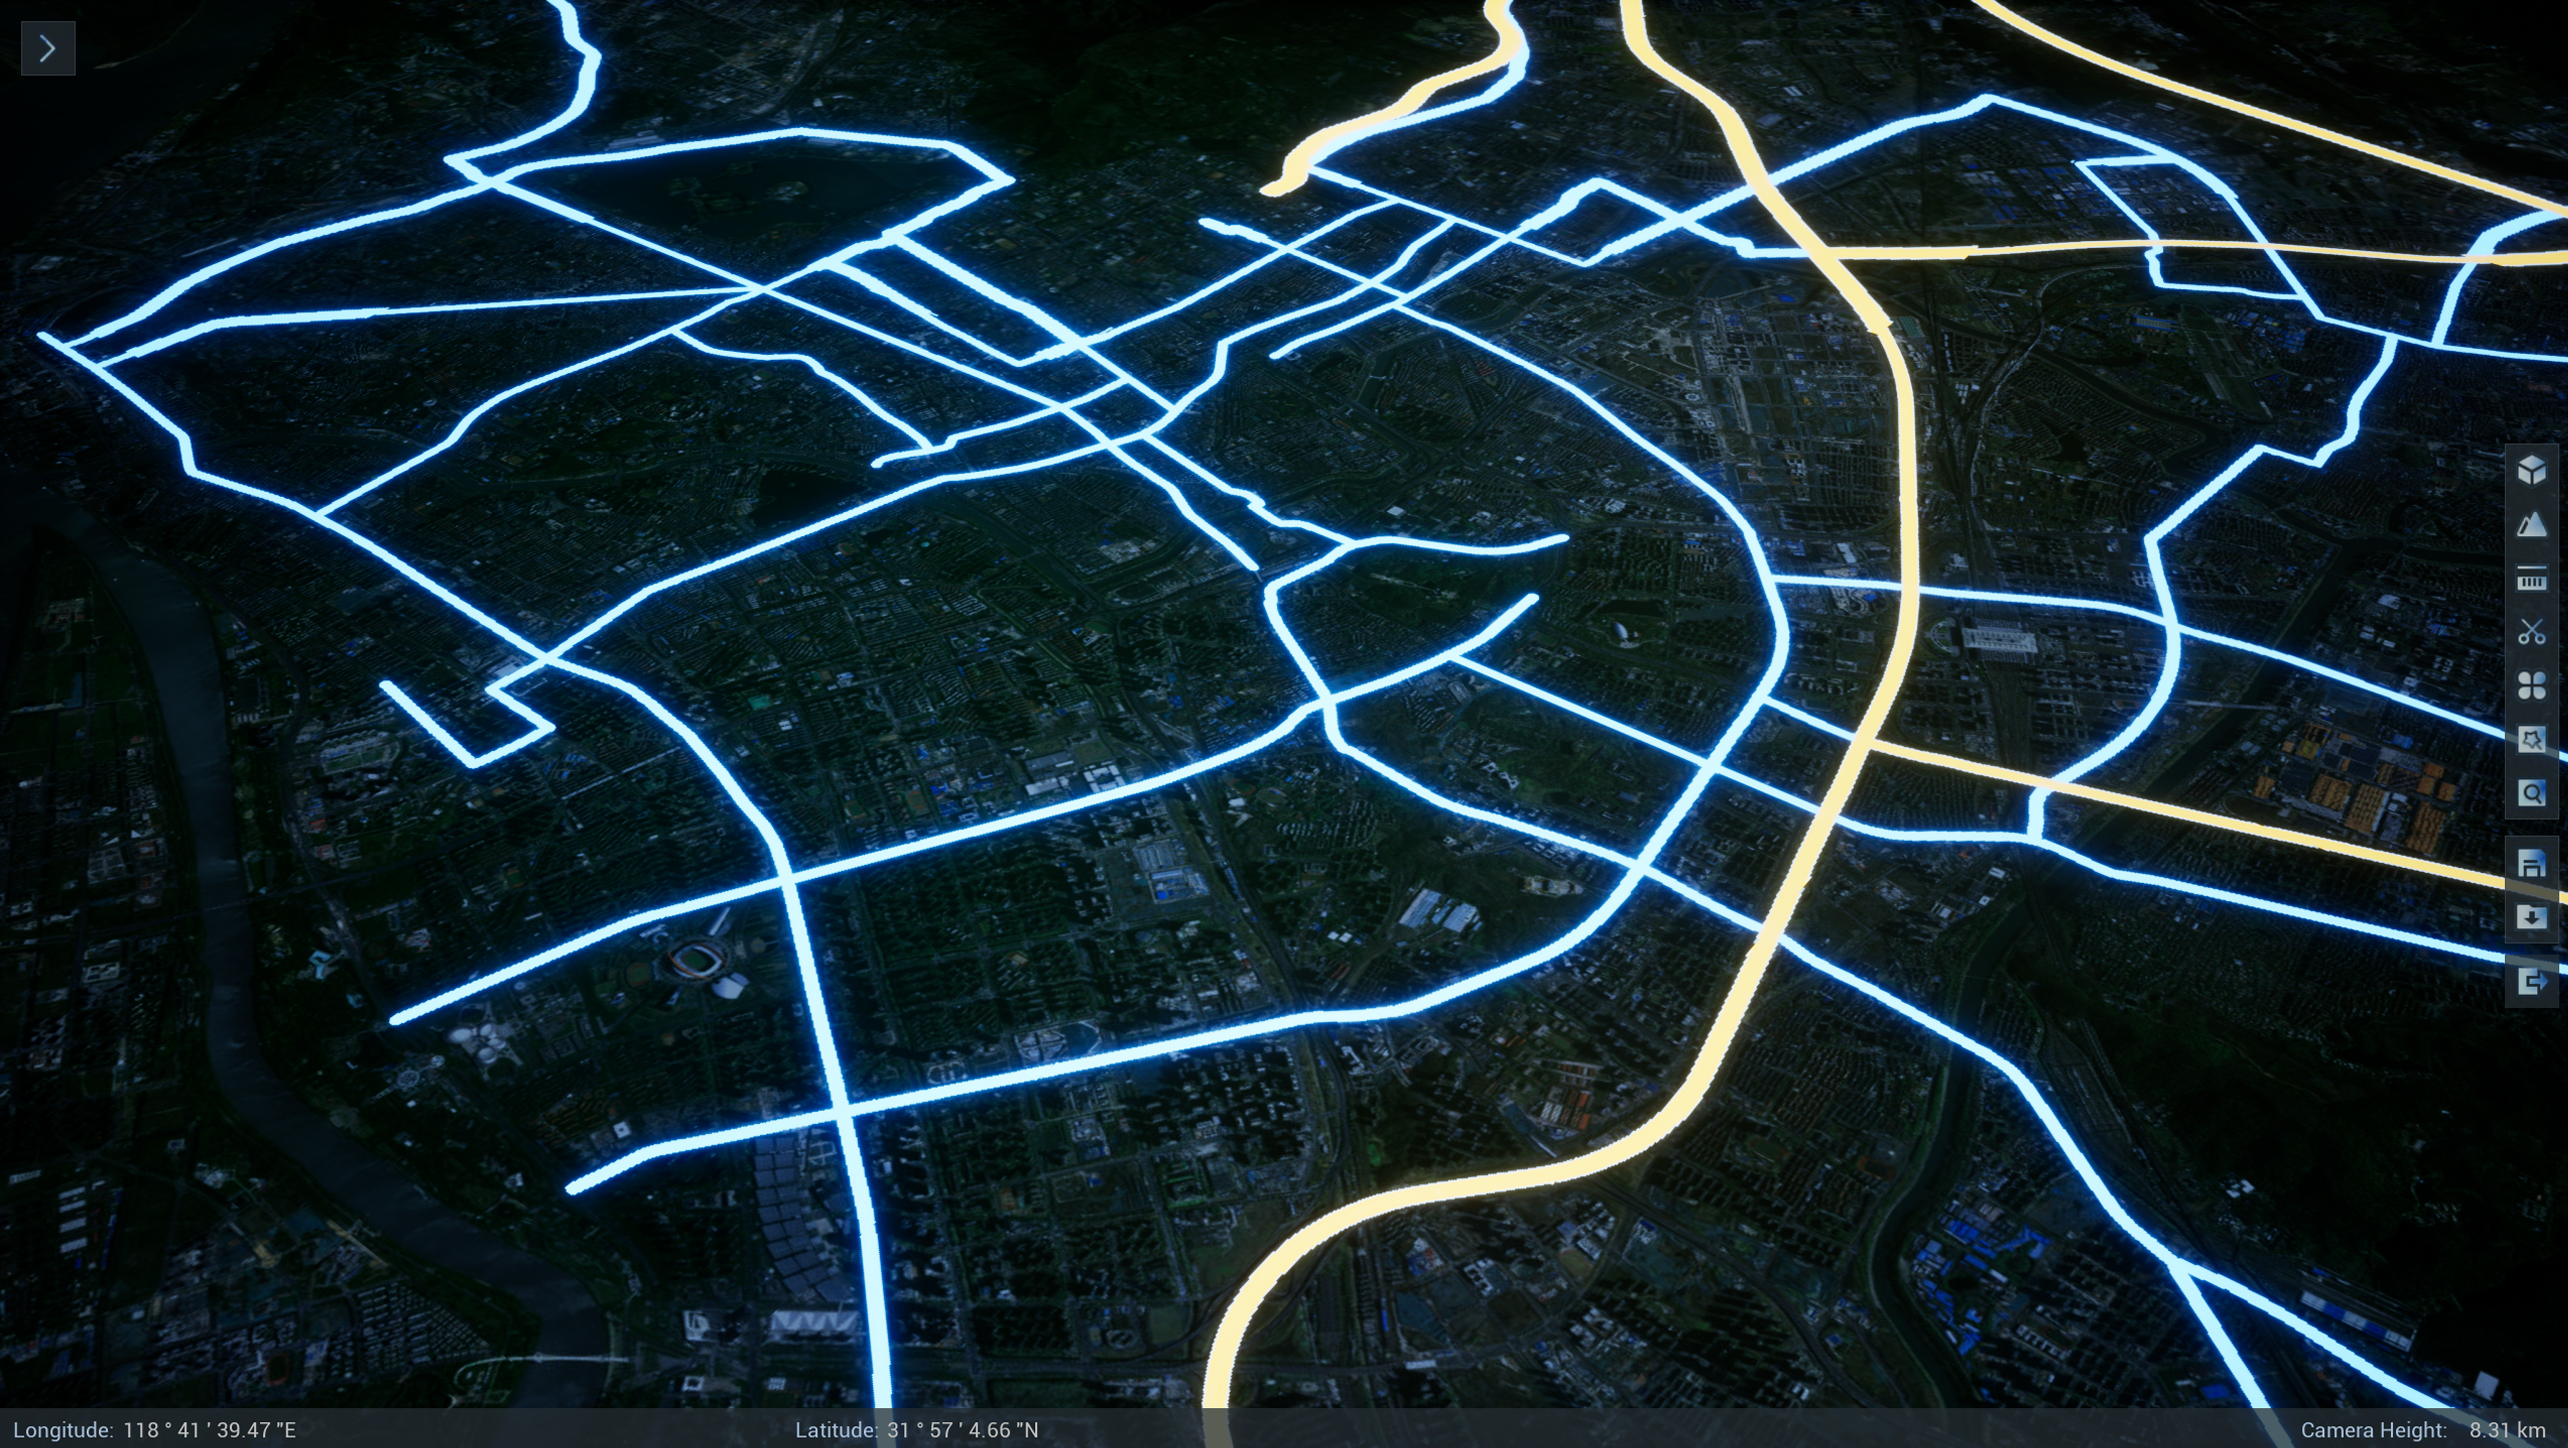
Based on performance considerations, this page provides a way to create self-luminous effects to achieve a wide range of road lighting effects.
The main operating steps are as follows:
Data preparation
SuperMap iDesktopX is needed to prepare image data and road vector data.
Raw image data preparation
SuperMap iDesktopX is used to generate original image data into image tile data in *.sci3d format. For specific operation steps, see SuperMap iDesktopX Operation Steps for Generating 3D Image Tile.
Road vector data preparation
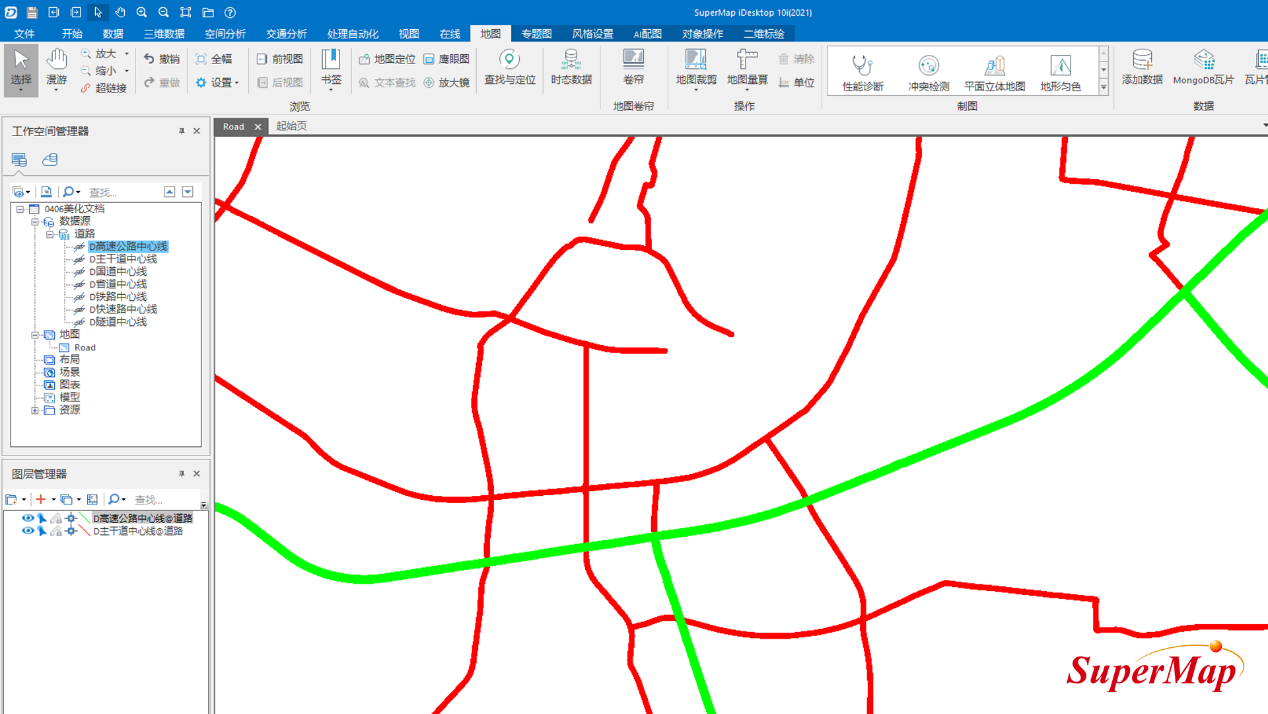
- In SuperMap iDesktopX, add the raw road vector line data to the Workspace Manager and add the data to the map via the right-click menu Add to New Map action.
- The Layer Style panel sets and adjusts vector line colors, line widths, and more. Among them, it is recommended to use three colors of red, green and blue for the color of the road route, so as to set different self-illumination effects according to different colors in Uneral Engine.
- After setting, save the current map. The saved map appears under the Maps node in Workspace Manager.
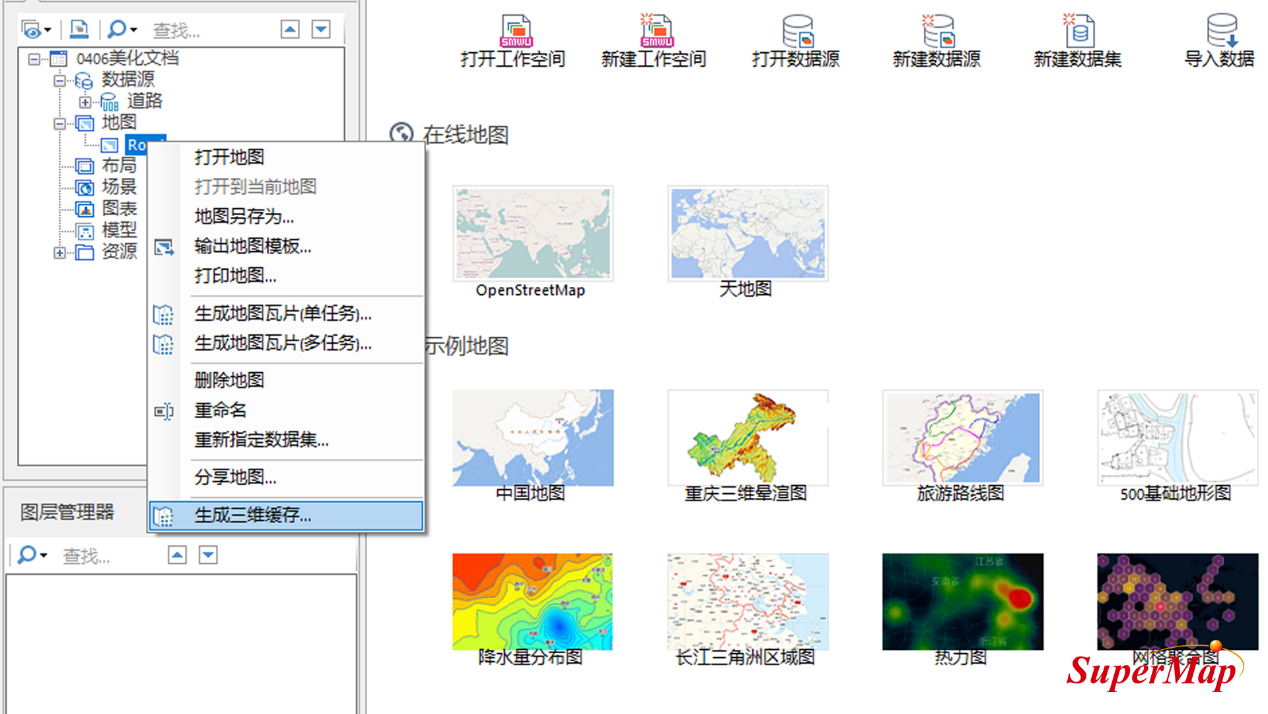
- Select the map data saved in the previous step, click the right mouse button and select "Generate 3D tiles" in the menu to pop up the Map Generation 3D tiles panel. Set various parameters as needed to generate tile data in *.sci3d format. For specific operation steps, see map generation three-dimensional tile operation steps.
Make self-luminous effect
This part needs to create the road self-illumination effect based on the prepared data in Unreal Engine. The specific operation steps are as follows:
- Image data and road vector data are loaded via editor controls in Unreal Engine with this product installed.
- Click and locate Content Browser-> All ->Plugins->SuperMap Content->UE5->MaterialFunctions->Utility->SM_Road_Emissive Material Function, copy the material function into SM_Terrain Material Blueprint.
- SM_Terrain material blueprints are located in the Content Browser->All->Plugins->SuperMap Content->UE5folder.
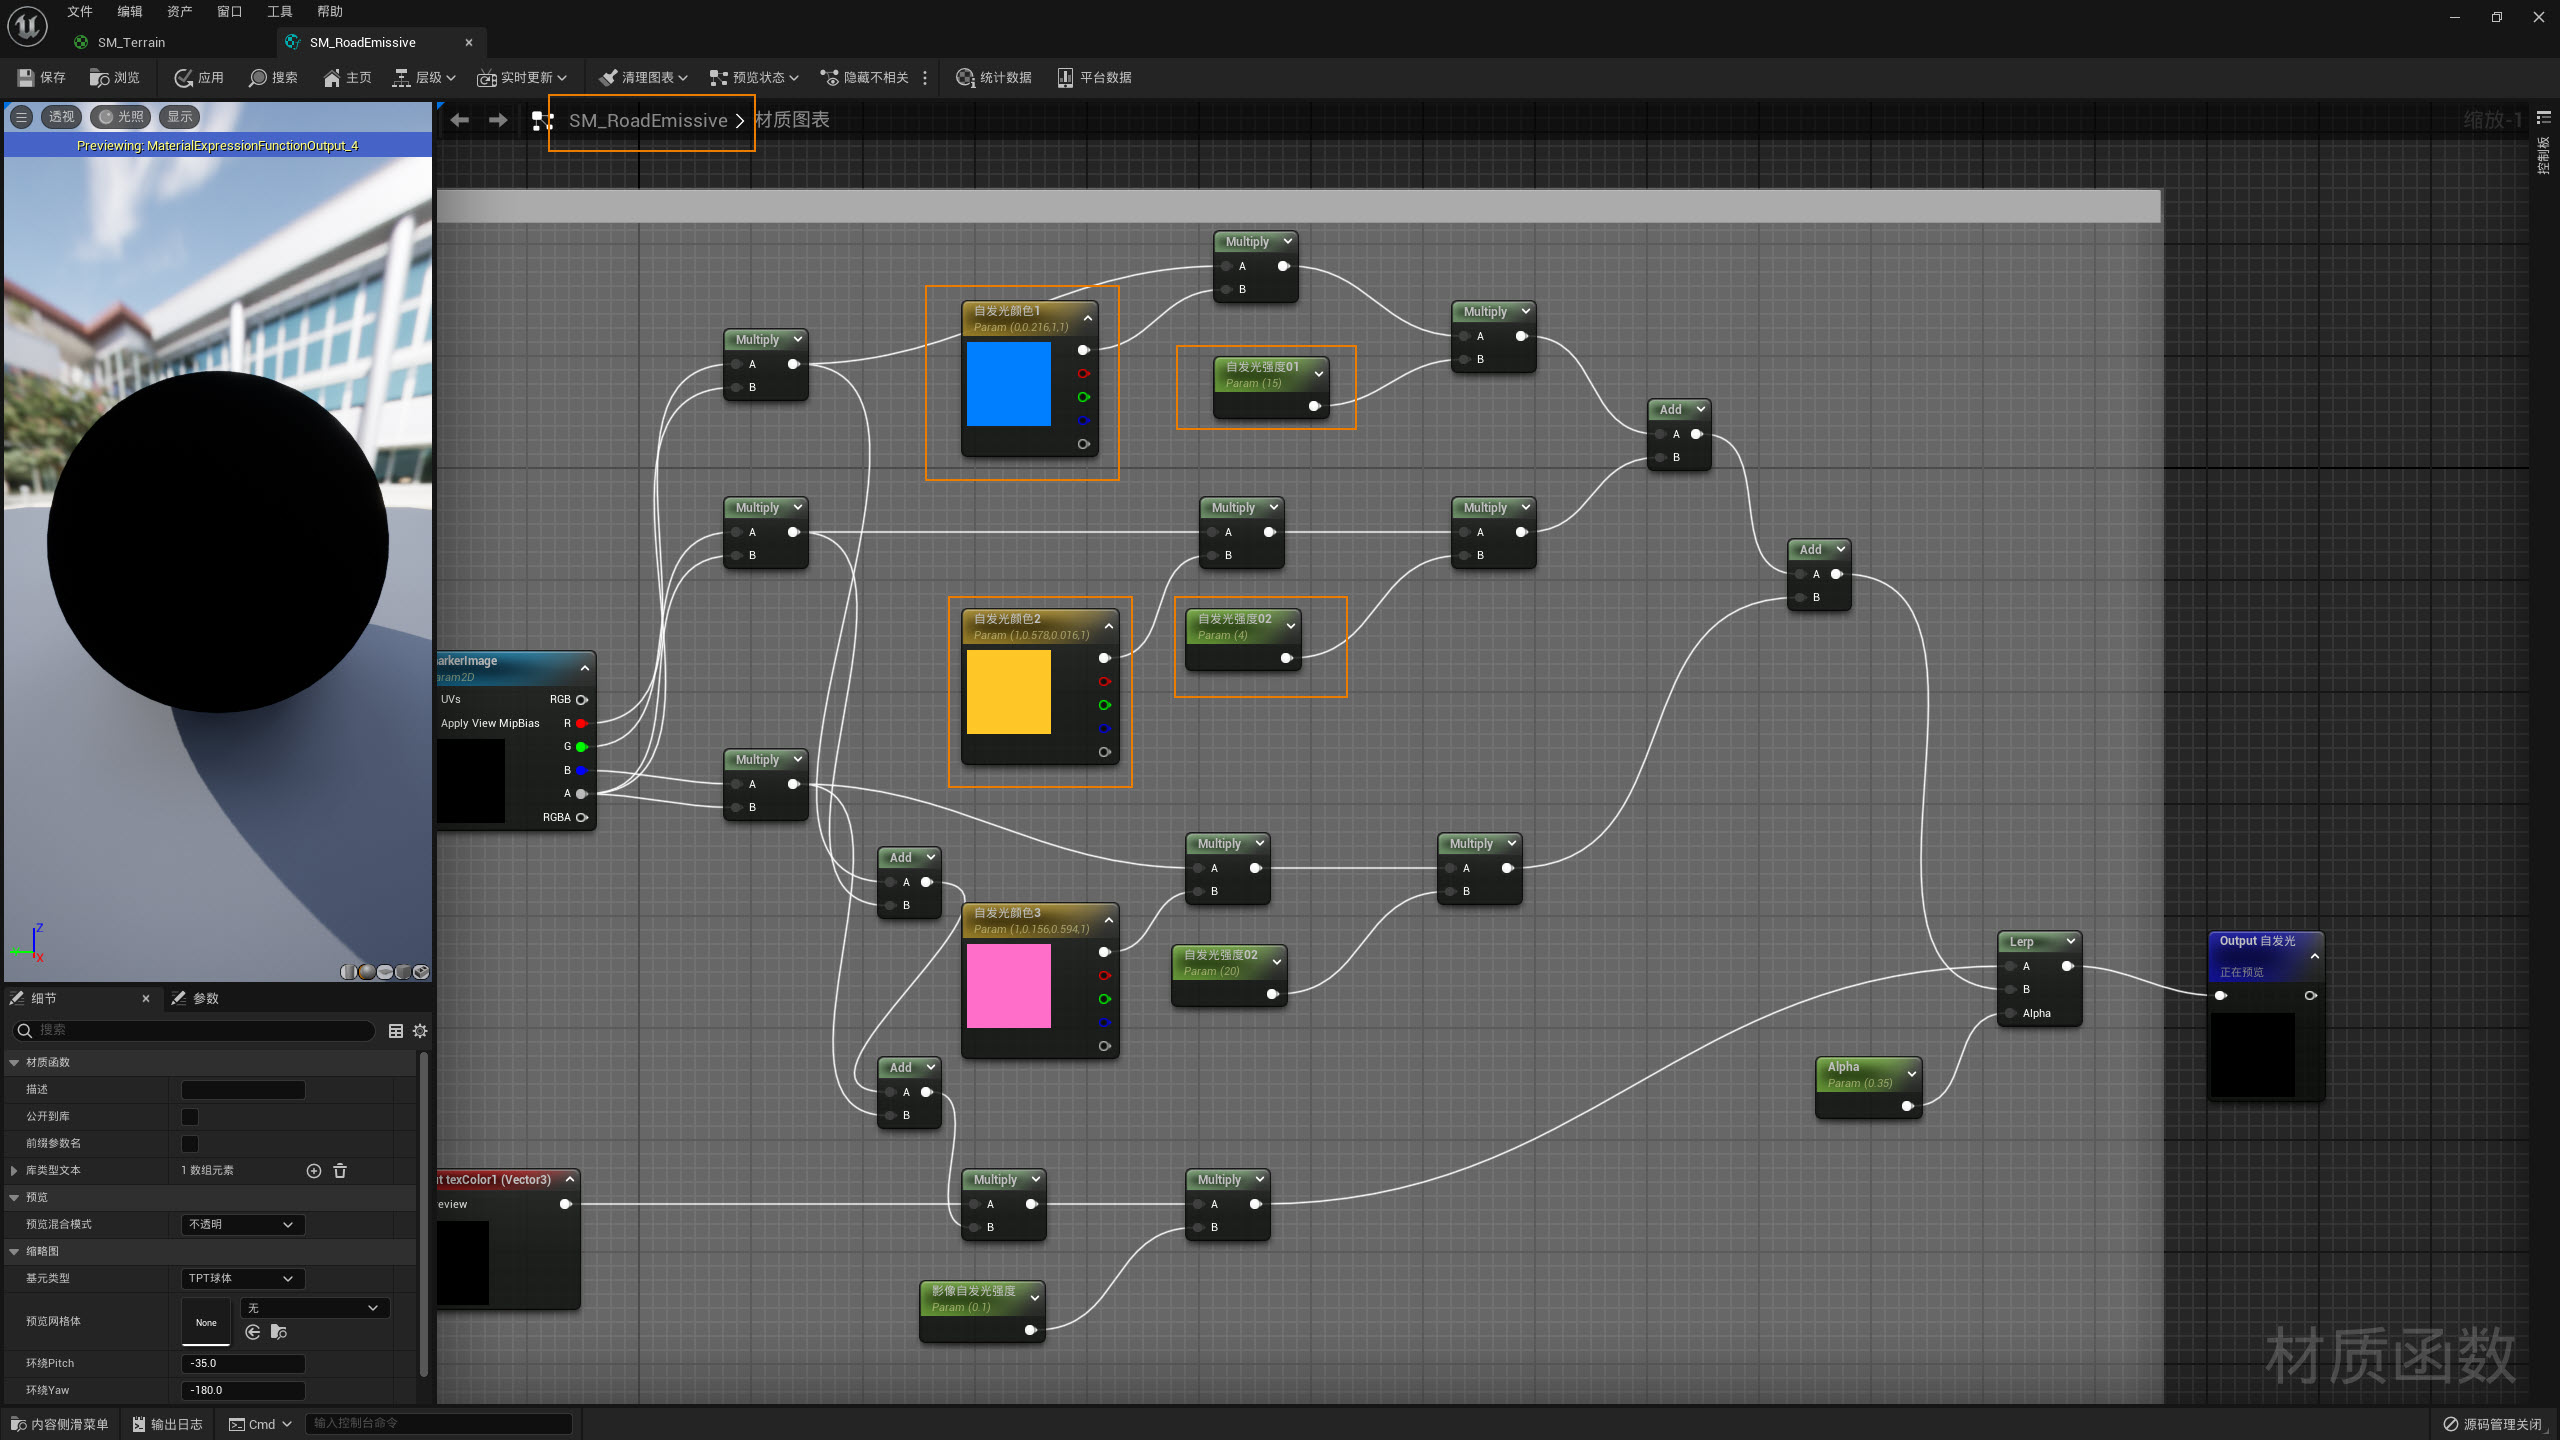
- The SM_RoadEmission material function can be used to obtain color values in road image data and set different self-luminous intensity values according to different colors.
- In the SM_Terrain material blueprint that is open, connect the left side of the SM_RoadEmissive material function to the output node of Custom5 and the right side to the SM_Terrain material's Self-Illumination node to make the road self-luminous.
- Open SM_RoadEmission material function, you can set different parameters such as color and intensity of self-illumination for red and green areas of road route respectively. If you want to set more effects, you can set different styles according to the various colors you get.
- The original image data also needs to set the self-illumination effect, otherwise the self-illumination effect only has color and no details. Finally, we need to mix the above mentioned contents through the Lerp function.
- SM_Terrain's lighting mode is no lighting, and needs to be modified to default lighting.
- After setting the material parameters, click Run this level and adjust the time to night via the Scene/Weather adjustmentpanel to see the road self-glow effect. Subsequent effects such as floodlight can be set through Outline->PostProcessVolume.
 attention
To ensure the road self-illumination effect, when loading the road route data, you need to check the terrain texture mask, and then click the Add Layer button.
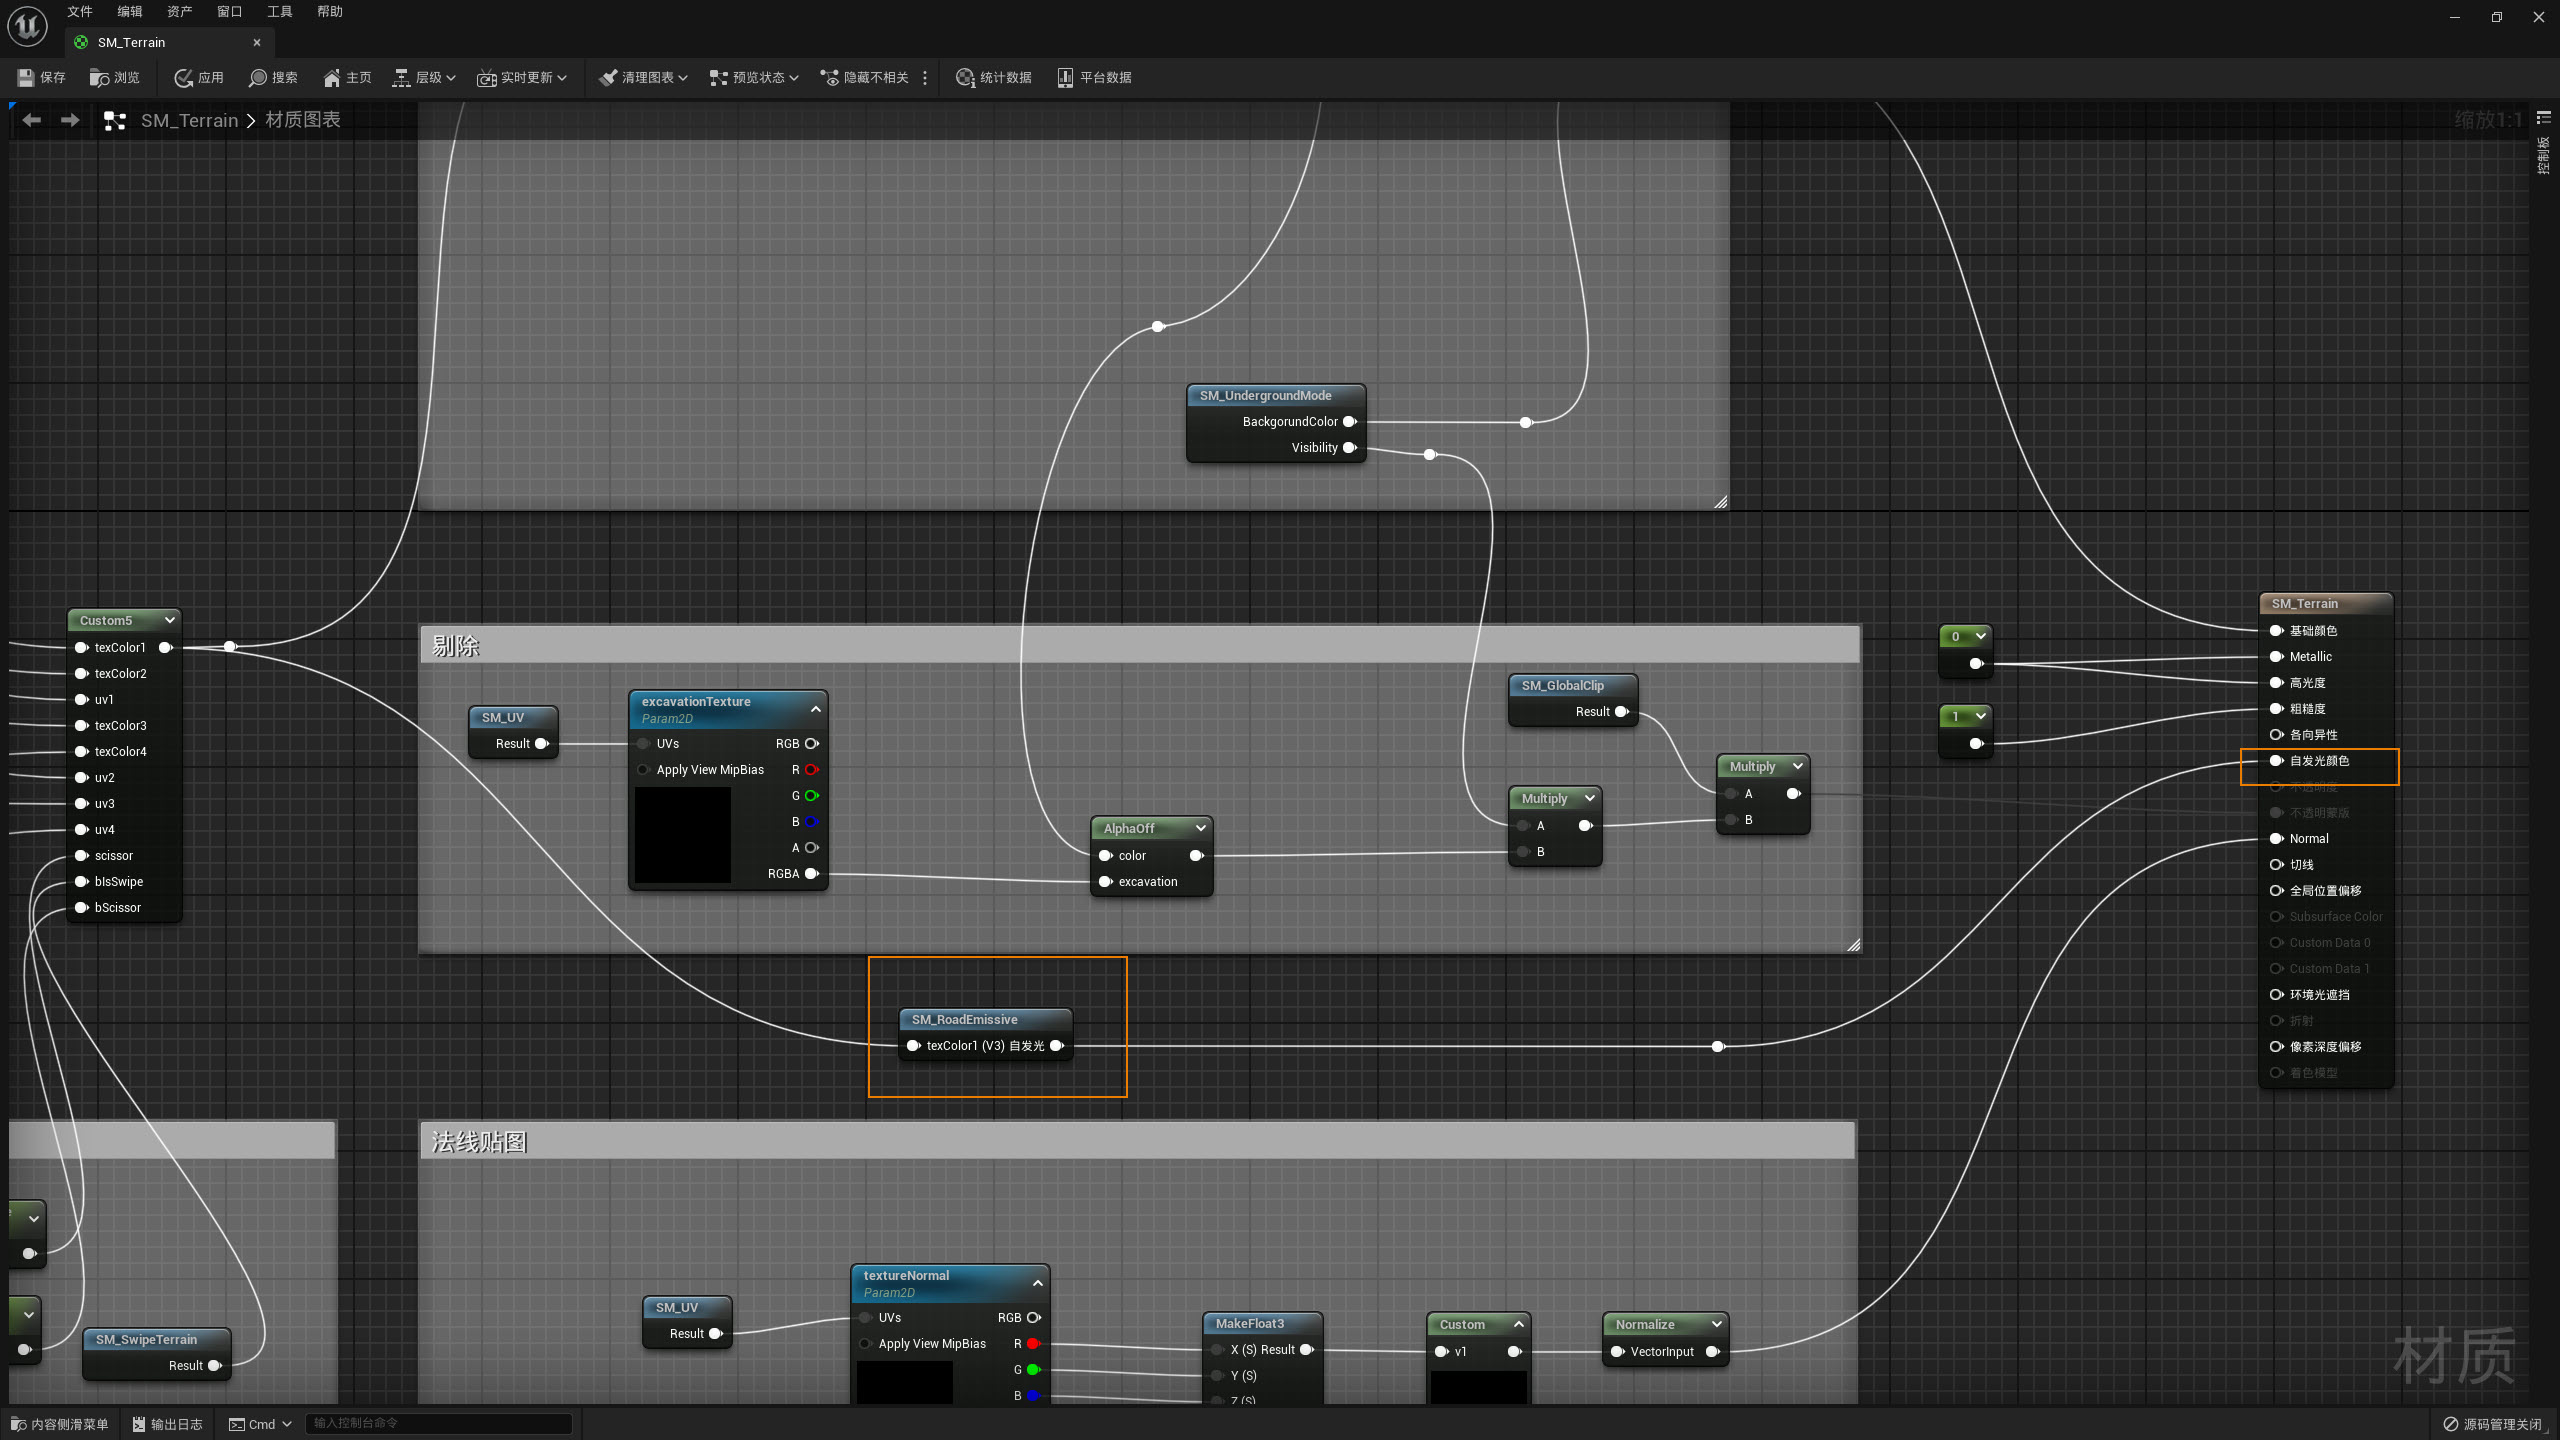 |
SM_RoadEmissive Material Function Adjustment Example |
 |
Road Vector Line Material Function Adjustment Example |
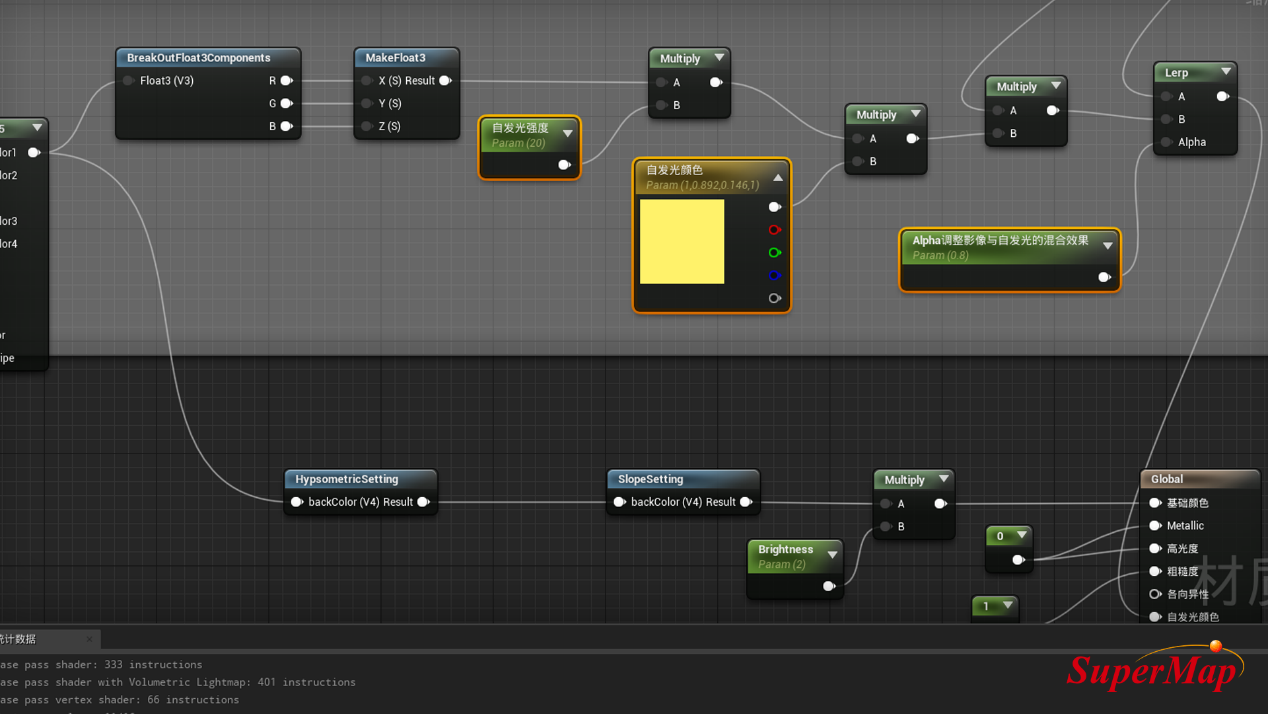 |
Image Material Function Adjustment Example |
