new scene
This page describes how to create a new scene and set its parameters.
After starting Unreal Engine and opening the corresponding project, the operation steps for creating a new scene are as follows:
Change game mode
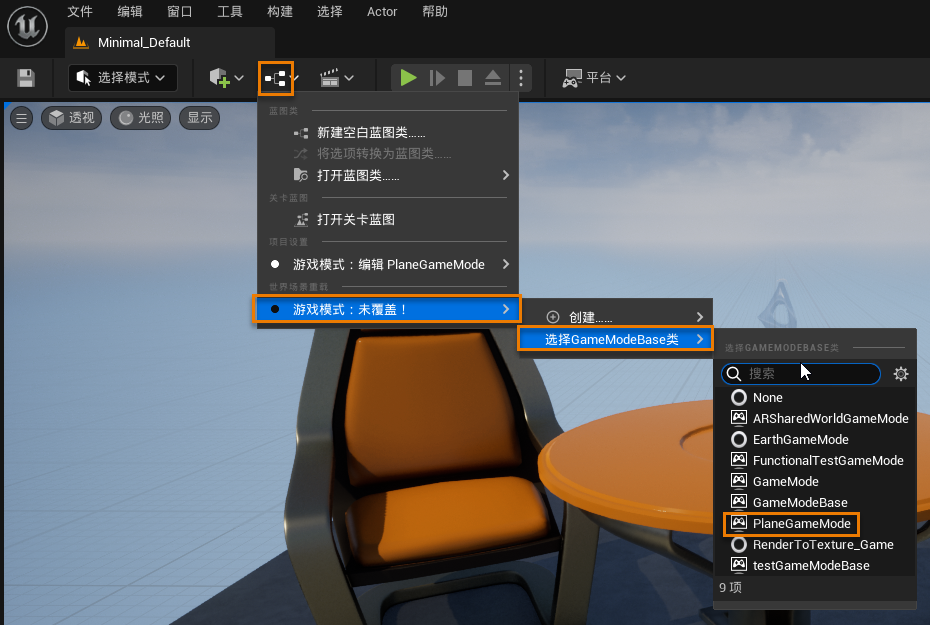
In order for the mouse to support GIS camera operation and have the ability to operate the camera to browse the scene, the game operation mode needs to be modified.
- On the Unreal Engine project page that opens, click Toolbars -> Blueprint List -> World Scene Reload -> Game Mode -> Select GameModeBase Class -> PlaneGameMode .
New checkpoint
- Click File -> New Level in the menu bar to pop up the New Level dialog box.
- In the pop-up dialog box, select Blank Level .
- You can choose any level type according to your needs. This page takes blank level as an example to explain.
- If you are using Unreal Engine 4.27, skip steps 3 - 4.
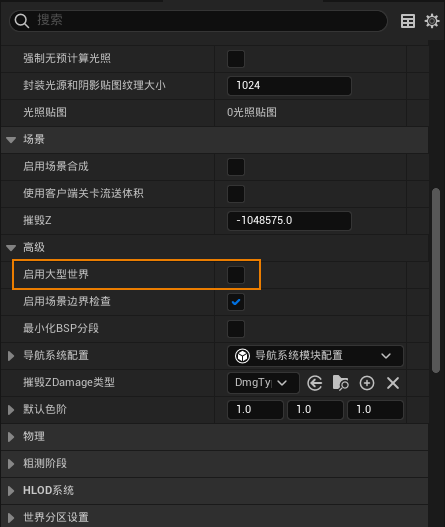
- Click Window -> World Scene Settings . Under the World Scene Settings pane, click Scene -> Advanced -> Enable Large Worlds .
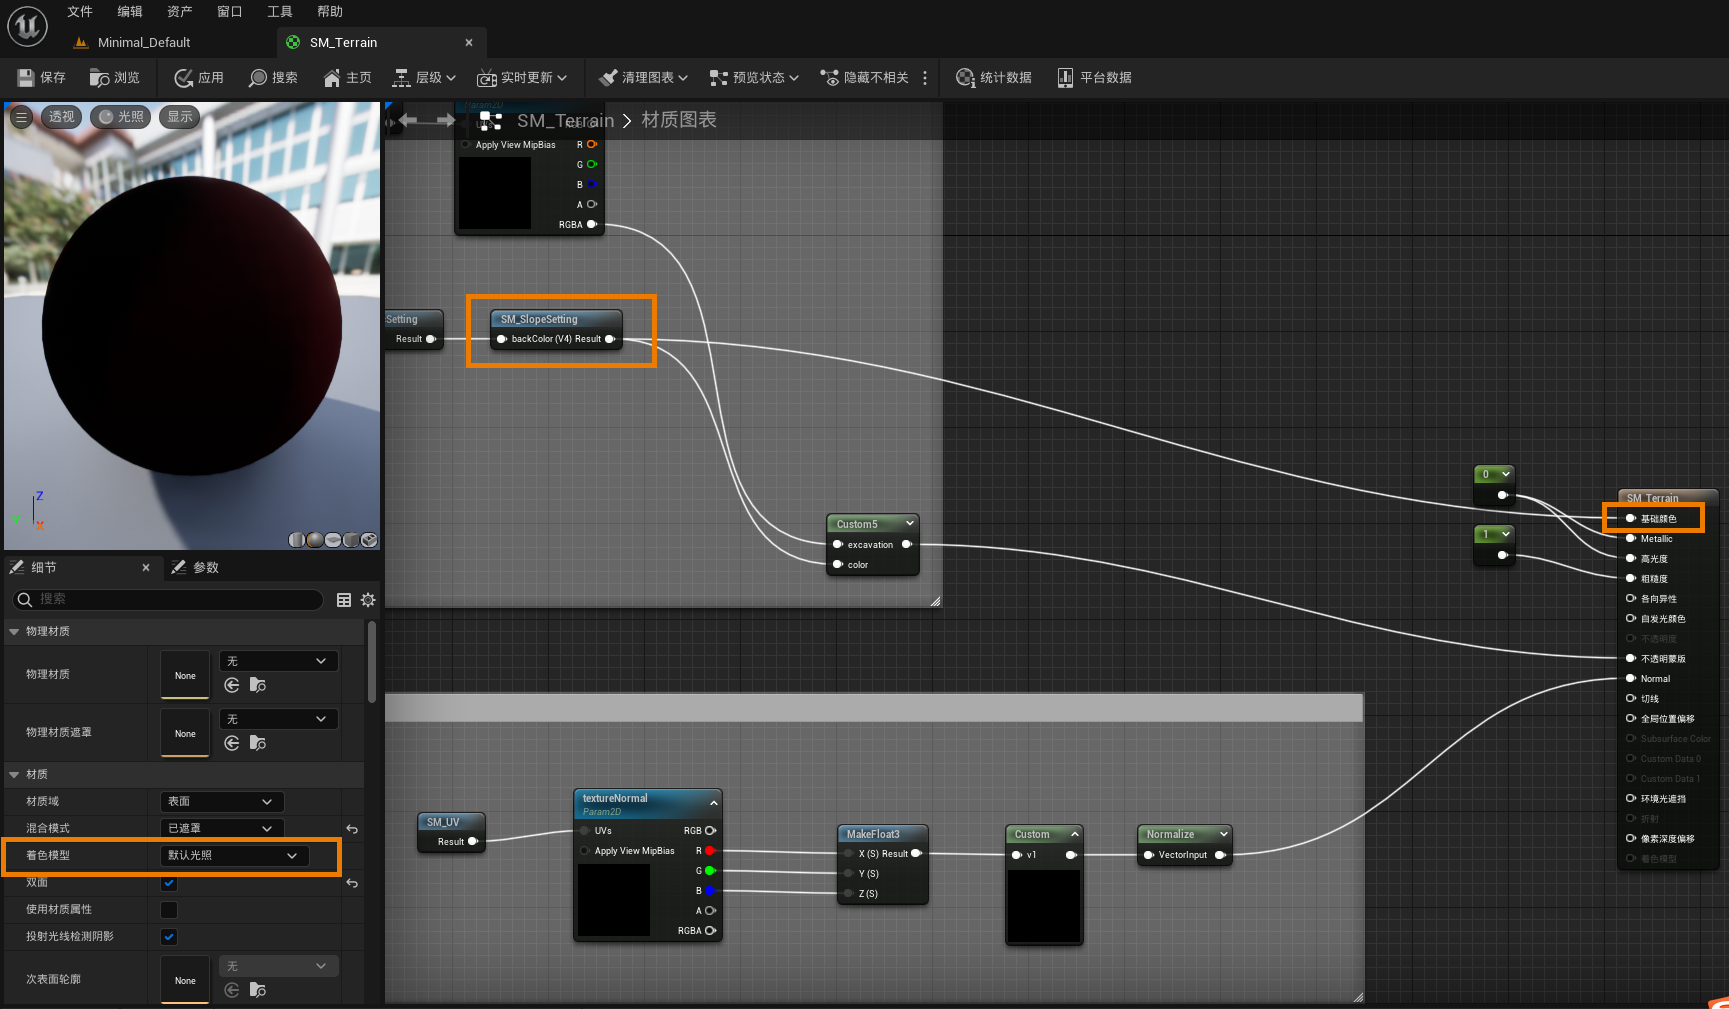
- In Unreal Engine 5.0, when loading terrain image data and spherical scenes, the default material SM_Terrain is used, where the shading model is no light. If you need to expose terrain, imagery, and spheres to light, you can do the following:
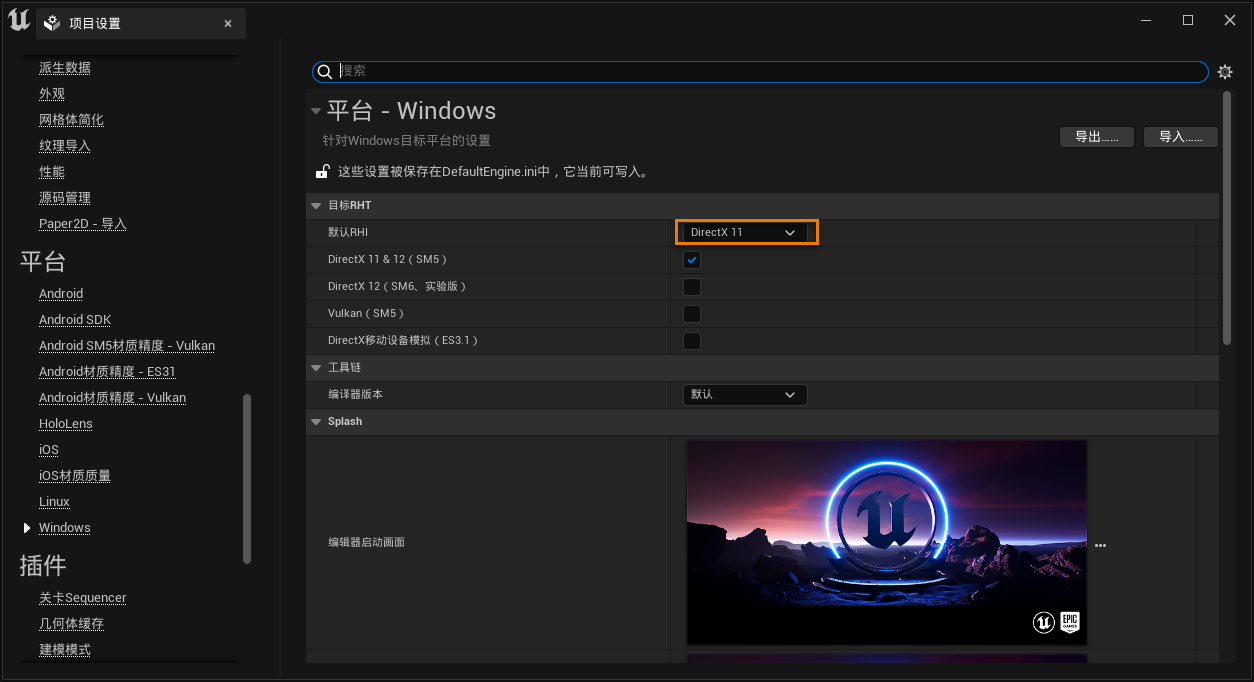
- Set Project Settings -> Platforms -> Windows -> Target RHI -> Default RHI to DerictX11.
- Click Content Browser -> Plugins -> SuperMap Content -> Materials -> UE5 -> SM_Terrain to set the shading model to default lighting, disconnect SM_SlopeSetting from the self-illuminated color, and connect to the base color.
 attention
Select and Set Actor
- Drag the Content Browser -> Plugins -> SuperMap Content -> BluePrints -> SuperMapUI -> SuperMap_MainActor Blueprint class into the level viewport.
- To create a spherical scene, drag Plugins -> SuperMap C++ class -> SuperMap -> Public -> Editor -> SuperMap_Star(C++ class) into the level viewport and set its position to (0.0,0.0,0.0).
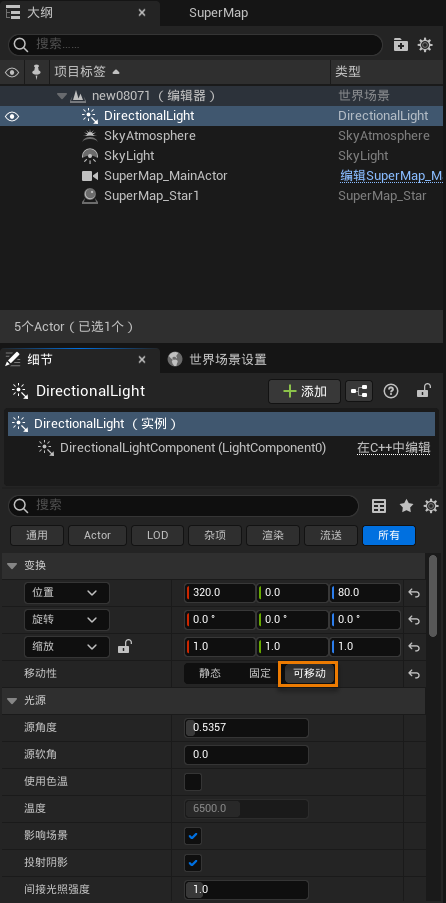
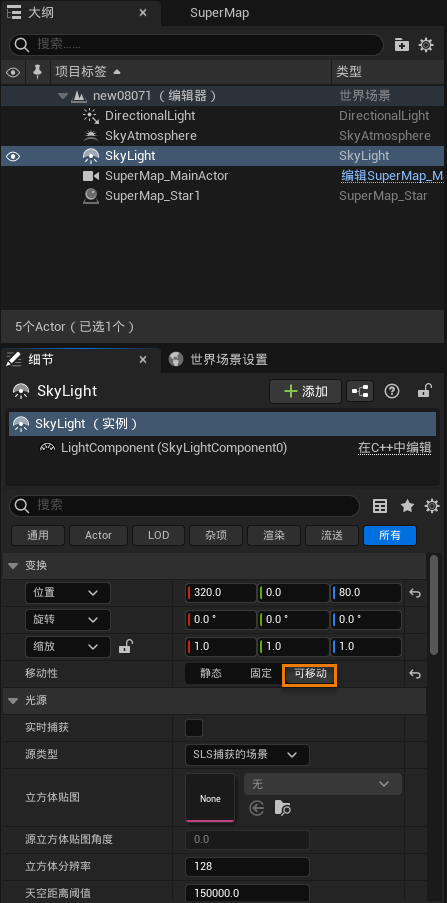
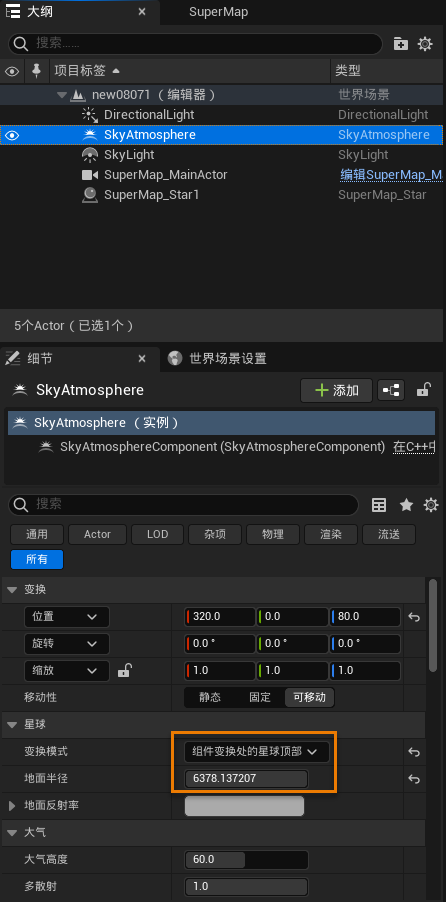
- If desired, select Directional Lighting, Sky Lighting, Sky Atmosphere, etc. Actors in the main toolbar -> Create Shortcuts , and drag them into the keycard viewport.
- In the Details pane, set mobility for Directional and Sky lighting to movable ; set transformation mode for Sky Atmosphere to Top of Planet at Component Transform , and ground radius to 6378.137.
Creating Scenes with SuperMap Editor Controls
After creating the level and setting up the actors, you need to open the SuperMap editor control to create the scene and load the GIS data.
- Find and select Content Browser -> Plugins -> SuperMap Content -> BluePrints -> SuperMapUI -> SuperMap Editor Controls , right-click and select Run Editor Tools Controls.
- In the SuperMap Editor control panel that pops up, select a spherical or planar scene as needed and load GIS data. SeeLoading GIS data with SuperMap editor controls for more information.
 attention
If there is no SuperMap content in the Content Browser, click the Settings button on the right side of the Content Browser and select Show Plugin Content in the pop-up panel.


