


Sunlight analysis
Sunlight analysis refers to calculating the length of time that a specified area can be illuminated by the sun within a certain period of time according to the latitude and longitude range of the specified area. At the same time, according to the specified maximum, minimum height and sampling frequency, the lighting information in the specified area is obtained. The lighting value represents the percentage of the sunshine time in the starting time to the ending time. This feature is temporarily supported for use on model data of spherical scenes.
Operating steps
- Click 3D Analysis -> Sunlight Analysis to switch to the Sunlight Analysis Settings panel.
- setting parameters
- Minimum Height: indicates the height of the bottom elevation of the analysis area relative to the center point of the drawing surface, in meters. If set to 1, it indicates that the bottom elevation of the analysis area is the elevation of the center point of the drawing surface +1 meter.
- Minimum Height: indicates the height of the bottom elevation of the analysis area relative to the center point of the drawing surface, in meters. If set to 1, it indicates that the bottom elevation of the analysis area is the elevation of the center point of the drawing surface +1 meter.
- Maximum height: default is 20 meters. Represents the height of the top of the analysis area relative to the center point of the draw polygon in meters, or if set to 10, the top of the analysis area is +10 meters above the center point of the draw polygon.
- Time range: used to set the start time and end time of sunshine analysis, which can be set within 0-24 hours.
- Sampling frequency: refers to collecting sunshine data of each sampling point according to the sampling frequency within the specified starting and ending time range. The unit is minute. The default sampling frequency is 5 minutes. That is, within the specified analysis time range, statistics are made once every 5 minutes to determine whether there is sunshine at each sampling point. Finally, the lighting rate of each sampling point is calculated.
- After setting the parameters, click Analyze and then left click in the scene to draw the area to be analyzed.
- Right-click to end the click.
- After finishing the clicking operation, you can select and move the observation point or target point, which will change the results of the cross-view analysis in real time. The analysis results are as follows:
- Click Clear to clear the 3D scene of through-view analysis results.
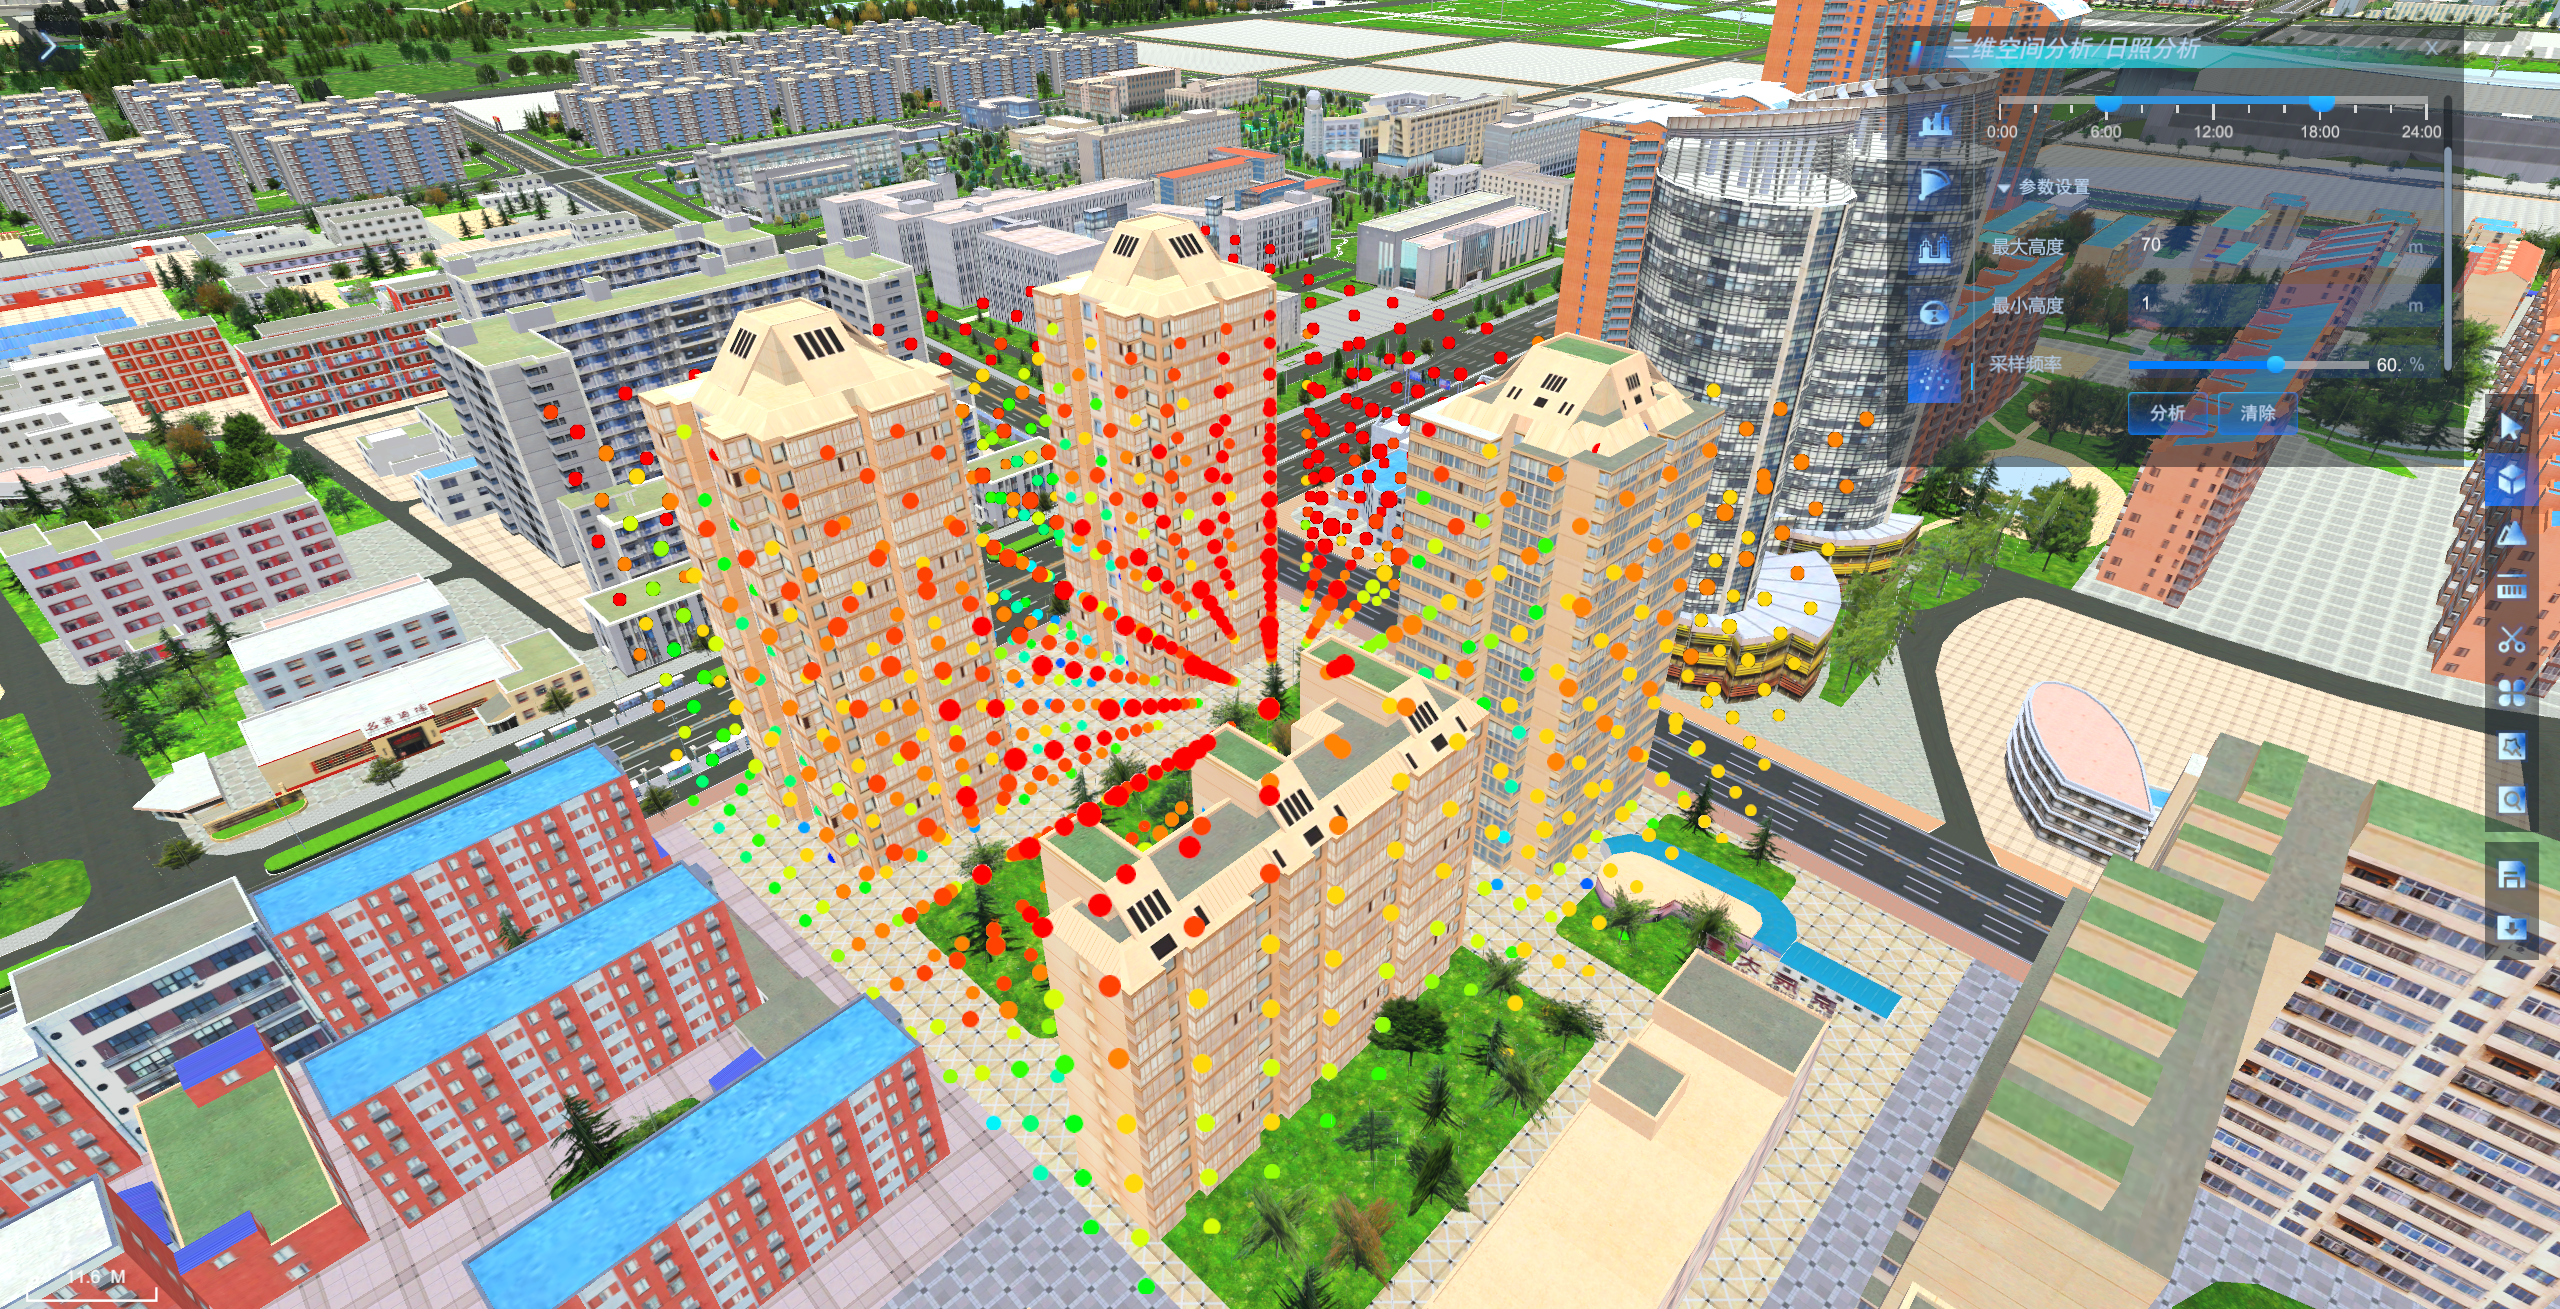 |
| Sunlight analysis results |