Linux Container Virtualization (LXC) is a lightweight virtualization technique that utilizes kernel virtualization technology to provide lightweight virtualization for isolating processes and resources. Docker extends LXC, providing higher-level API and simplifying application packaging and deployment, creating independent private environments for end users, which can effectively save developers and system administrators' environment deployment time.
SuperMap iServer is now online on Alibaba Cloud and Docker Center (the addresses for obtaining images are registry.cn-beijing.aliyuncs.com/supermap/iserver and supermap/iserver, and it is recommended that you obtain iServer images through Alibaba Cloud). With just a few steps, you can deploy iServer in Docker.
Install Docker
Install Docker in the public network environment
Install Docker Desktop on Windows
1. Enable virtualization of the computer.
Generally, computers are turned on by default. You can check whether virtualization is turned on through "Task Manager → Performance → CPU".
2. Turn on Hyper-V.
Enable Hyper-V to start the virtual machine, which can be set through "Control Panel → Program → Enable or Turn off Windows Functions → Check Hyper-V". After enabling, restart the computer to take effect.
3. visit https://docs.docker.com/desktop/windows/install/, download Docker Desktop。
4. Install Docker Desktop and follow the prompts.
5. Open Docker Desktop and wait for it to be enabled.
If the prompt "Hardware assisted virtualization and data execution protection must be enabled in the BIOS" appears, it may be due to some programs disabling the virtual machine management program.
Solution: Run CMD as an administrator and execute the following command:
bcdedit /set hypervisorlaunchtype auto
When successfully operated, restart the computer and reopen Docker Desktop.
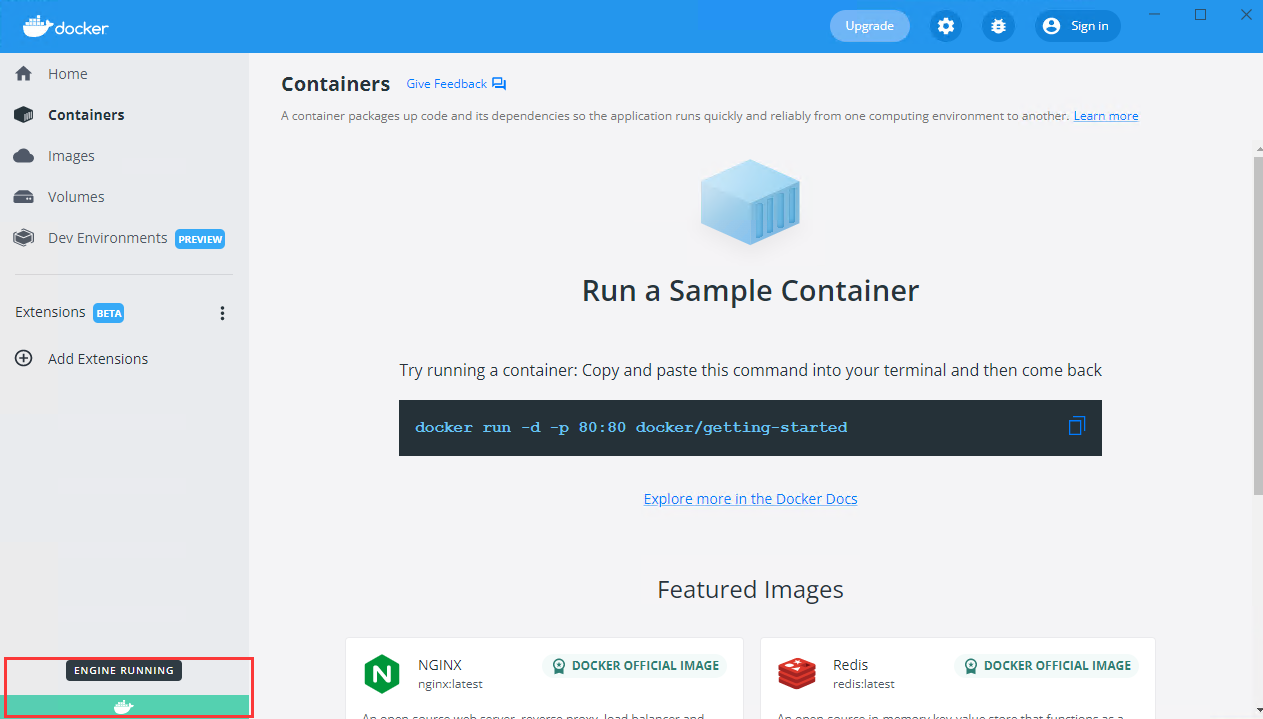
6. When the whale icon in the bottom left corner has a green background, it indicates that Docker is available.
Install Docker on Linux
Install through convenient script
This operation takes CentOS-7-x86_64 as an example. this convenient script is applicable to multiple systems such as CentOS, Debian, Ubuntu, etc. It does not support custom installation configuration. For details, please refer to the official documentation: https://docs.docker.com/engine/install/.
Note: Log in as root or the most privileged user and perform the following operations.
1. Install with convenient script:
curl -fsSL https://get.docker.com | bash -s docker --mirror Aliyun
2. After the installation is completed, execute the following command to view the Docker version and confirm that the installation is successful:
docker --version
deploy manually
This operation takes Ubuntu_18.04_LTS x86_64 as an example. For Docker installation of other systems, please refer to the official installation document: https://docs.docker.com/engine/install/.
Note: Log in as root or the most privileged user and perform the following operations.
1. Uninstall old versions that may exist:
apt-get remove docker docker-engine docker.io containerd runc
2. Update the apt package index:
apt-get update
3.Install the following packages to make the repository available to apt via HTTPS(repository):
apt-get install -y apt-transport-https ca-certificates curl software-properties-common
4.Add the GPG key and set the stable repository
- Obtained through Docker official website
4.1 Add Docker official GPG key:
curl -fsSL https://download.docker.com/linux/ubuntu/gpg | sudo apt-key add -
4.2 Set up the stable repository:
add-apt-repository "deb [arch=amd64] https://download.docker.com/linux/ubuntu $(lsb_release -cs) stable"
- Obtained through Alibaba Cloud
4.1 Add Alibaba Cloud GPG key:
curl -fsSL http://mirrors.aliyun.com/docker-ce/linux/ubuntu/gpg | sudo apt-key add -
4.2 Set up the stable repository:
add-apt-repository "deb [arch=amd64] http://mirrors.aliyun.com/docker-ce/linux/ubuntu $(lsb_release -cs) stable"
5.Update the apt package index again:
apt-get update
6.Install the latest version of Docker CE:
apt-get install -y docker-ce
At this point, the installation of Docker has been completed, and the following command can be used to verify whether it is successful:
docker run hello-world
This command downloads a test file and runs it in a container. When the container runs, it prints some information and automatically exits.
Install Docker offline
For LAN scenarios where the public network cannot be connected, we have collected and produced Docker offline installation packages for common operating systems. If needed, please contact SuperMap Support Center for assistance. You can also refer to the official Docker documentation for installation: https://docs.docker.com/engine/install/binaries/.
When the installation is complete, start Docker:
service docker start
Get iServer image
Note: If it is a Windows system, open CMD (Command Prompt) and perform the operation; If it is a Linux system, it is necessary to log in as root user or the highest privileged user and perform operations.
Obtain SuperMap iServer image in public network environment
- Get iServer image
You can obtain an iServer image through Alibaba Cloud. Enter the following command to view all image tags supported by iServer:
docker run --rm -t registry.cn-beijing.aliyuncs.com/supermap/tiny-tools:3.12-amd64 regctl tag ls registry.cn-beijing.aliyuncs.com/supermap/iserver
To pull a specified version of iServer image, you need to enter the corresponding tag. The rules are as follows:
Image tag for Linux X86-64 architecture: [version number] - amd64
Image tag for Linux ARM64 architecture: [version number] - arm64
For example, enter the following command to get the iServer image for the Linux X86-64 architecture 12.0.0.0 version :
docker pull registry.cn-beijing.aliyuncs.com/supermap/iserver:12.0.0.0-amd64
Enter the following command to get the iServer image for Linux ARM64 architecture 12.0.0.0 version:
docker pull registry.cn-beijing.aliyuncs.com/supermap/iserver:12.0.0.0-arm64
- View image information
After the download is complete, you can view the downloaded image information with the following command:
docker images
Get offline SuperMap iServer image
- For LAN scenarios that cannot be connected to the public network, you can contact the SuperMap Support Center to obtain an offline iServer image.
- Copy the obtained iServer image (*. tar) to an offline environment and import it into Docker
docker load -i *.tar
- Check whether the import is successful with the following command:
docker images
Start and use iServer
Run Docker container
Run a Docker container iserver1 based on the obtained iServer image.
-
If you downloaded the image from Alibaba Cloud, execute the following command to obtain the Linux X86-64 architecture 12.0.0.0 version image as an example:
docker run --name iserver1 -d -p 8090:8090 -v `pwd`/my_opts:/opt/iserverOPTs registry.cn-beijing.aliyuncs.com/supermap/iserver:12.0.0.0-amd64
Among
--name refers to specifying a name for the container. The --name iserver1 indicates that the specified container name is iserver1;
-d refers to run the container in the background and returning the container ID;
-p specifies port mapping, the format of: host port: container port. -p 8090:8090 indicates that the specified mapped host port (externally exposed port) is 8090, and the container port is also 8090;
iServer JAVA-POTS represents the Java memory configuration of iServer
-v represents the mapping data path, in the format of: host path: container path. When setting up a cluster, this parameter can be used to publish services on the primary node. If the master node does not need to publish services, there is no need to use the - v parameter;
registry.cn-beijing.aliyuncs.com/supermap/iserver represents the corresponding image name. If you are obtaining an offline image, you should enter the corresponding image name here. You can view the existing image information of the local repository by using the following command:
docker images
Wait a few seconds and iServer startup completed. Enter http://<Host IP>:8090 in the browser to access iServer.
Set environment variables (optional)
To use iServer's distributed analytics service, the environment variable distributeanalysmost needs to be set at runtime, where distributeanalysmost corresponds to the IP address inside the container.
-
If you downloaded the Linux X86-64 architecture 12.0.0.0 version image from Alibaba Cloud, execute the following command:
docker run --name iserver1 -d -p 8090:8090 --env distributeanalysthost="172.17.0.2" -v `pwd`/my_opts:/opt/iserverOPTs registry.cn-beijing.aliyuncs.com/supermap/iserver:12.0.0.0-amd64
Note: my_opts represents the folder where the data to be mapped from the host to the container is located, which can be customized according to the actual path on your compute, /opt/iserverOPTs is a folder that already exists in the container, used to store all iServer related configuration files.
Publishing GIS services on iServer
In the above steps, the mapping path from the host to the Docker container (-v `pwd`/my_opts:/opt) has been specified through the -v parameter, so the data can be directly placed in a directory on the host (`pwd`/my_opts). Log in to iServer Service Manager and enter the Quick Publish Service Wizard. When browsing remotely, you can directly find the mapped data in the corresponding directory of the container and publish it.
The path mapping method can be used to publish file based GIS data, such as file based workspaces, MBTiles tile packages, etc. For GIS data stored in databases, such as database workspaces, MongoDB tiles, etc., this mapping is not required. It is recommended to deploy the database separately, such as on the host machine or other machines, and make it accessible to all iServer.
Build the iServer cluster based on Docker
The iServer launched in the above example can be used as the cluster master node. Start container son1 as a cluster child node:
-
If you downloaded the Linux X86-64 architecture 12.0.0.0 version image from Alibaba Cloud, execute the following command:
docker run --name son1 --link iserver1:master -v /home/data:/home registry.cn-beijing.aliyuncs.com/supermap/iserver:12.0.0.0-amd64
-
Child nodes do not need to expose their port numbers to the outside world. They can use the internal IP of container son1 to access services within the host machine, publish services, and join the cluster. The IP of the cluster master node corresponds to the alias master. You can also manually join the cluster by modifying the iserver-system.xml of the child nodes. The modifications are as follows:
<clustering>
<reporters>
<reporter>
<enabled>true</enabled>
<address>http://master:8090/iserver/services/cluster</address>
<isTileWorker>true</isTileWorker>
</reporter>
</reporters>
</clustering>
-
The format of the link parameter is --link name:alias,here --link iserver1:master means to connect the container to iserver1 container and set the alias for iserver1 as master. Alias can be freely specifie.
-
-v mapping data paths to facilitate publishing services on child nodes
After the two containers are started, you can access the service through http://<HOST IP>:8090, and see that the child node has been added on the "cluster" page. The child node can also participate in the graph cutting task as a tile child node.
Enable the cluster service on the master node to use the cluster function.
License configuration
The method for configuring iServer license for Docker deployment is as follows:
-
The normal license configuration process:
-
To use a file license, the container adaptation license file needs to be placed in the container LICENSE_DIR (default is /opt/SuperMap/License) directory, and the container hostname should be consistent with the one recorded in the license file
-
To use the network lock hardware license, you need to add:
-e LICENSE_SERVER= license server IP
-
Cloud license configuration process: Please refer to the introduction in the cloud license section.
-
Web License configuration process: Please refer to the introduction in the Web License .
Notice
When the seccomp security computing mode is enabled in the Docker environment you are using, you can adjust it in the following ways to ensure that the iServer image can be deployed normally.
-
Method 1: When executing the image run command, add the parameter --security-opt seccomp=unconfined to turn off iServer image security verification, for example:
docker run --security-opt seccomp=unconfined --name iserver -d -p 8090:8090 -v `pwd`/my_opts:/opt/iserverOPTs registry.cn-beijing.aliyuncs.com/supermap/iserver:12.0.0.0-amd64
-
Method 2 (recommended): Use a custom seccomp configuration file to allow the container to modify the kernel I/O permission level to normally access files in the iServer image. The specific configuration method is as follows:
- Fetch the default seccomp configuration file maintained by Docker officially from GitHub to the local Docker environment. You can refer to the download address: https://raw.githubusercontent.com/moby/moby/profiles/seccomp/default.json
- Find the following configuration item in the file, delete and save the file as a json, for example: seccomp.json.
{
"names": [
"iopl",
"ioperm"
],
"action": "SCMP_ACT_ALLOW",
"includes": {
"caps": [
"CAP_SYS_RAWIO"
]
}
}
- Execute the image run command, adding the parameter --security-opt seccomp=/{specify directory}/{json file saved in the previous step} to reference the modified custom seccomp configuration file to run the container, for example:
docker run --security-opt seccomp=/path/seccomp.json --name iserver -d -p 8090:8090 -v `pwd`/my_opts:/opt/iserverOPTs registry.cn-beijing.aliyuncs.com/supermap/iserver:12.0.0.0-amd64