- Development Environment Preparation
- Create a New Project
- Add Dependent Libraries
- Code Implementations
- Compiling and Running
Development Environment Preparation
- Xcode 4.X version or higher
- iOS SDK 5 or higher
- Download and unzip iClient for iOS library files
Create a New Project
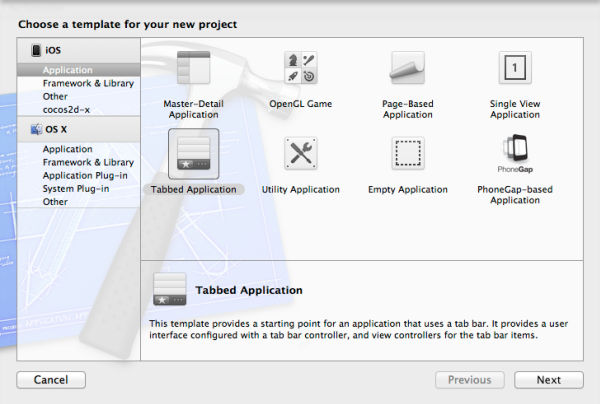
- In Xcode, select "Create a new Xcode project", then choose your project template and click "Next", as shown below, in this sample we choose Tabbed Application.
- Set the project Name, Organization and Company, then indicate your device, as shown below, in this sample we choose iPhone and click "Next".

- Save the project to the specified directory, notice whether the settings need git trusteeship, then the project is created.

Add Dependent Libraries
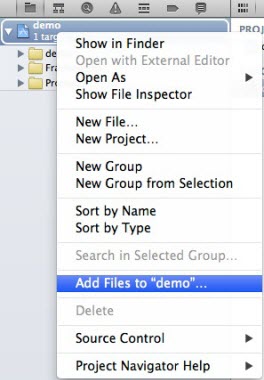
- Copy the MapView and Proj4 folder in iClient for iOS package to the new created project folder, then right click Project Name and choose "Add Files", as shown below:
- Add MapView.xcodeproj to your project, do not click when there is a notice "Copy items into destination group�s folder (if needed)", the final project menu structure is as following:

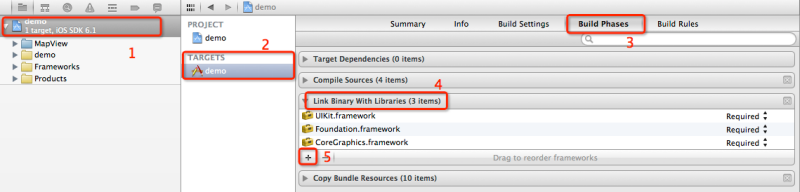
- Next is to add the dependent libraries, shown as below, please select Project Name->TARGETS->Build Phases->Link Binary With Libraries and click "+".
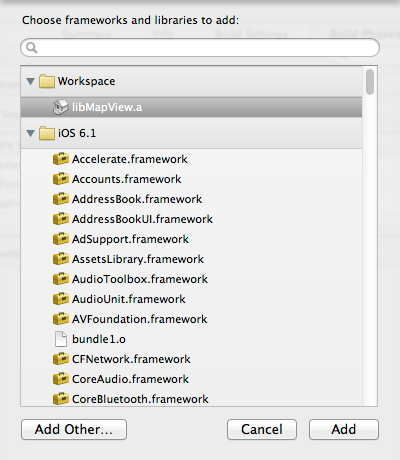
- Select libMapView.a and click Add button to add the static library of iClient for iOS to the dependent library.
- Then add libsqlite3.dylib, libsqlite3.0.dylib, QuartzCore.framwork, CoreFoundation.framework as the same way, the final dependent library list is as following:

- After adding the static libraries and dependent libraries, we need to add the Path of the header file as the same way, please select Build Setting->Header Search Paths (you can enter the keywords in the query box).
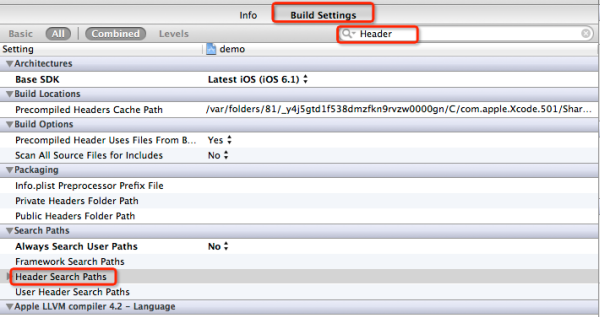
- Double click the blank space of Header Search Paths, add the folder directory of MapView and select the recursive traverse way, shown as following:

- Notice that do not select the blank space of debug and release, the final header file path settings is as following:

Code Implementations
The environment construction is complete, then open the FirstViewController.h file and add the following code:
#import "RMMapView.h"

@interface FirstViewController : UIViewController{
RMMapView *mapView;
}

    @property (nonatomic, retain) RMMapView *mapView;
Open the FirstViewController.m file and add the following code:
    @synthesize mapView;
    - (void)loadView {
    CGRect bounds = [[UIScreen mainScreen] bounds];
    [self setMapView:[[RMMapView alloc] initWithFrame:CGRectMake(0.0, 0.0, bounds.size.width, bounds.size.height)] ];
    self.view = mapView;
    // Your own code
}
Compiling and Running
Select your simulator and click Run, say "Hello" to your Map.
