


The following content describes how to build a development environment on Android Studio and use view controls for development.
Create a project
Create a new project in Android Studio, as follows:
 |
| Figure: Choose project template |
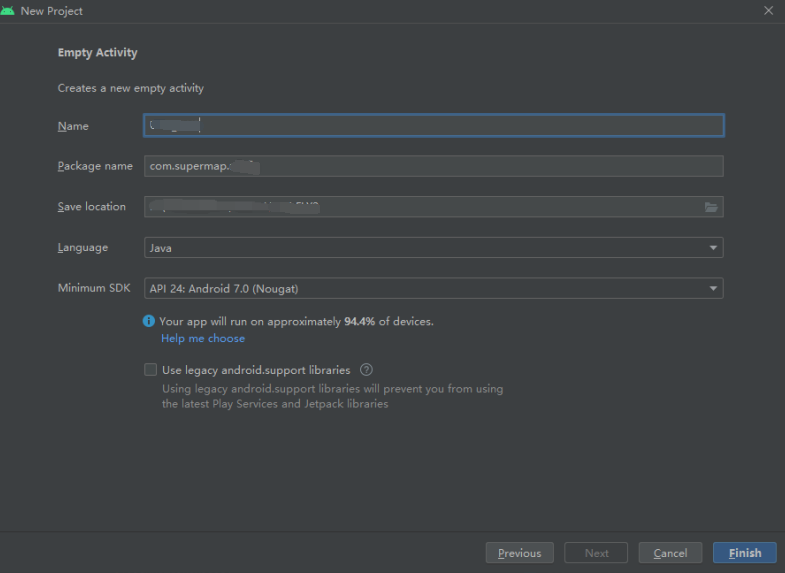 |
| Figure: Fill project attributes |
Configure Gradle
The following steps is similar to other Android development environments, if you are familiar with this process, you can skip this step.
Older version than 7.0
Gradle6.5 is used here. If you want to use Gradle version 7.0 and above,please pay attention to the difference in environment configuration.
Now open the Project Structure and specify the corresponding version in the Project column.
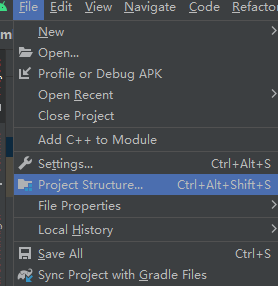 |
| Figure: Open the Project Structure |
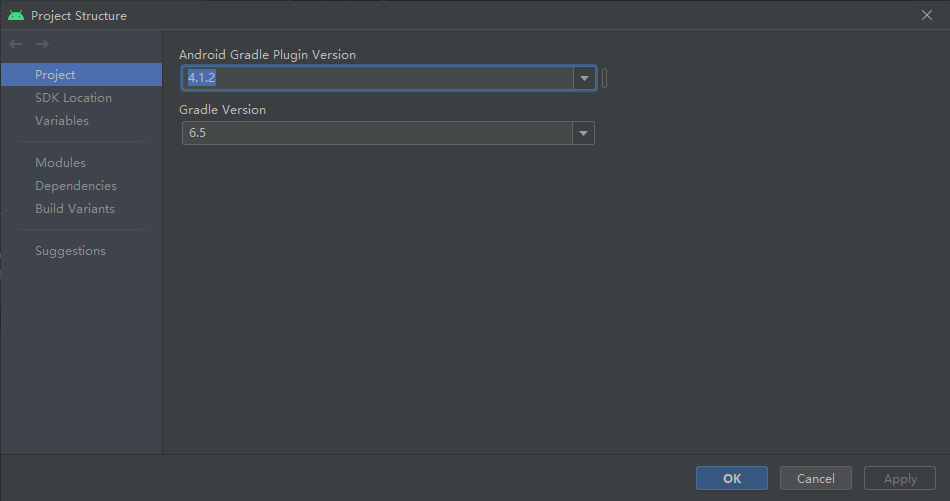 |
| Figure: Set the Project Structure |
Project build.gradle file reference:
// Top-level build file where you can add configuration options common to all sub-projects/modules.
buildscript {
  repositories {
    google()
    mavenCentral()
    maven { url 'https://jitpack.io' }
  }
  dependencies {
    classpath "com.android.tools.build:gradle:4.1.2"
  }
}
allprojects {
  repositories {
  maven { url 'https://jitpack.io' }
    google()
    jcenter()
 }
}
Project settings.gradle file reference:
rootProject.name = "Project name"
include ':Module name'
Version 7.0
Step 1: open the Android Studio project-level "build.gradle" file and add the Maven code library. Configure the Maven repository address in "buildscript > repositories".
buildscript {
  repositories {
    google()
    jcenter()
    maven {url "https://..." }
  }
}
Step 2: Open the project-level "settings.gradle" file and configure the address of the Maven repository.
dependencyResolutionManagement {
  repositoriesMode.set(RepositoriesMode.FAIL_ON_PROJECT_REPOS)
  repositories {
    repositories {
      google()
      jcenter()
      maven {url "https://..." }
    }
  }
}
Version 7.1 and above
Step 1: Open the Android Studio project-level "build.gradle" file and add the Maven code library. Configure the Maven repository address in "buildscript > repositories".
buildscript {
  repositories {
    google()
    jcenter()
    maven {url "https://..." }
  }
}
Step 2: Open the project-level "settings.gradle" file and configure the address of the Maven repository.
pluginManagement {
  repositories {
    repositories {
      google()
      jcenter()
      maven {url "https://..." }
    }
  }
}
dependencyResolutionManagement {
  repositoriesMode.set(RepositoriesMode.FAIL_ON_PROJECT_REPOS)
  repositories {
    repositories {
      google()
      jcenter()
      maven {url "https://..." }
    }
  }
}
Configure Gradle
The following steps are similar to other Android development environments. If you are familiar with this process, you can skip these steps and focus on importing jar and so.
Configure the build.gradle of the module to import the so library and jar package in the product package.
Copy the so library and jar package to the following location of the project.
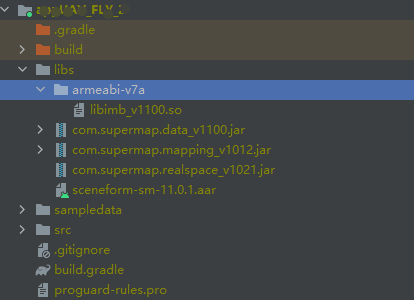 |
| Figure: Add librarys |
Local video development
DJI MSDK is not required, and it is suitable for the development of local video maps.
build.gradle reference:
plugins {
  id 'com.android.application'
}
android {
  compileSdkVersion 28
  defaultConfig {
    applicationId "com.supermap.appuav_scene3d"
    minSdkVersion 24
    targetSdkVersion 28
    versionCode 1
    versionName "1.0"
    ndk{
      //abiFilters 'arm64-v8a'//use x64 so
      abiFilters 'armeabi-v7a'
    }
  }
  buildTypes {
    release {
      minifyEnabled false
      proguardFiles getDefaultProguardFile('proguard-android-optimize.txt'), 'proguard-rules.pro'
    }
  }
  compileOptions {
    sourceCompatibility JavaVersion.VERSION_1_8
    targetCompatibility JavaVersion.VERSION_1_8
  }
  sourceSets {
    main {
      jniLibs.srcDirs = ['libs']
    }
  }
}
dependencies {
  implementation 'androidx.appcompat:appcompat:1.3.0'
  implementation 'com.google.android.material:material:1.4.0'
  implementation 'androidx.constraintlayout:constraintlayout:2.0.4'
  //Note: sceneform-sm of the current version
  implementation files('libs\\sceneform-sm-11.0.1.aar')
  implementation files('libs\\com.supermap.data_v1100.jar')
  implementation files(libs\\com.supermap.ar_v1100.jar')
  //Add the following as needed
  //implementation files(libs\\com.supermap.mapping_v1100.jar')
  //implementation files('libs\\com.supermap.realspace_v1101.jar')
}
Live Video Development
Access the real-time video of DJI drones by introducing DJI MSDK. Additional dependencies on DJI's SDK are required for dependency configuration.
Add the following content under the dependencies node of the build.gradle file:
implementation 'androidx.multidex:multidex:2.0.0'
implementation 'com.squareup:otto:1.3.8'
implementation 'androidx.lifecycle:lifecycle-extensions:2.2.0'
implementation ('com.dji:dji-uxsdk:4.16', {
  /**
  * Uncomment the following line to exclude amap from the app.
  * Note that Google Play Store does not allow APKs that include this library.
  */
  exclude group: 'com.amap.api'
  exclude group: 'com.mapbox.mapboxsdk'
})
compileOnly ('com.dji:dji-sdk-provided:4.16.1')
In addition, in order to prevent possible dependency conflicts inside DJI MSDK. You need to add the following content under the android node of the build.gradle file:
//use DJI SDK and add packagingOptions to prevent conflicts.
packagingOptions{
  doNotStrip "*/*/libdjivideo.so"
  doNotStrip "*/*/libSDKRelativeJNI.so"
  doNotStrip "*/*/libFlyForbid.so"
  doNotStrip "*/*/libduml_vision_bokeh.so"
  doNotStrip "*/*/libyuv2.so"
  doNotStrip "*/*/libGroudStation.so"
  doNotStrip "*/*/libFRCorkscrew.so"
  doNotStrip "*/*/libUpgradeVerify.so"
  doNotStrip "*/*/libFR.so"
  pickFirst 'lib/*/libstlport_shared.so'
  pickFirst 'lib/*/libRoadLineRebuildAPI.so'
  pickFirst 'lib/*/libGNaviUtils.so'
  pickFirst 'lib/*/libGNaviMapex.so'
  pickFirst 'lib/*/libGNaviData.so'
  pickFirst 'lib/*/libGNaviMap.so'
  pickFirst 'lib/*/libGNaviSearch.so'
  exclude '/lib/armeabi-v7a/libChineseFontPkg.so'
  exclude 'META-INF/rxjava.properties'
  //exclude 'META-INF/dji-sdk-lib_aar.kotlin_module'
}
The complete build.gradle file reference is as follows:
plugins {
  id 'com.android.application'
}
android {
  compileSdk 28

  defaultConfig {
    applicationId "com.supermap.uavfly"
    minSdk 24
    targetSdk 28
    versionCode 1
    versionName "1.0"
    ndk{
      abiFilters 'armeabi-v7a'
    }
  }
  buildTypes {
    release {
      minifyEnabled false
      proguardFiles getDefaultProguardFile('proguard-android-optimize.txt'), 'proguard-rules.pro'
    }
  }
  compileOptions {
    sourceCompatibility JavaVersion.VERSION_1_8
    targetCompatibility JavaVersion.VERSION_1_8
  }
  sourceSets {
    main {
      jniLibs.srcDirs = ['libs']
    }
  }
  //use DJI SDK, added packagingOptions to prevent unexpected crashes of the program.
  packagingOptions{
    doNotStrip "*/*/libdjivideo.so"
    doNotStrip "*/*/libSDKRelativeJNI.so"
    doNotStrip "*/*/libFlyForbid.so"
    doNotStrip "*/*/libduml_vision_bokeh.so"
    doNotStrip "*/*/libyuv2.so"
    doNotStrip "*/*/libGroudStation.so"
    doNotStrip "*/*/libFRCorkscrew.so"
    doNotStrip "*/*/libUpgradeVerify.so"
    doNotStrip "*/*/libFR.so"

    pickFirst 'lib/*/libstlport_shared.so'
    pickFirst 'lib/*/libRoadLineRebuildAPI.so'
    pickFirst 'lib/*/libGNaviUtils.so'
    pickFirst 'lib/*/libGNaviMapex.so'
    pickFirst 'lib/*/libGNaviData.so'
    pickFirst 'lib/*/libGNaviMap.so'
    pickFirst 'lib/*/libGNaviSearch.so'
    exclude '/lib/armeabi-v7a/libChineseFontPkg.so'
    exclude 'META-INF/rxjava.properties'
    //exclude 'META-INF/dji-sdk-lib_aar.kotlin_module'
  }
}
dependencies {
  implementation 'androidx.appcompat:appcompat:1.1.0'
  implementation 'com.google.android.material:material:1.1.0'
  implementation 'androidx.constraintlayout:constraintlayout:1.1.3'
  //use DJI SDK
  implementation 'androidx.multidex:multidex:2.0.0'
  implementation 'com.squareup:otto:1.3.8'
  implementation 'androidx.lifecycle:lifecycle-extensions:2.2.0'
  implementation ('com.dji:dji-uxsdk:4.16', {
    /**
    * Uncomment the following line to exclude amap from the app.
    * Note that Google Play Store does not allow APKs that include this library.
    */
    exclude group: 'com.amap.api'
    exclude group: 'com.mapbox.mapboxsdk'
  })
  compileOnly ('com.dji:dji-sdk-provided:4.16.1')
  implementation 'pub.devrel:easypermissions:2.0.1'//Access request
  implementation files('libs\\sceneform-sm-11.0.1.aar')
  implementation files('libs\\com.supermap.data_v1100.jar')
  implementation files(libs\\com.supermap.ar_v1100.jar')
  //Add the following as needed
  //implementation files(libs\\com.supermap.mapping_v1100.jar')
  //implementation files('libs\\com.supermap.realspace_v1101.jar')
}
Configure the Android manifest
Each Android application requires a program manifest file named AndroidManifest.xml, which has a fixed name and is placed in the root directory of each Android application.
Generally, use the local video development method, add the read and write permissions of the mobile phone, and network-related permissions. If the real-time video development method is adopted, the UAV needs to be connected.
Please refer to DJI's application activation example, the link is as follows: https://github.com/DJI-Mobile-SDK-Tutorials/Android-ActivationAndBindingDemo。
The following is an example of an Android manifest (AndroidMainifest.xml) for a USB connection.
<?xml version="1.0" encoding="utf-8"?>
<manifest xmlns:android="http://schemas.android.com/apk/res/android"
  xmlns:tools="http://schemas.android.com/tools"
  package="com.supermap.uavfly2">
  <!-- DJI SDK need permission ↓ ↓ ↓-->
  <uses-permission android:name="android.permission.BLUETOOTH" />
  <uses-permission android:name="android.permission.BLUETOOTH_ADMIN" />
  <uses-permission android:name="android.permission.VIBRATE" />
  <uses-permission android:name="android.permission.INTERNET" />
  <uses-permission android:name="android.permission.ACCESS_WIFI_STATE" />
  <uses-permission android:name="android.permission.ACCESS_COARSE_LOCATION" />
  <uses-permission android:name="android.permission.ACCESS_NETWORK_STATE" />
  <uses-permission android:name="android.permission.ACCESS_FINE_LOCATION" />
  <uses-permission android:name="android.permission.CHANGE_WIFI_STATE" />
  <uses-permission android:name="android.permission.WRITE_EXTERNAL_STORAGE" />
  <uses-permission android:name="android.permission.READ_EXTERNAL_STORAGE" />
  <uses-permission android:name="android.permission.READ_PHONE_STATE" />
  <uses-permission android:name="android.permission.RECORD_AUDIO" />
  <uses-feature android:name="android.hardware.camera" />
  <uses-feature android:name="android.hardware.camera.autofocus" />
  <uses-feature android:name="android.hardware.usb.host" android:required="false" />
  <uses-feature android:name="android.hardware.usb.accessory" android:required="true" />
  <!-- SDK requirement permission ↑ ↑ ↑-->
  <application
    android:name="com.supermap.ar.areffect.uavfly.DJIFlyApplication"
    android:allowBackup="true"
    android:icon="@mipmap/ic_launcher"
    android:label="@string/app_name_uav"
    android:supportsRtl="true"
    android:theme="@style/Theme.UavFly"
    tools:replace="android:label">
  <!-- ↓ ↓ ↓ ↓ ↓ ↓ DJI SDK Configuration ↓ ↓ ↓ ↓ ↓ ↓ -->
  <uses-library android:name="com.android.future.usb.accessory" />
  <uses-library
    android:name="org.apache.http.legacy"
    android:required="false" />
  <meta-data
    android:name="com.dji.sdk.API_KEY"
    android:value="this is DJI APP KEY" />
  <activity
    android:name="dji.sdk.sdkmanager.DJIAoaControllerActivity"
    android:theme="@android:style/Theme.Translucent"
    tools:ignore="IntentFilterExportedReceiver">
  <intent-filter>
    <action android:name="android.hardware.usb.action.USB_ACCESSORY_ATTACHED" />
  </intent-filter>
  <meta-data
    android:name="android.hardware.usb.action.USB_ACCESSORY_ATTACHED"
    android:resource="@xml/accessory_filter" />
    </activity>
  <service
    android:name="dji.sdk.sdkmanager.DJIGlobalService"
    tools:ignore="Instantiatable"></service>
  <!-- ↑ ↑ ↑ ↑ ↑ ↑ DJI SDK Configure ↑ ↑ ↑ ↑ ↑ ↑-->
  <activity
    android:name="com.supermap.MainActivity"
    android:screenOrientation="landscape"
    android:theme="@style/Theme.UavFly2"
    tools:ignore="IntentFilterExportedReceiver">
  <intent-filter>
    <action android:name="android.intent.action.MAIN" />
    <category android:name="android.intent.category.LAUNCHER" />
      </intent-filter>
    </activity>
  </application>
</manifest>
So far, the development environment has been set up.
Write codes
Layout file
- Add a view control to the layout (you can also create a view control through code, which is consistent with the way of using RealativeLayout).
- Add a button to the layout to control the playback and pause of the video.
- Add a time axis to the layout to facilitate the adjustment of the video playback position.
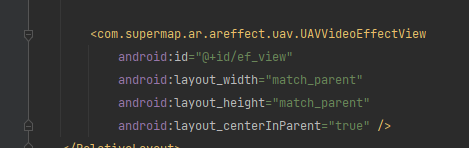 |
| Figure: Add view control |
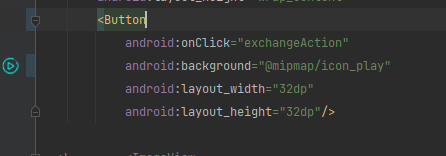 |
| Figure: Add button |
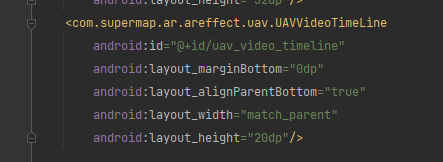 |
| Figure: Add time axis |
Application code
Write the application code in MainActivity as follows:
/**
 * Drone video simple development template
 */
public class MainActivity extends AppCompatActivity {
  private UAVVideoEffectView effectView;
  private UAVVideoTimeLine timeLine;
  @Override
  protected void onCreate(Bundle savedInstanceState) {
    super.onCreate(savedInstanceState);
    ActivityCompat.requestPermissions(this,new String[]{Manifest.permission.WRITE_EXTERNAL_STORAGE,
    Manifest.permission.INTERNET,
    Manifest.permission.ACCESS_NETWORK_STATE,
    Manifest.permission.CHANGE_WIFI_STATE,
    Manifest.permission.READ_EXTERNAL_STORAGE,
    Manifest.permission.READ_PHONE_STATE,
  }, PackageManager.PERMISSION_GRANTED);
  Environment.setLicensePath(StartActivity.LICENSE);
  Environment.initialization(this);
  setContentView(R.layout.activity_main_scene3d);
  //Layout control
  effectView = findViewById(R.id.ef_view);
  timeLine = findViewById(R.id.uav_video_timeline);
  //...Read data (load video dataset)
  //Bind the timeline. It must be bound after reading the data
  timeLine.bindView(effectView);
  //Assign video to initial position
  effectView.getMediaPlayer().seekTo(0);
  //UAV view real-time update monitoring events
  effectView.addOnUpdateListener(new EffectView.OnUpdateListener() {
    @Override
    public void onUpdate() {
      //Callback when the screen is updated
    }
  });
}
@Override
protected void onResume() {
  super.onResume();
  effectView.onResume();
}
@Override
protected void onPause() {
  super.onPause();
  effectView.onPause();
}
@Override
protected void onDestroy() {
  effectView.onDestroy();
  super.onDestroy();
}
//Basic action
public void exchangeAction(View view) {
  if (effectView.isPlaying()){
    effectView.pause();
  }else {
    effectView.start();
  }
}
}
Note: Refer to the "Video Access" section to introduce how to load videos.
Run a project
Select a real device or an emulator, and click "Run" to install the program to the device.
The running effect is shown in the figure below.
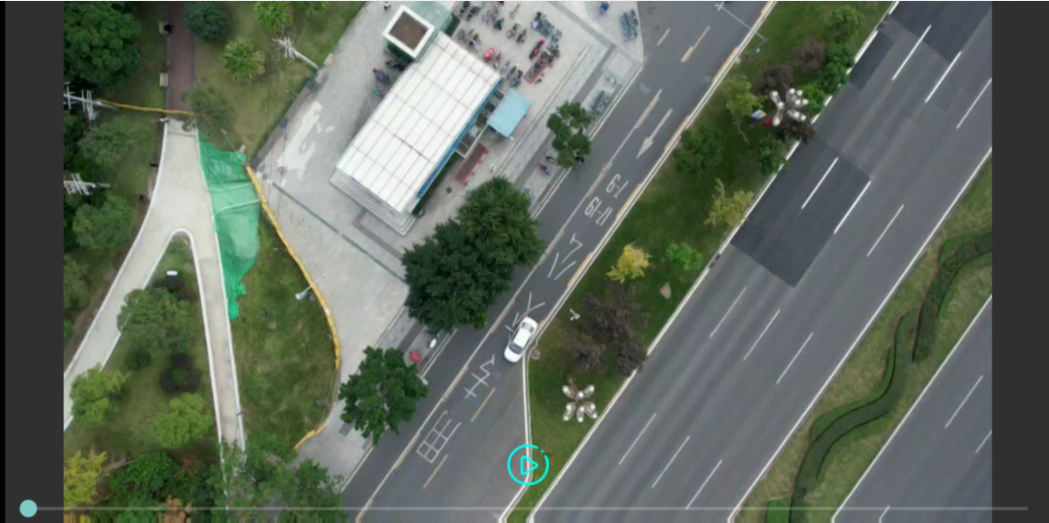 |
| Figure: The running effec |