Node Animation (nodeanimationdemo)
Introduction
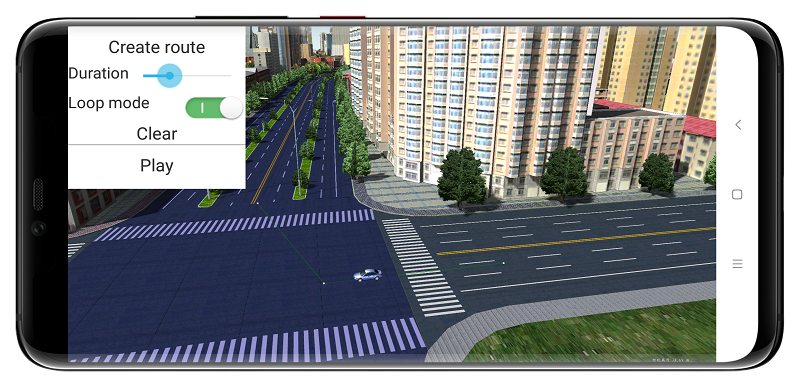
Demonstrate the custom node animation route in the 3D scene and loop the node animation.
Operation effect
 |
| Figure: Node Animation Operation Effect |
Location
Android Studio
- Product package: Product package\SampleCode\SampleCode_AndroidStudio\AndroidStudioSampleCode\nodeanimationdemo
ADT
- Product package: Product package\SampleCode\SampleCode_ADT\NodeAnimationDemo
Data
Storage location
- Product package: Product package\SampleData\CBD_android
Deployment Location: mobile device internal storage\SuperMap\data\CBD_android
License
Offline license, copy the license file to the "mobile device internal storage\SuperMap\License" folder.
Library
| jar |
|---|
| com.supermap.data.jar, com.supermap.realspace.jar |
| so |
| libimb.so, libgnustl_shared.so, libQt5Core.so, libQt5Gui.so, libQt5Svg.so, libQt5Widgets.so(Note: Starting from version 11.1, the last five so libraries need to be added.) |
Key types/members
| Control/Class | Method |
|---|---|
| SceneControl | getScene(), setSceneControlInitedHandler() |
| Scene | open(), pixelToGlobe(), getLayers(), setWorkspace() |
| Workspace | open() |
| WorkspaceConnectionInfo | setServer(), setType() |
| Environment | initialization(), getLicenseStatus() |
| LicenseStatus | isLicenseValid(), isLicenseExsit() |
| Layer3Ds | get(), addLayerWith() |
| Layer3D | getFeatures() |
| GeoModel | fromFile(), setRotationZ(),getNodeAnimation() |
| GeoStyle3D | setFillForeColor(), setAltitudeMode(), setLineColor() |
| GeoPoint3D | setStyle3D() |
| GeoLine3D | setStyle3D() |
| GeoPlacemark | setStyle3D(), getGeometry() |
| Feature3Ds | add() |
| Feature3D | getGeometry() |
| NodeAnimation | setPlayMode(), setLength(), setEnabled(), setTrack() |
| Point3Ds | getCount() |
| Enum | Value |
|---|---|
| WorkspaceType | DEFAULT, SXWU, SMWU |
Basic steps
- Run the program, click Click to Create Route, and touch on the screen to customize animation route.
- Configure the duration for the animation.
- Set loop mode. By default, the loop mode is animation loop. If you cancel the default setting, single animation will be employed.
- Click Start to allow the car to run along the customized route.
- Click Clear and repeat the above steps.


