


Produces 2D orthophoto image data and 3D oblique photographic models. 2D tiff images and 3D OSGB or OBJ oblique photographic models can be produced based on drone flight photos. This data can be applied to business scenarios such as emergency rescue, river course management, forest obstruction, agricultural disease and insect pest control, and natural disaster assessment, as a basic data base to empower applications in various industries.
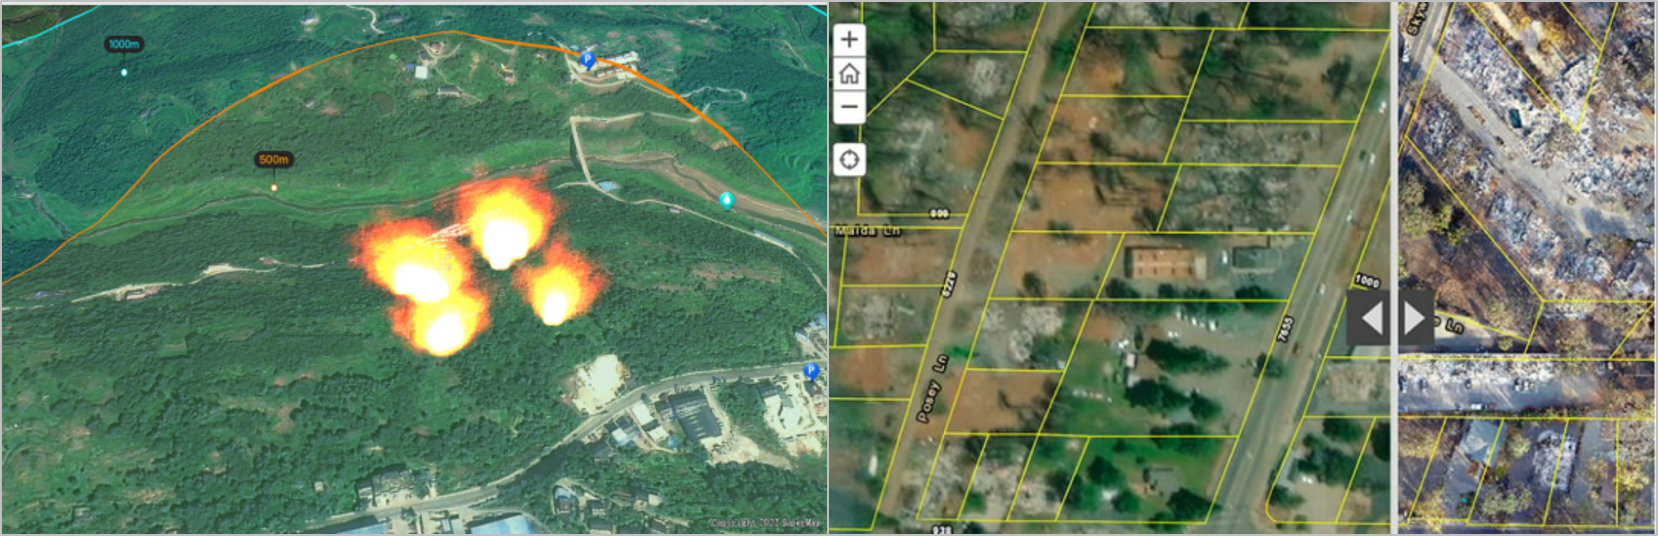 |
| Figure: 2D and 3D data production data application |
Task Planning
SuperMap UAVSurvey (hereinafter referred to as "UAVSurvey") is a UAV spatial video data collection software that supports four task planning methods: waypoint task, rectangle task, polygon task, and import task trajectory.
Waypoint tasks support the planning of linear flight tasks by adding points. The rectangular task is a regional task with a rectangular flight area, which is mostly used for orthographic flight, and can also be used for oblique photography flight. The polygonal task is a regional task with an arbitrary polygonal task area, which is mostly used for oblique photography flight, and can also be used for orthographic flight. The import task supports the import of flight task routes and areas, and the flight parameters are set in UAVSurvey. For 2D and 3D data production, it is recommended to use rectangle task, polygon task and import task.
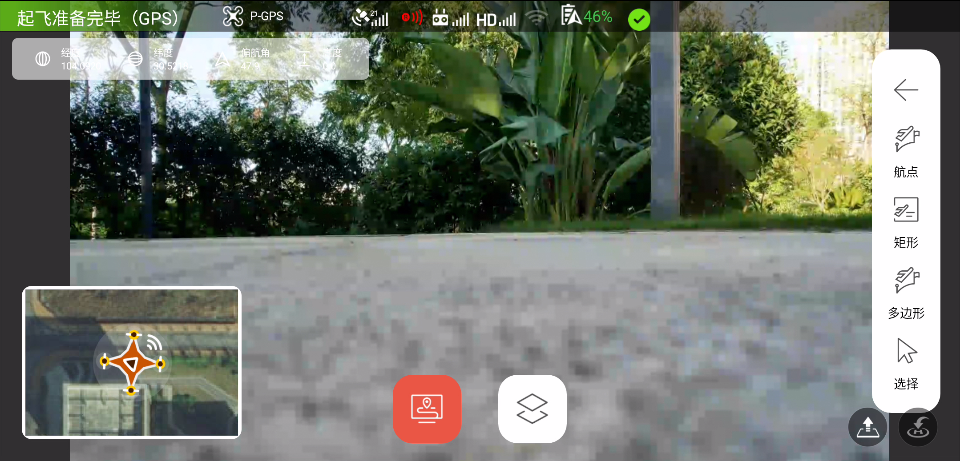 |
| Figure: Task Planning |
Flight Monitoring
After the flight mission planning is completed, UAVSurvey can perform the flight according to the designated mission. During the flight, the pilot can monitor the flight trajectory of the aircraft in real time and the real-time position of the drone on the map, view the video images collected by the drone, the attitude information of the drone and the hardware operating status on the map.
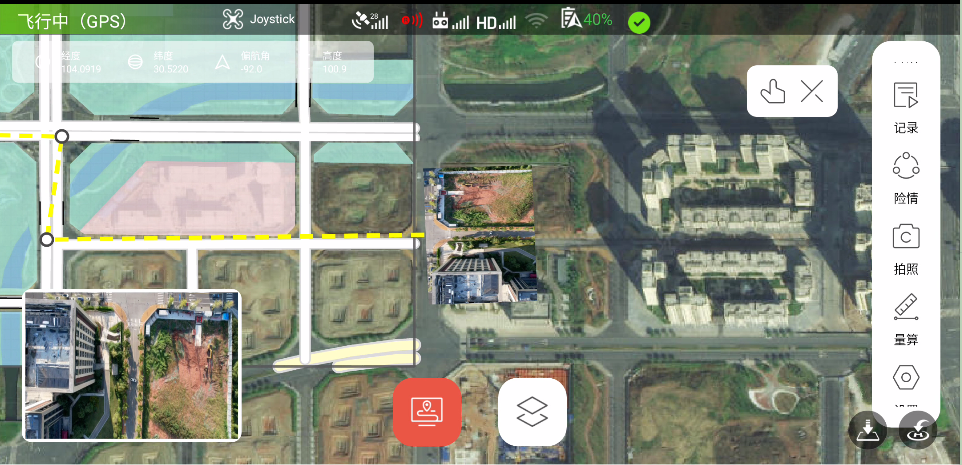 |
| Figure: Flight monitoring |
Data Storage and Export
The photo and video data collected by the UAV after the flight mission is stored in the directory of the mobile device, the path is: UAVSurvey/User/Customer/Data/, where the photo data is stored in the Picture folder, and the Record folder stores video data. Data is exported through physical devices. For 2D and 3D data production, just export the contents of the Picture folder.
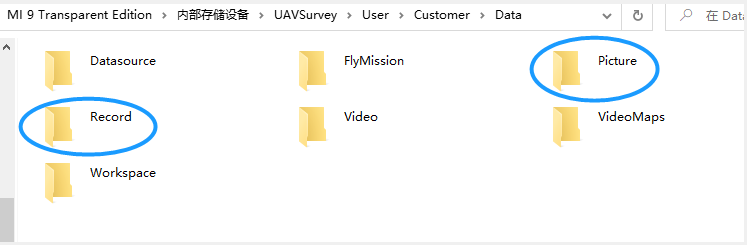 |
| Figure: Data Storage and Export |
2D and 3D Data Production
There are many 2D and 3D data production software in the industry, and you can choose one according to the display situation. The third-party data production platform selected in this article is GET3D Cluster from Daspatial. SuperMap platform supports the production of orthophotos by manual registration.
Select Project > Create Project in the toolbar, set the project name and storage path, and select "Tilt" for the project property.
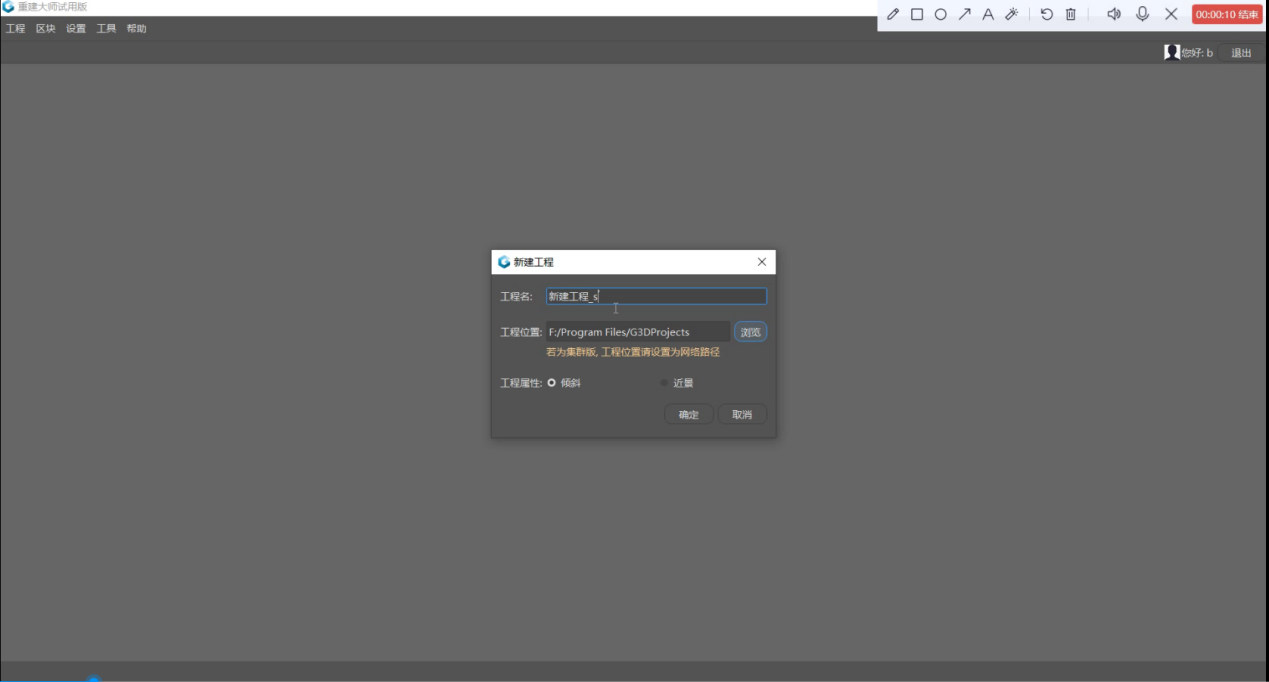 |
| Figure: Create a project |
After creating a project, select Import.
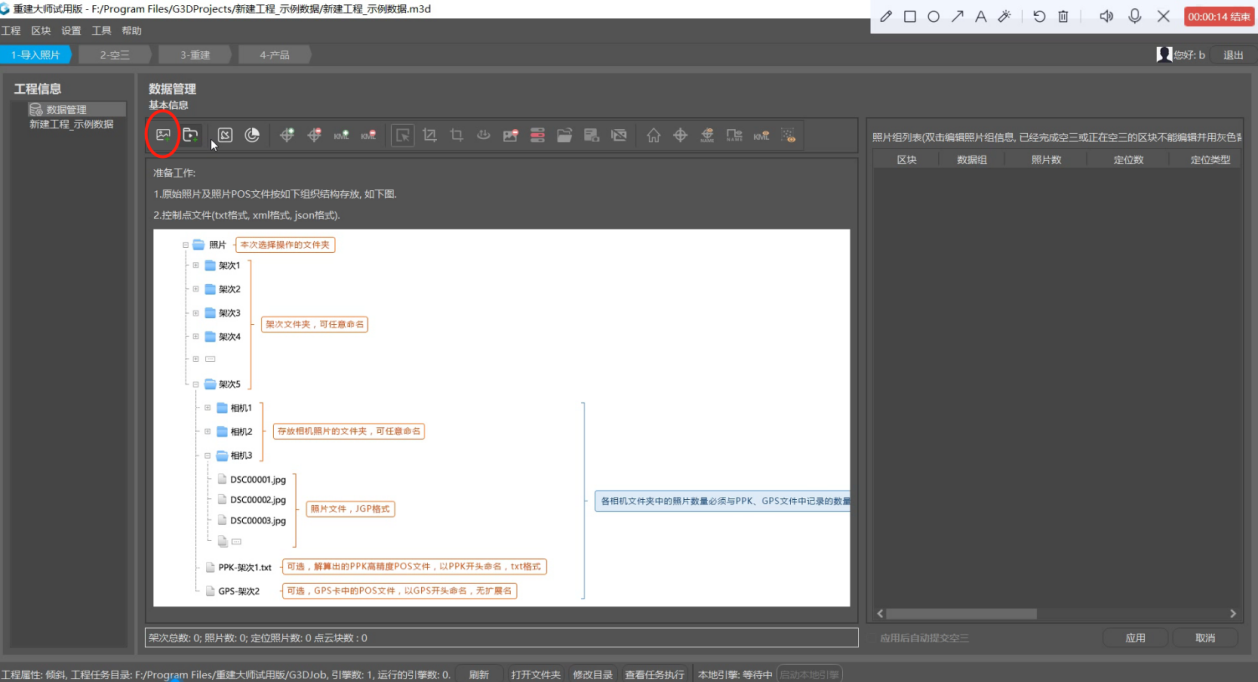 |
| Figure: Import |
Select the storage directory of pictures.
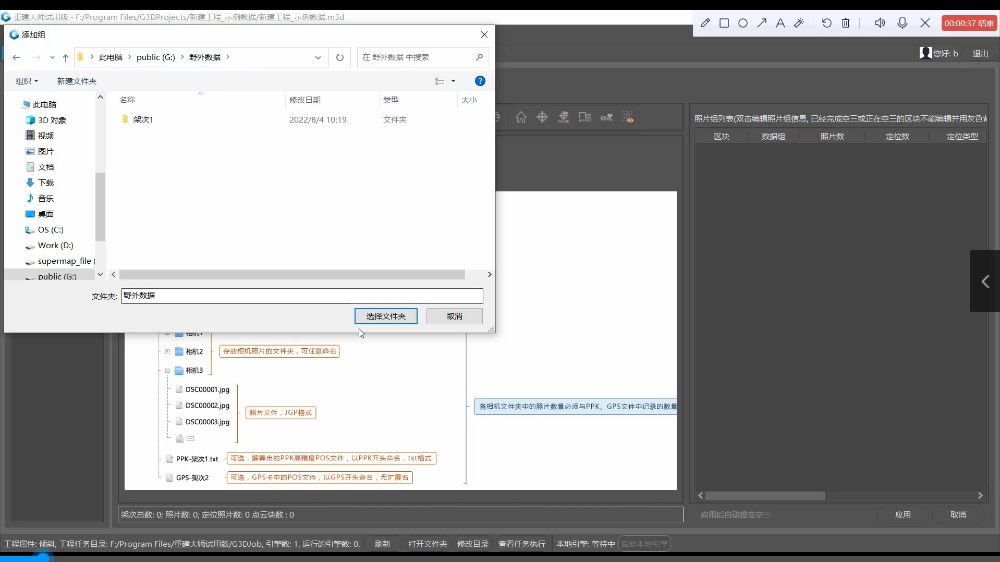 |
| Figure: Selec the storage path |
Right click on the data group and select EXIF as the positioning method.
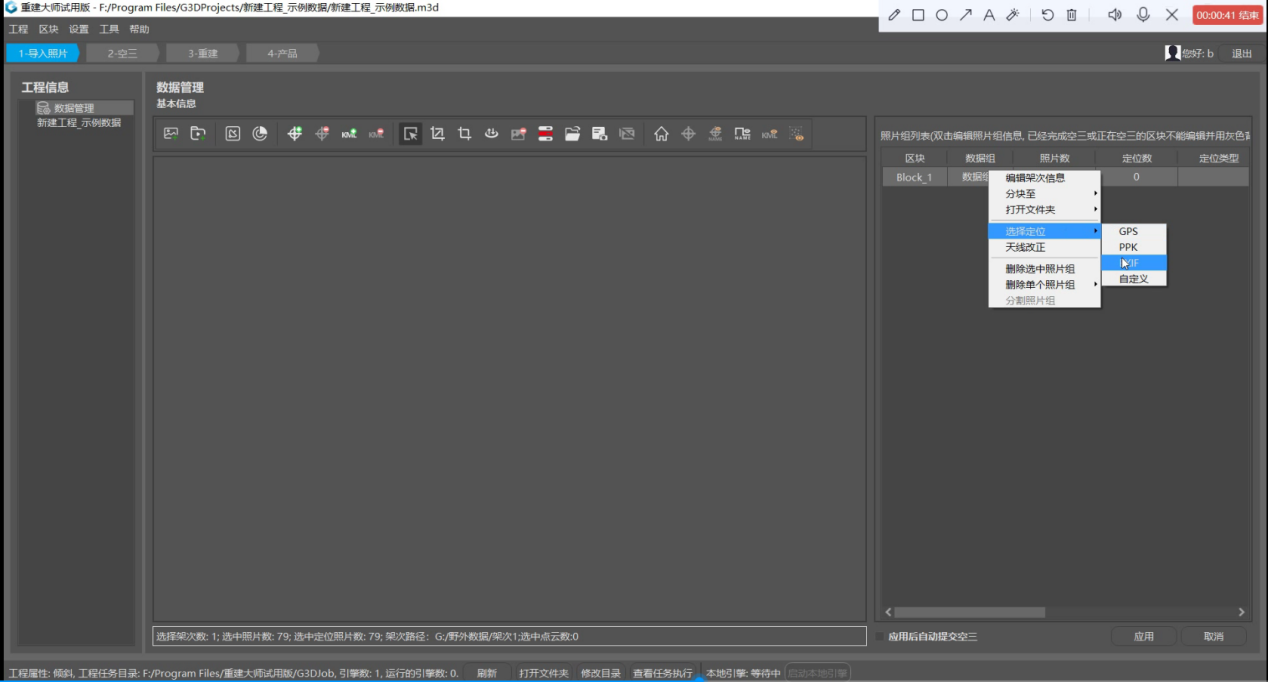 |
| Figure: Select the positioning method |
Click Apply.
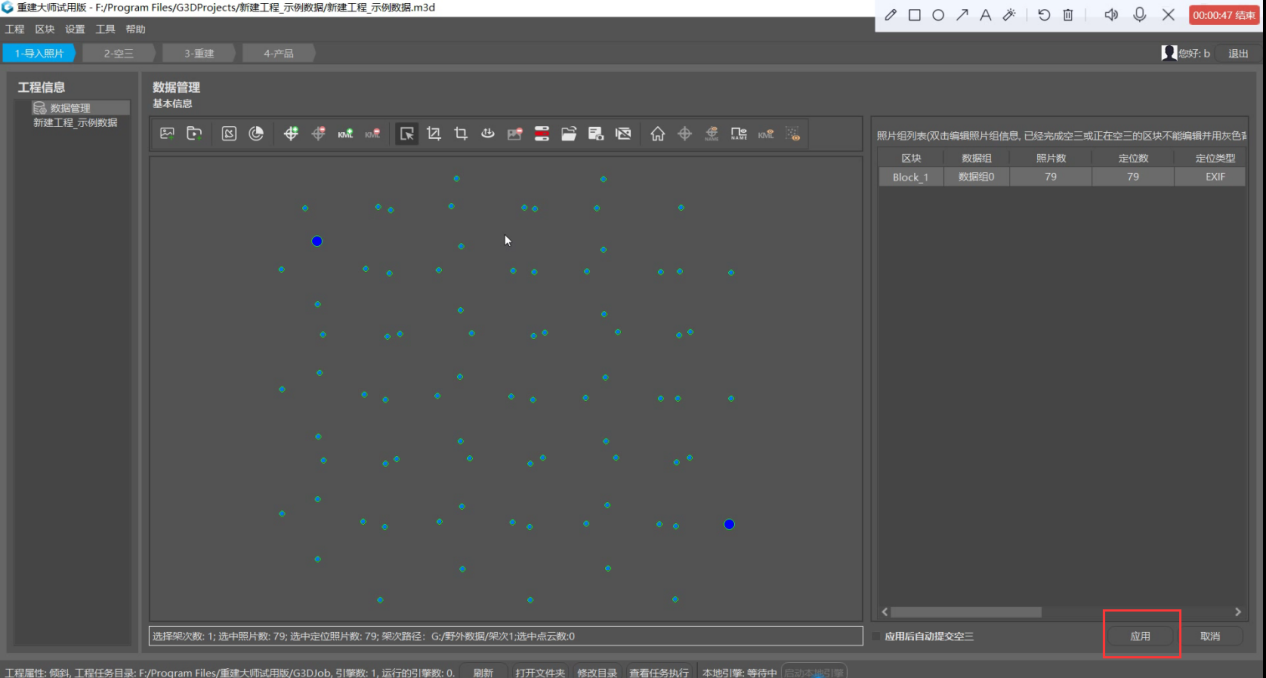 |
| Figure: Apply |
Select "Local Kongsan".
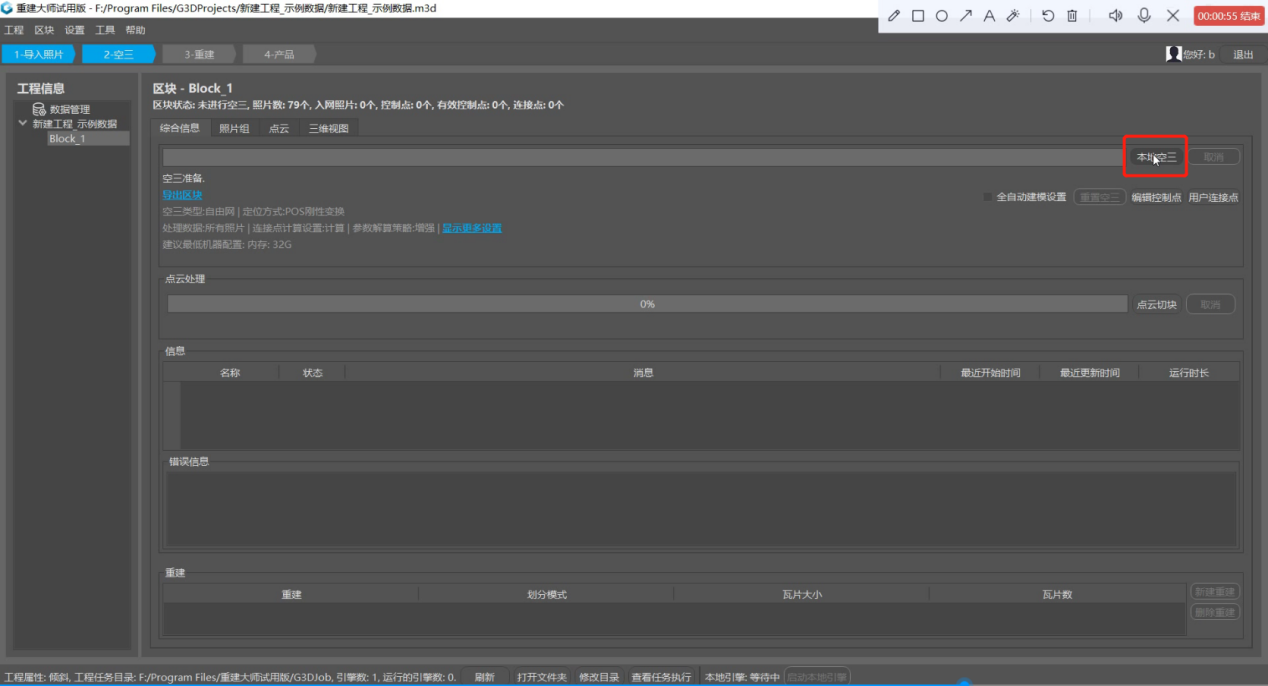 |
| Figure: Select "Local Kongsan" |
Select "Submit Kongsan" in the popup.
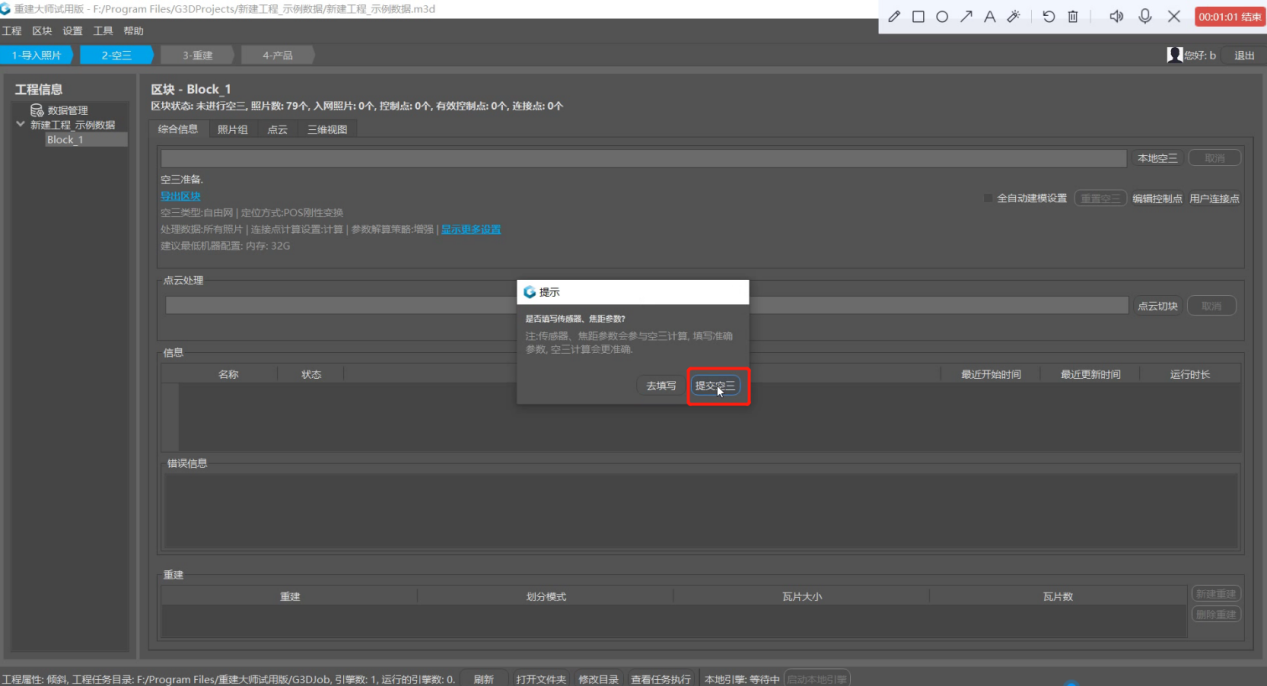 |
| Figure: Submit Kongsan |
Set all related parameters to default, and click "OK".
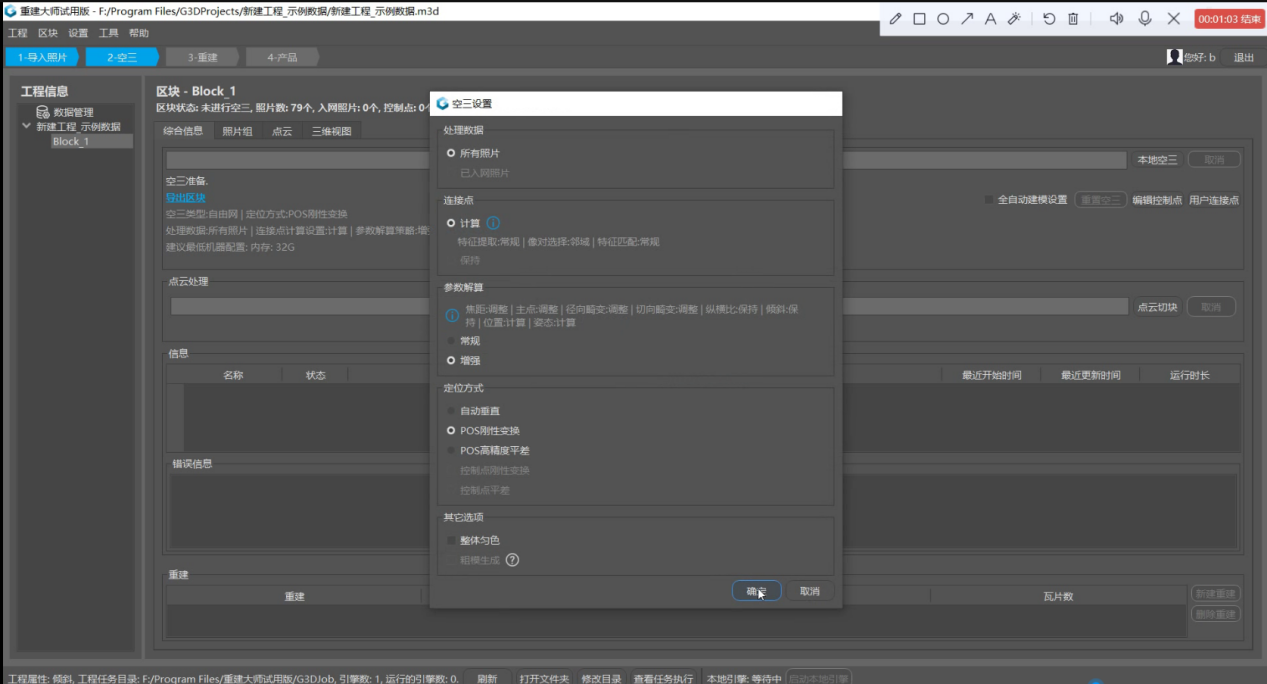 |
| Figure: Set parameters |
After the calculation, click "New Reconstruction".
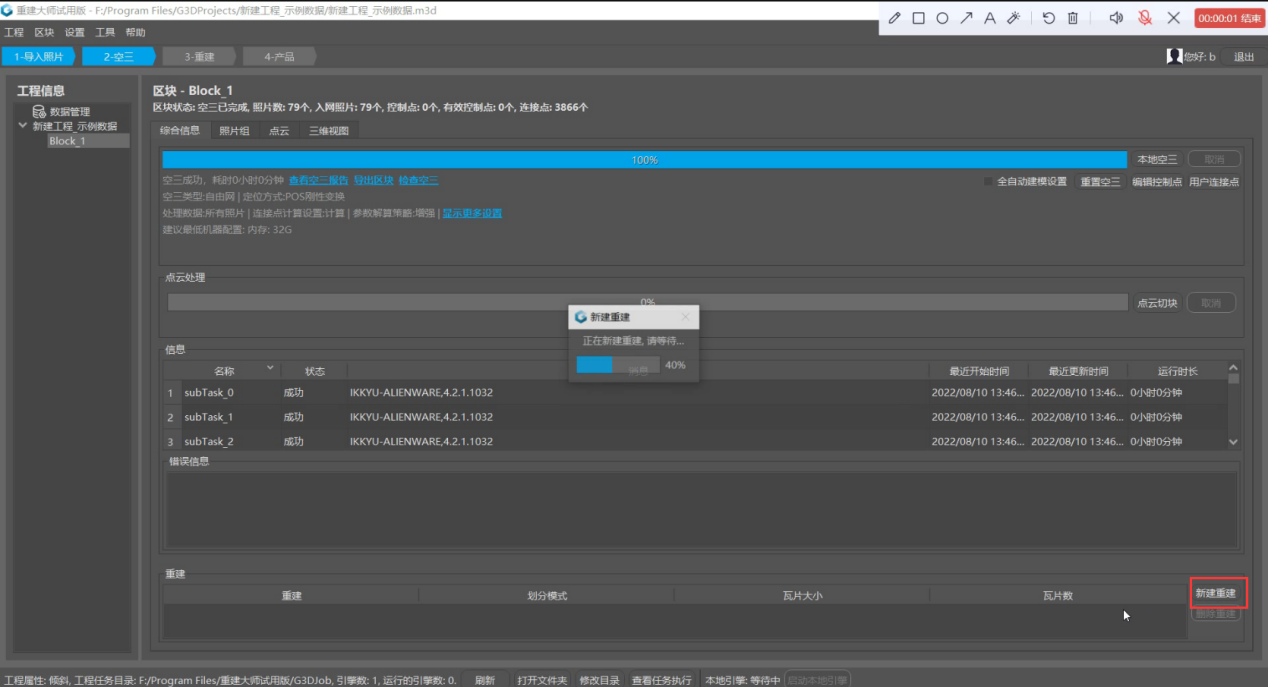 |
| Figure: New Reconstruction |
The coordinate system can be set as needed to facilitate the collection and overlay of business data. Tile division Select different division modes according to data size and business requirements, and finally click "Submit Product".
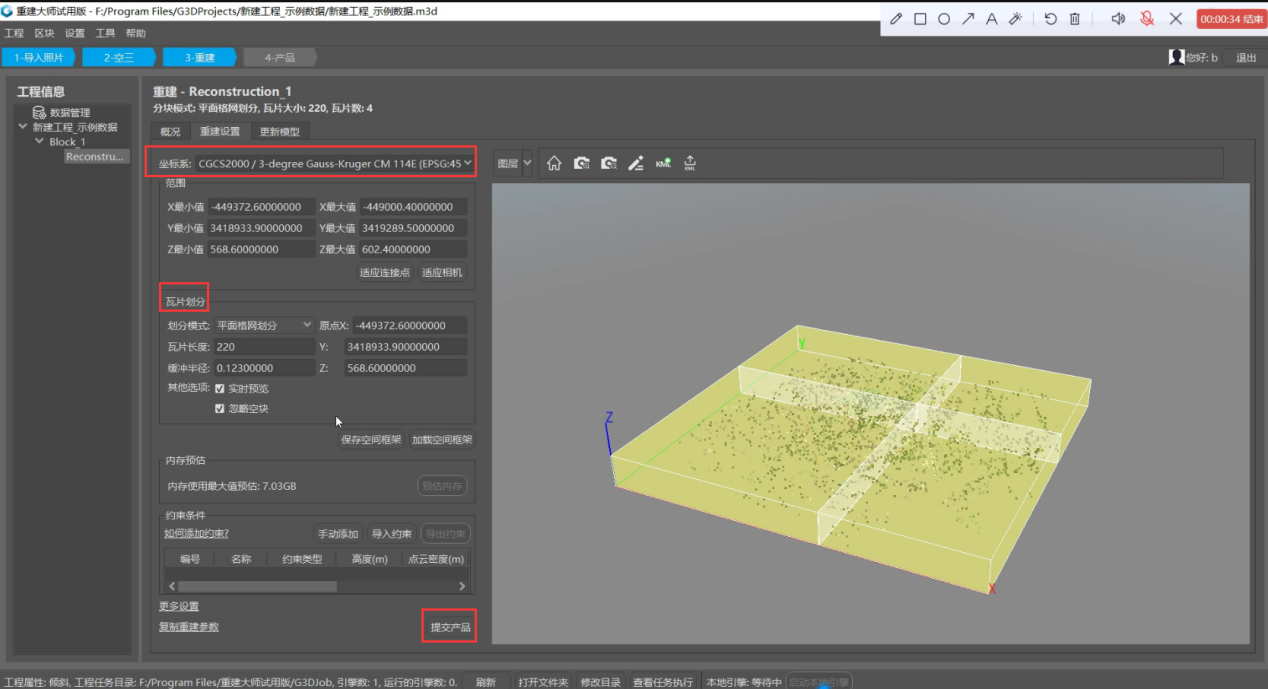 |
| Figure: Submit Product |
In the pop-up product dialog box, set the product name, output path, select "Product Options" and set corresponding parameters in the corresponding product options, including output format, texture source, texture quality, and texture maximum size. In the 3D data production business, select the product as a 3D model, select OSGB or OBJ as the output format, select "oblique photography" as the texture source, and select default values for others. Click "Submit" after setting.
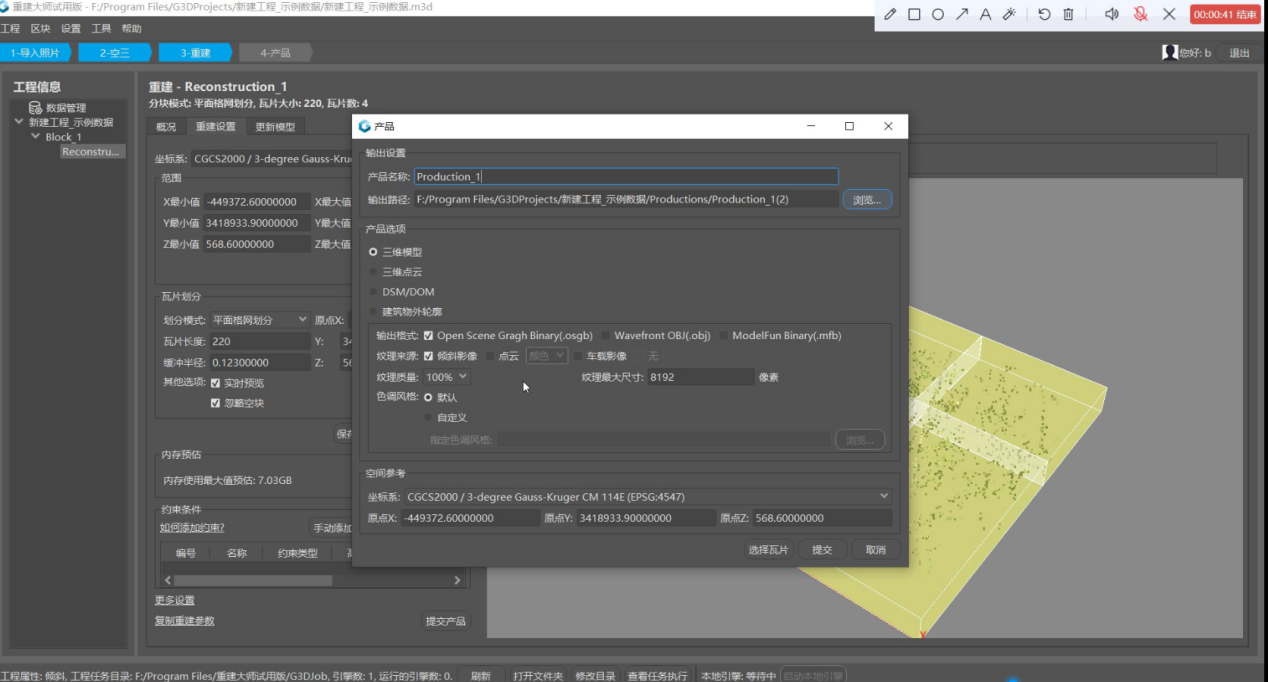 |
| Figure: Set "Product Option" |
After creating the model, click "View Product".
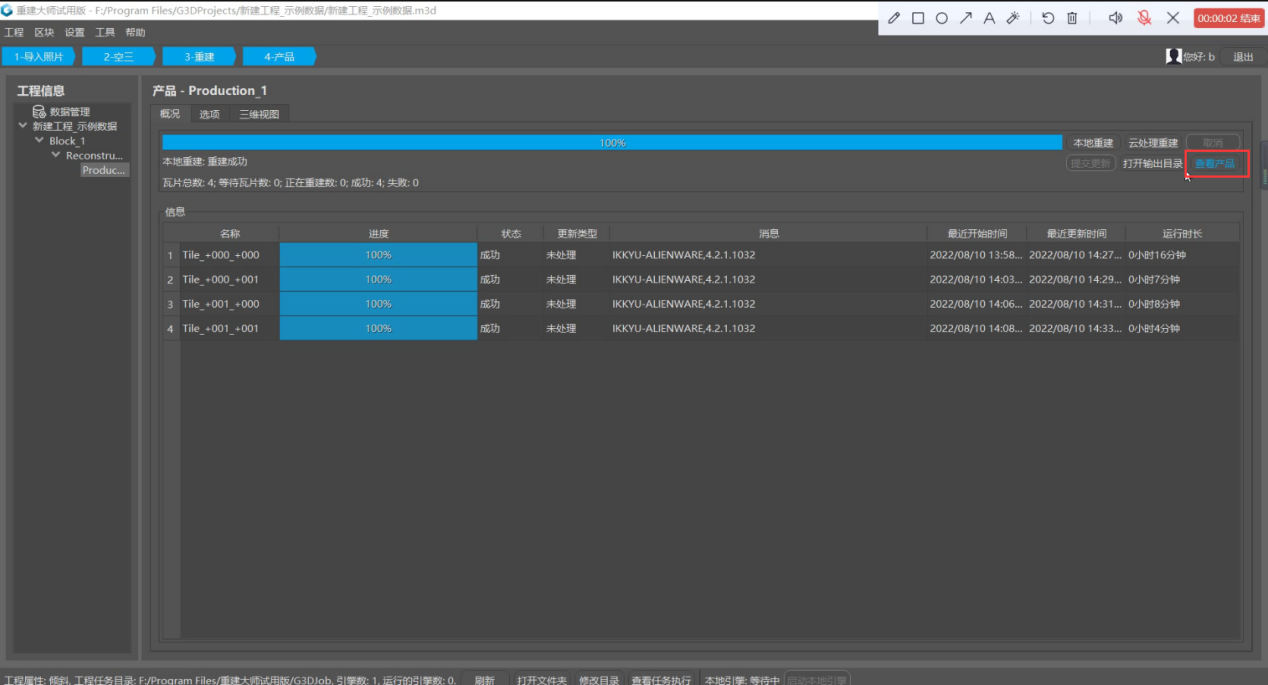 |
| Figure: View Product |
At this point, you are looking at the created 3D model.
 |
| Figure: View 3D model |
Select Tools > Output Orthomap in the toolbar.
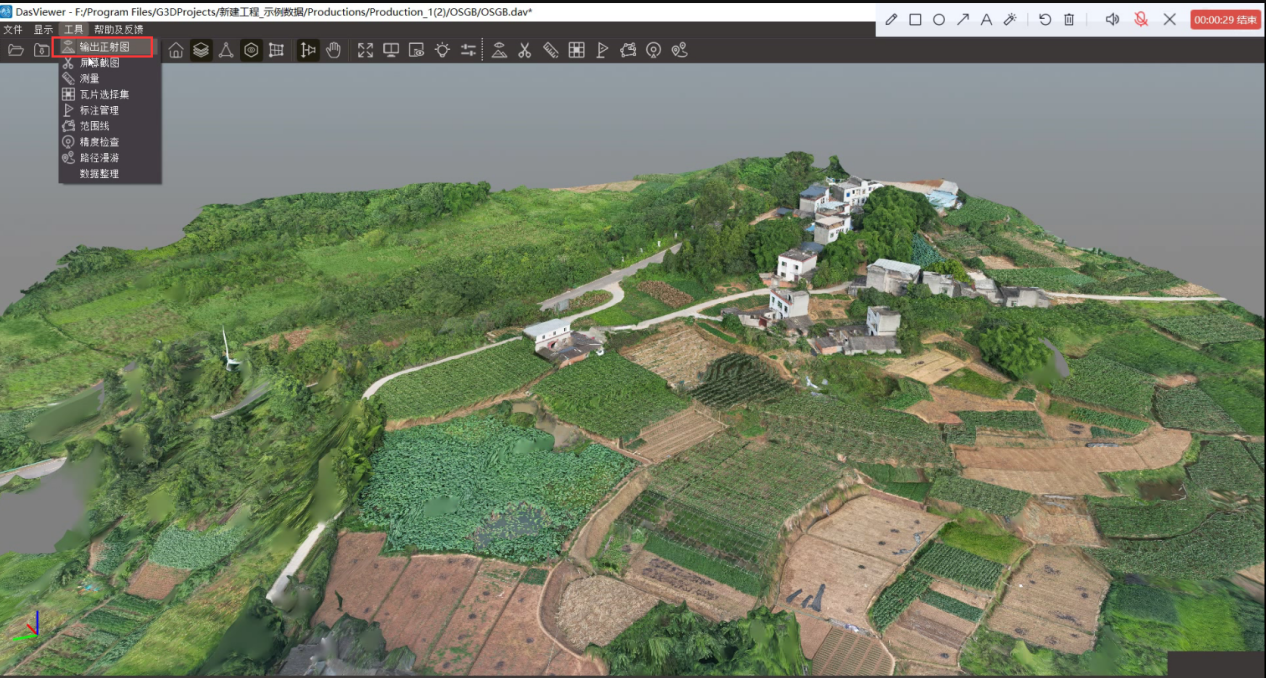 |
| Figure: Output Orthomap |
Set the output path and resolution in the pop-up dialog box, and click "OK".
 |
| Figure: Set the output path and resolution |
So far, the two-dimensional ortho tiff image is generated.
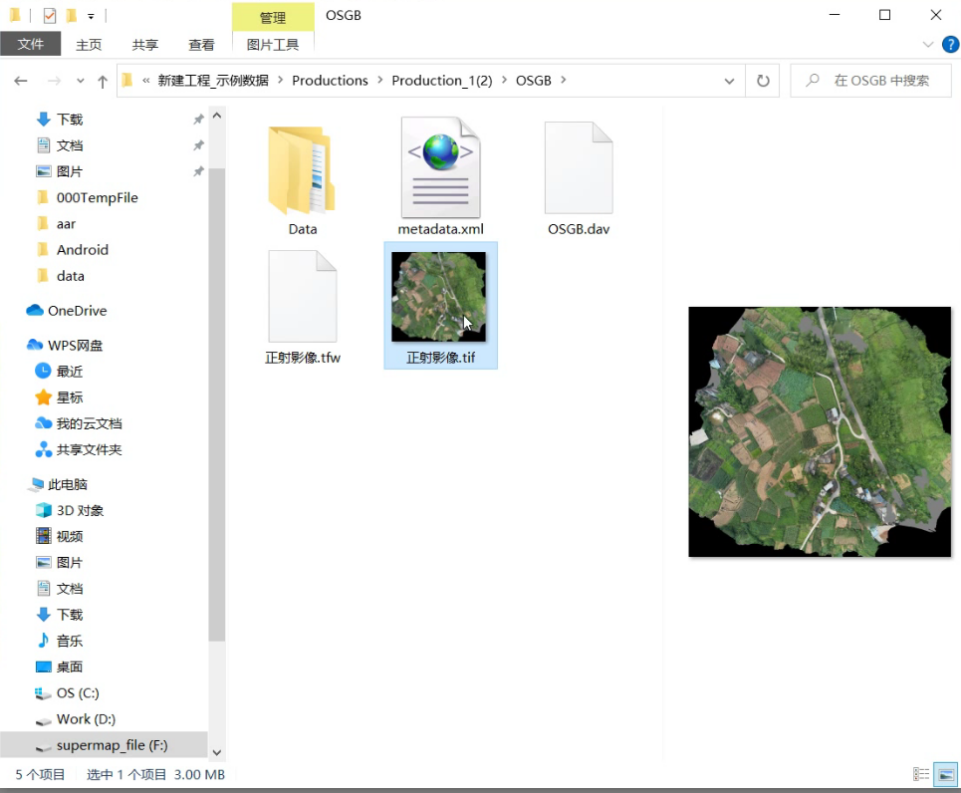 |
| Figure: Generated Tiff |