Tutorial
GIS Cloud Suite Management
SuperMap iManager supports to manage GIS Cloud Suite. Users can delete/redeploy the existing sites, search the services by keywords, enter and use GIS Cloud Suite through the site. Users can also view the service/container logs, redeploy the services/containers, adjust the specs of service, stop/start the services, modify the images of service, expose/hide the services address, scaling the services, and control the containers’ command pad.
The following content is going to introduce GIS Cloud Suite management in two aspects: service and container.
Service Management
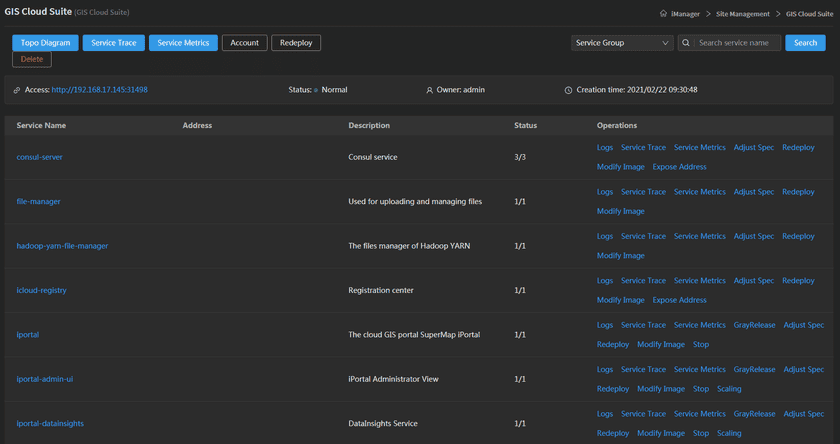
On the GIS Cloud Suite page, the page has the information of environment name, access address, status, owner, creation time, and services list. Please manage GIS Cloud Suite environments by the following functions:
- Topo Diagram: View the associations between the services in the environment, more introductions please refer to Sites Management > GIS Cloud Suite > GIS Cloud Suite Monitoring.
- Service Trace/Service Metrics: Please refer to GIS Cloud Suite Monitoring.
- Account: Clicks to view the site’s username and password.
- Redeploy: ‘One-click’ to redeploy GIS Cloud Suite environment.
- Delete: Delete the existing GIS Cloud Suite environment.
- Service Group: Filter the services by service type, support to select multiple types of service.
- Search: Search the services in the service list by key words.
- Access: Clicks on the link of the address to enter and use GIS Cloud Suite.
- Status: The current state of the environment.
- Owner: The name of the account that created the environment.
- Creation Time: The time that the environment was created.
The services list lists all the services running in the environment, manage the services by the following functions:
- Service Name: The name of the service, click on the link of the name to enter the containers detail page to manage the containers(please refer to Container Managememt).
- Address: The address of the service, users can access the client of service by the address link.
- Description: Explains the funtion of the service.
- Status: Shows the number of running/total nodes in the service.
- Log: Clicks to view the operation log of the service.
- Service Trace/Service Metrics: Please refer to GIS Cloud Suite Monitoring.
-
Gray Release: Traffic is split amongst two or more completely different versions of a webpage. The services that support gray release include: ispeco-dashboard-ui, ispeco-dashboard-api, and gisapp.
- Service: The name of the aimed service.
- Version: Fills in the name of the new version.
-
Gray release strategy(Based on traffic ratio): To realize gray release by setting the traffic ratio of users.
- Traffic ratio: Set the percentage of new version users. For example, if the traffic ratio is 30, that is 30% of users are going to use the new version, 70% of the users are going to use original version.
-
Gray release strategy(Based on request content): To realize gray release by setting request header and header value. Fills in the request header and header value when sending request, to control the version.
- Header/Header value: Set the request header and header value, the header value supports regular expression.
- Add header: Add header and header value. If you add header, the request content should have multiple headers and header values. That is, if you set three set of headers, the request must include all three set of headers.
After setting gray release, the system will create a new service, you need to specify the new version’s image by Modify Image function. What is more, you can do the following operations:
- OffLine: Delete the version.
- Modify GrayRelease: Edit the strategy of gray release.
Please refer to Tech Docs > Best Practice > Gray Release for a complete example of gray release.
- Adjust Spec: Adjusts the service’s CPU and Memory spec.
- Redeploy: Redeploys the service.
- Modify Image: Change the image of service, used for rolling upgrade. The image format is: Registry/Namespace/Imagename:tag.
- Account: Clicks to view the account’s username and password.
- Stop/Start: Clicks to stop/start the service, reduces the useage of system resource. The services do not support to stop if the icon is not existing.
-
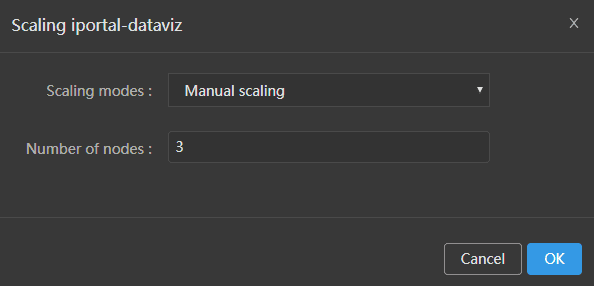
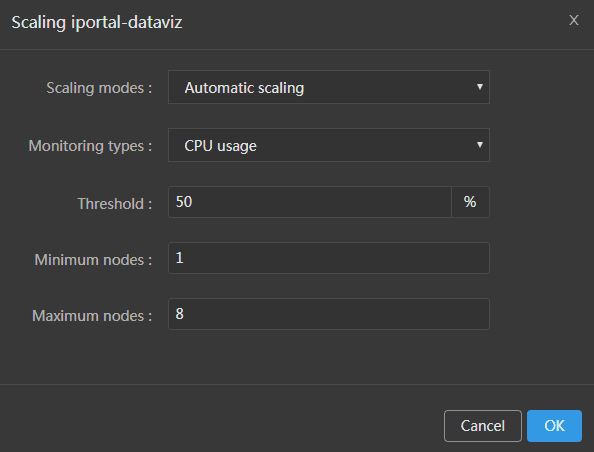
Scaling: Extends the service.
- Manual Scaling: Set the number of nodes, the system would scaling the nodes to the expected number.
- Automatic Scaling: Set the monitoring type, threshold, minimum node(s), and maximum nodes, the system would automatically scaling the nodes according to the loads. The automatic scaling could be deleted by clicking on the button beside the service name.
- Expose Address: Exposes the service access address.
Container Management
Clicks on the service name to enter the container details page, the page shows the information of container name, IP, status, duration, and host machine. If any container malfunctioned, you can recreate the container, the service would stop working until finishing recreating.
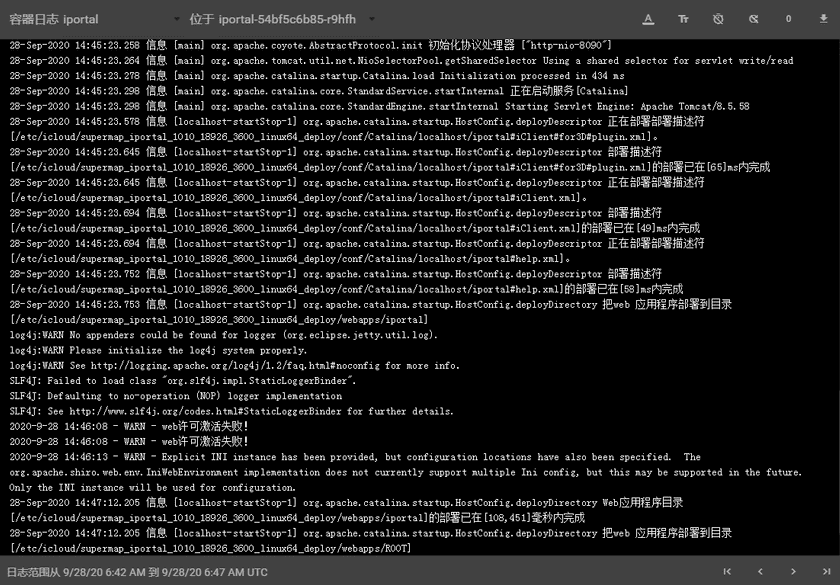
Clicks on Logs to enter the container log, the log records the running status and running history of the container.
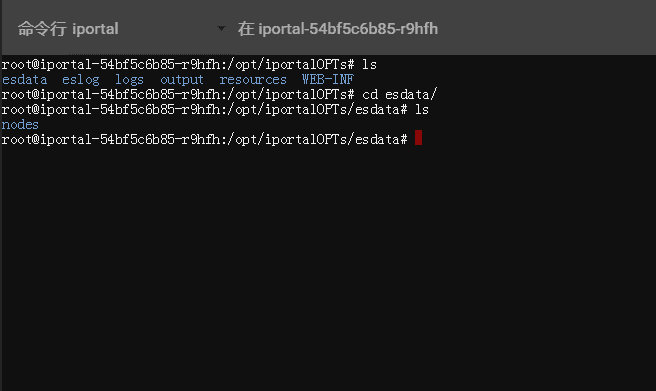
Clicks on Command Pad to control the container, administrator can execute commands in the interface to operate the container.
For example, executes ‘ls’ command to view the files in the directory.
Notes:
Using [shift + insert] to paste the commands into the Command Pad.
