Tech Docs
Gray Release
The content below is going to introduce how to achieve gray release in iManager, we use ispeco-dashboard-api service as an example.
- Log in to SuperMap iManager, clicks on Site Management > Create on the left navigation bar.
-
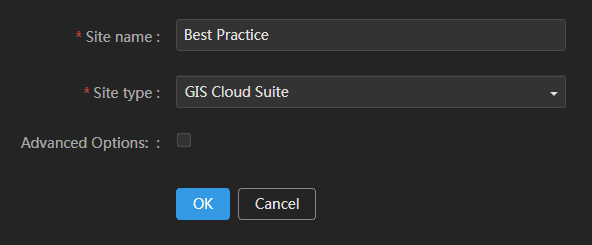
Fill in ‘Best Practice’ as the Site name, select ‘GIS Cloud Suite’ as the Site type, click on OK to create the site.
- Enter the home page of GIS Cloud Suite, find the service ispeco-dashboard-api in the services list.
- Click on GrayRelease on the right side of ispeco-dashboard-api.
-
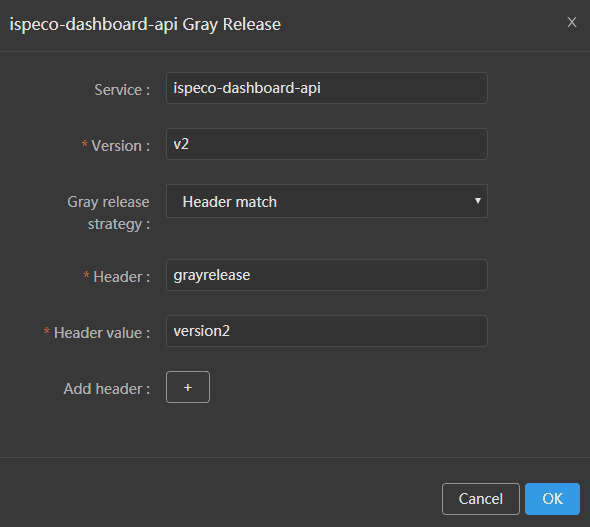
Fill in ‘v2’ as the Version, select ‘Header match’ as the Gray releasee strategy, fill in ‘grayrelease’ as the Header, fill in ‘version2’ as the Header value, click on OK.
- The system will create a service named ispeco-dashboard-api-v2 after editing gray release. Find the service ispeco-dashboard-api-v2 in the list, click on Modify Image on the right side of ispeco-dashboard-api-v2.
-
Modify the tag of the image to ‘test’, and click on OK.
Notes:
You need to push the image which is used for gray release to your registry first, and modify to your gray release image in this step. - Open Postman(or others software has the same function as Postman), send the GET request to
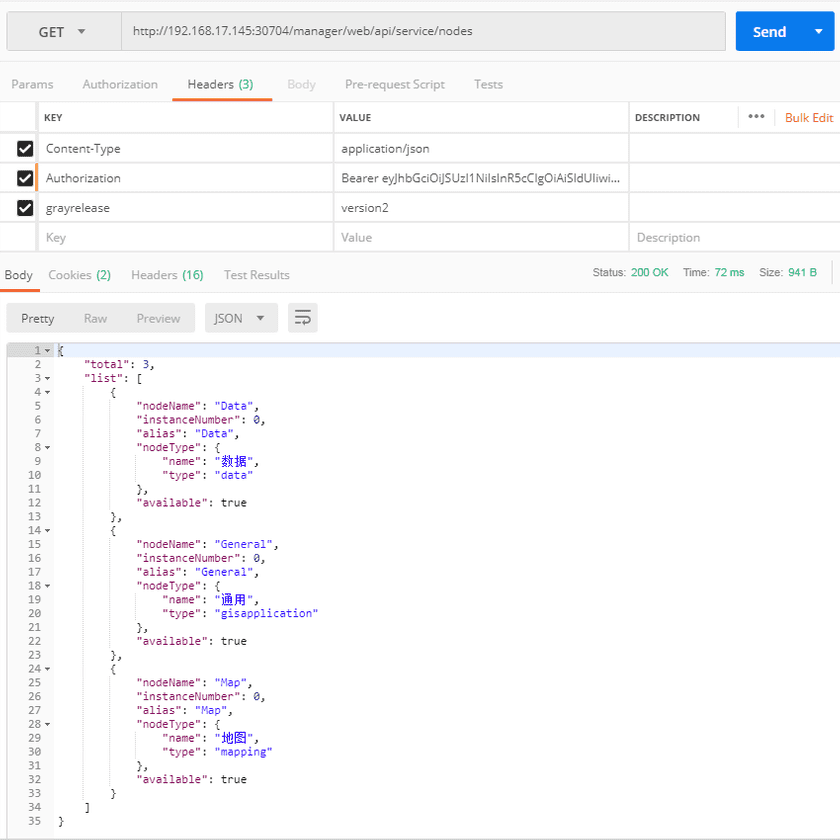
http://192.168.17.145:30704/manager/web/api/service/nodesto get the information of service node, the introduction of the method please refer to GIS Cloud Suite > API > service > nodes > GET. Fill in the token in the Header, please refer to GIS Cloud Suite > API > tokens to get the token. Add a new Header ‘grayrelease’ and Header value ‘version2’. -
Send the request, as the screenshot below:
In the step 8, if you do not add Header ‘grayrelease’ and the Header value ‘version2’, the returned response is from the service ispeco-dashboard-api. If you add Header ‘grayrelease’ and the Header value ‘version2’, the returned response is from the service ispeco-dashboard-api-v2. The explaination of gray release please refer to Tutorial > Site Management > GIS Cloud Suite > GIS Cloud Suite Management.


