GIS Cloud Suite
Publish Local Files by HostPath
The content below is going to introduce how to publish local files as GIS services by the way of HostPath. Please follow the steps:
- Create a GIS Cloud Suite site in SuperMap iManager. GIS Could Suite Creation please refer to Tutorial > Sites Management > GIS Cloud Suite > GIS Cloud Suite Creation.
-
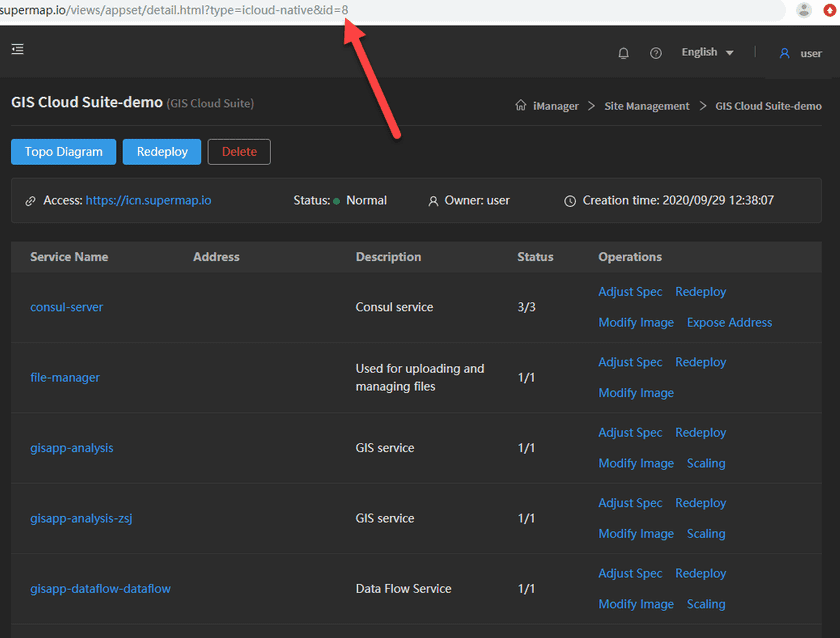
Find the id of GIS Cloud Suite site. As the screenshot below, the id of the GIS Cloud Suite site is ‘8’.
-
Check the storage path(gisDataPath) of local files. As the screenshot below, CherryDataset is the directory of local files which needs to be published, the storage path of CherryDataset is ‘/root/zsj/data’.
- Download HostPathGISData.rar.
-
Unzip HostPathGISData.rar and enter the unzipped folder, open the file named pv-values.yaml. Modify the value of id to the id that you found in step 2, and modify the value of gisDataPath to the storage path that you checked in step 3.
Notes:
The values of id and gisDataPath in the screenshot are examples, please replace to your actual values. -
Copy and paste the three files ‘pv-values.yaml’, ‘install-pv.sh’, and ‘pv.yaml’ from HostPathGISData folder to the master node of K8s, then execute the following command:
chmod +x install-pv.sh && ./install-pv.sh - When finish installing, after all the services started up, visit the management page. Click on File Manager on the left navigation bar, you can see the directory and files from gisDataPath in the File Manager.
-
Publish the files in the File Manager as GIS services. Publish services please refer to Service Management > Service Instances > Publish Services.
Notes:
We recommended you to use the directory by read only, to avoid data corruption.


