Tutorial
Add Database
After Logging into SuperMap iManager, click “Database Monitoring” in the iManager interface and add the database operation interface.
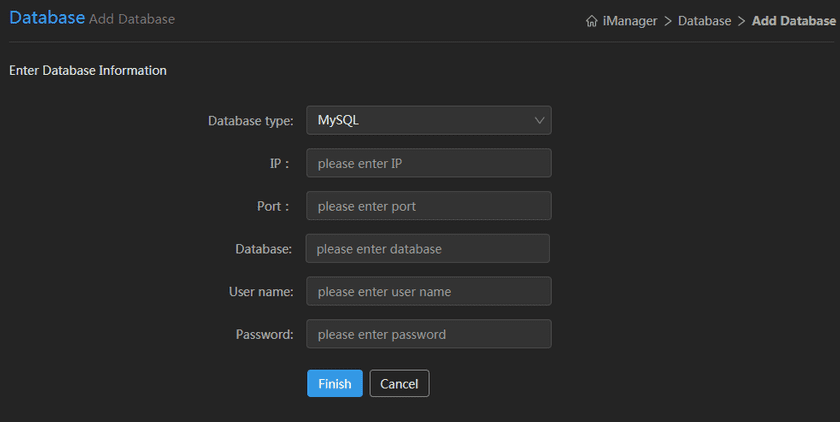
Add MySQL Database
- Database type: MySQL
- IP: The IP address of the server on which the database resides.
- Port: The port of the database.
- Database: The name of the database.
- User name: The user name of the database. The user must have the SELECT permission to all tables.
- Password: The password for the corresponding user.
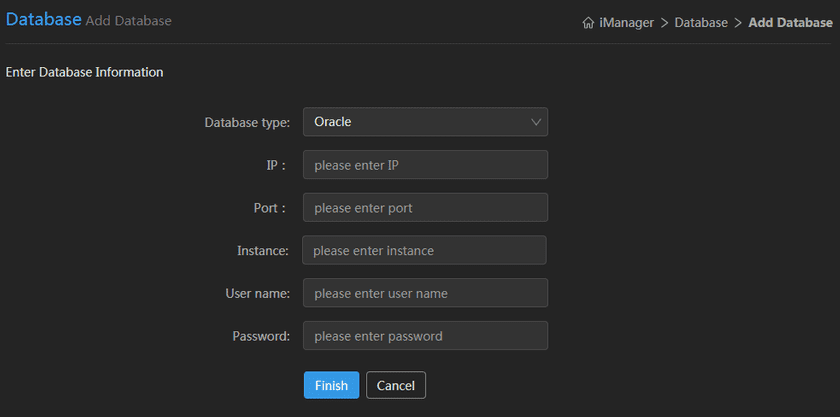
Add Oracle Database
- Database type: Oracle
- IP: The IP address of the server on which the database resides.
- Port: The port of the database.
- Instance: Oracle instance
- User name: The user name of the database. The user must have the create session, select any table, select any dictionary permissions.
- Password: The password for the corresponding user.
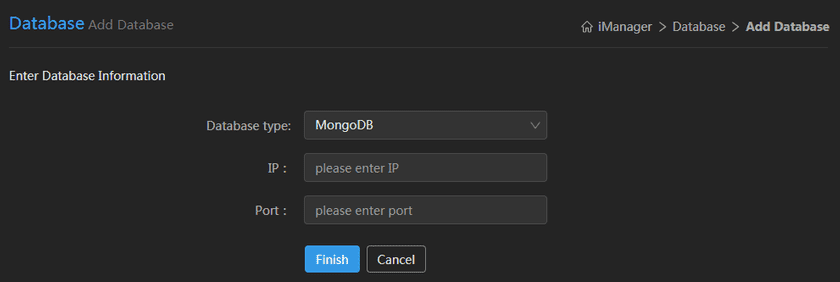
Add MongoDB Database
- Database type: MongoDB
- IP: The IP address of the server on which the database resides.
- Port: The port of the database.
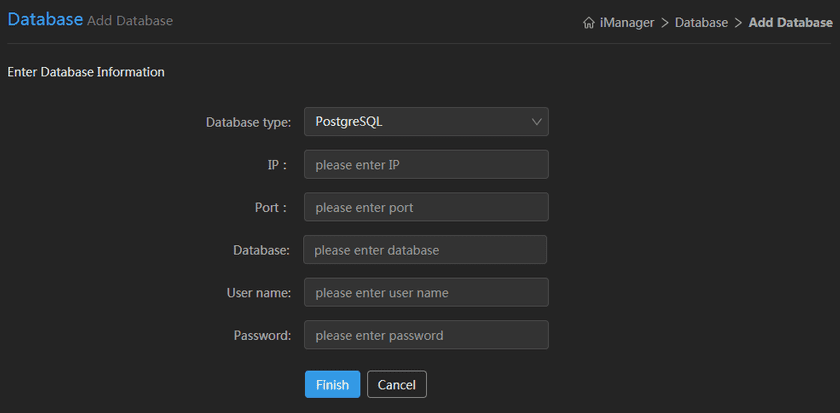
Add PostgreSQL Database
- Database type:PostgreSQL
- IP: The IP address of the server on which the database resides.
- Port: The port of the database.
- Database: The name of the database.
- User name: The user name of the database.
- Password: The password for the corresponding user.
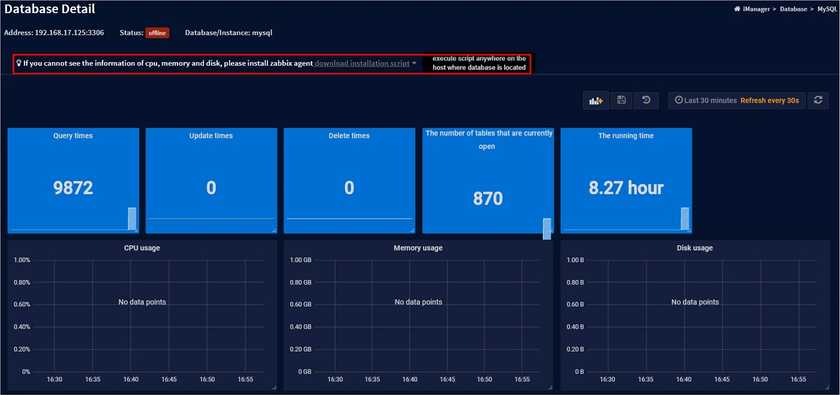
Clicks on the added database or its corresponding “details” button to enter the database details page. The added database should also install the ZABBIX agent as prompted by the page to obtain system-related monitoring data, such as CPU, memory, and disk useage, as shown in the figure.
