



Cross Clip
Instructions
Cross Clip, also known as quadrilateral clipping, allows you to draw a quadrilateral on a selected layer in the scene to clip away the data within the quadrilateral area, displaying only the data outside the drawn area. Currently, only model datasets, S3M tile data generated from model datasets/oblique photogrammetry 3D models/symbolized pipeline data, and instanced layers support Cross clipping. Cross clipping is not supported for terrain, images, or other data.
Entry
- Scene tab > Browse group > Scene Clip dropdown menu > Cross Clip
Steps
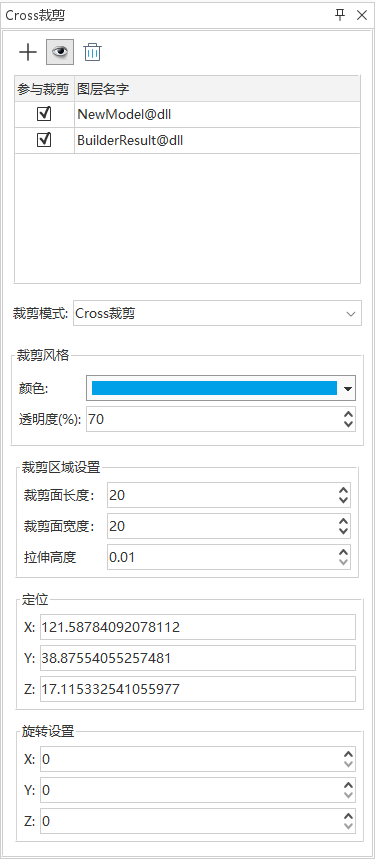
- In the "Scene" tab, under the "Browse" group, click the "Scene Clip" dropdown button, and select "Cross Clip" from the dropdown menu. The "Cross Clip" panel will appear, as shown below.
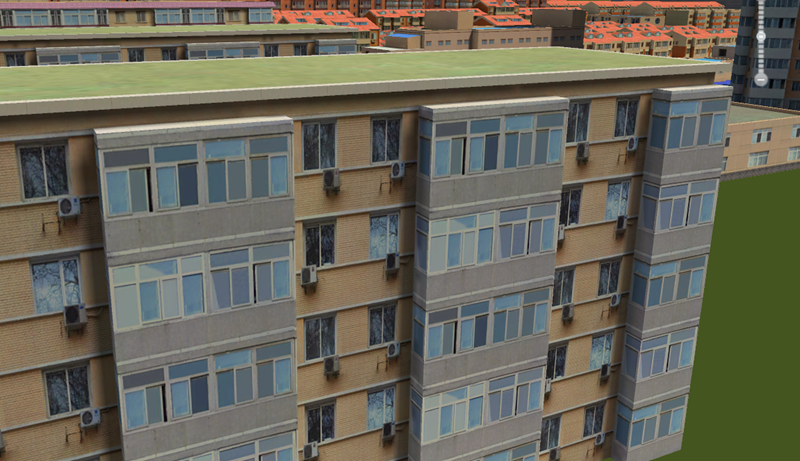
- In the layer list box, check the layers to be clipped by Cross. The selected layers to be clipped are shown in the following figure.
- Click the
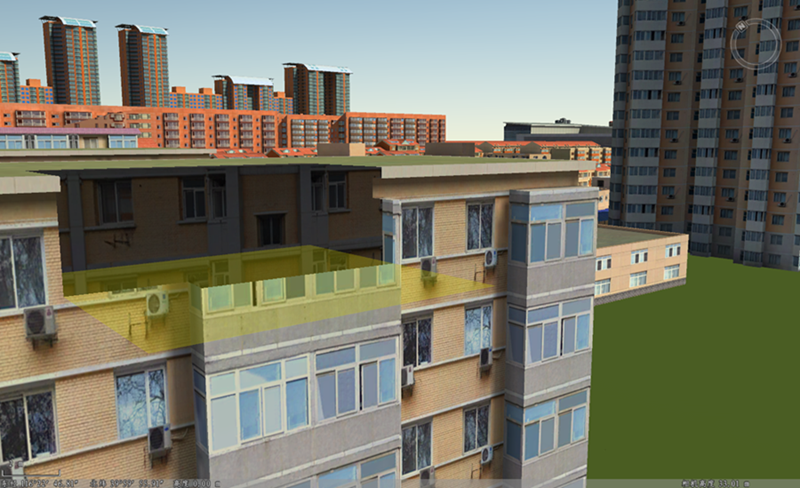
 button in the toolbar to add a clipping area. A quadrilateral face will be displayed in real-time as the mouse moves in the scene. Click to place the quadrilateral face at the desired location. The Cross clipping effect on the layers to be clipped is shown below.
- Click the
 button in the toolbar to control the visibility of the clipping shape. When the "Visibility" button is selected, the clipping area shape is displayed; otherwise, the quadrilateral clipping face is hidden. The "Visibility" button is selected by default.
 - Click the
 button in the toolbar to delete the clipping result.
 - Clipping mode: In the "Clipping Mode" dropdown, you can switch between clipping types, i.e., Cross Clip and Box Clip.
- Clipping style: Set the color and transparency of the Cross clipping face.
- Clipping face parameter settings: Set various parameters of the clipping face. Directly change the values, and the scene will respond in real-time to the clipped effect.
- Clipping area: Enter values in the input boxes to set the length, width, and stretch height of the clipping face.
- Positioning: Adjust the longitude, latitude, and height of the clipping face by entering X, Y, Z values.
- Rotation settings: Adjust the position of the clipping face by entering the rotation angle around the X, Y, Z axes.