


Instructions
Box Clip function, by setting a Box area for a layer, visually displays data inside or outside the Box area at the visualization level, and does not actually perform clipping operations on the data. Currently, it only supports Box clipping for model datasets, S3M tile data generated from model datasets/oblique photogrammetry 3D models/symbolic pipeline data, and instance layers; it does not support Box clipping for terrain, imagery, or other data.
Using Box Clip allows you to directly view the interior of a model without entering it.
Entry Point
- Scene tab ->Browse group ->Scene Clip dropdown menu ->Box Clip
Steps
- Open an existing scene or create a new 3D scene, and submit the target data.
- On the Scene tab, in the Browse group, click the Scene Clip dropdown button, and select Box Clip from the dropdown menu to open the Box Clip panel.
- The layer list in the Box Clip panel will display the layers that can participate in clipping in the current scene. You can select layers for clipping by checking the checkboxes in front of the layers.
- Add and adjust the clipping area:
- Click the Add Clipping Area button
 in the toolbar, and draw a quadrilateral area in the scene. The system will automatically generate a Box based on this area.
 - The size of the generated Box can be adjusted by entering values for Bottom Length, Bottom Width, Height, and Z-axis Rotation Angle in the Clipping Area Settings module on the panel.
- The position information of the clipping Box can be adjusted by entering X, Y, and Z values in the Position module on the panel.
- Click the Add Clipping Area button
-
Set the clipping style: Set the color of the intersection edge between the Box clipping area and the data.
-
Set the clipping line style:
-
Color: Set the color of the Box clipping area.
-
Transparency: Set the transparency of the Box clipping area.
-
- Click the Visibility button
 in the toolbar to control whether the Box clipping area is displayed. When the Visibility button is selected, the shape of the clipping area is displayed; otherwise, it is not displayed. The Visibility button is selected by default.
 - Click the button
 in the toolbar to delete the clipping result.
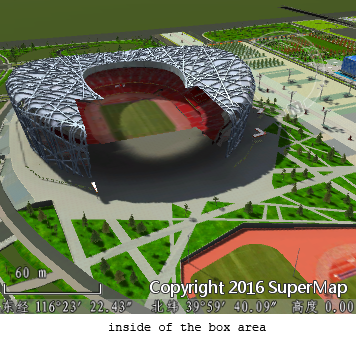
 - Depending on the usage needs, you can set to display data inside the clipping Box area or data outside the clipping Box area. As shown in the figure below, the left image displays data outside the clipping Box area, and the right image displays data inside the clipping Box area.