


Video Projection
Usage Instructions
Projects and plays specified video files (*.avi, *.wmv, *.mp4) in a 3D scene using the current viewpoint or a designated viewpoint as the observation point to simulate the real scenario of events recorded in the video.
Functional Entry
- 3D Analysis Tab -> Spatial Analysis Group -> Video Projection
Operational Steps
- Open the surrounding environment recorded by the AVI video file in the 3D scene, and navigate to the location recorded by the video file. Click the Video Projection button in the Spatial Analysis group under the 3D Analysis tab to pop up the "3D Spatial Analysis" panel.
- Determine the video projection position: The program provides two methods: using the current viewpoint as the observation point or drawing a specified position as the observation point via the "Add" button.
- After adjusting and confirming the video projection area, click the
 button on the "3D Spatial Analysis" panel to set the current viewpoint as the video projection point.
 - Click the "Add" button on the "3D Spatial Analysis" panel. After the mouse cursor is attached with a red dot, you can draw the projection point in the scene window. The video projection panel will pop up after the observation point is confirmed.
- After adjusting and confirming the video projection area, click the
- Add video file: Click the selection button on the right side of the video file, choose the video file (*.avi, *.wmv, *.mp4) to be projected from the pop-up "Browse For Folder" panel, or directly enter the storage path of the specified video file in the dialog box on the right side of the video file.
- Homologous Point Registration: After roughly projecting the video into the correct area, use homologous point registration to precisely align the video to be projected with the target location. Operation steps are as follows:
- Check the "Homologous Point Registration" checkbox and click the "Homologous Point Registration" button to pop up the homologous point registration dialog box.
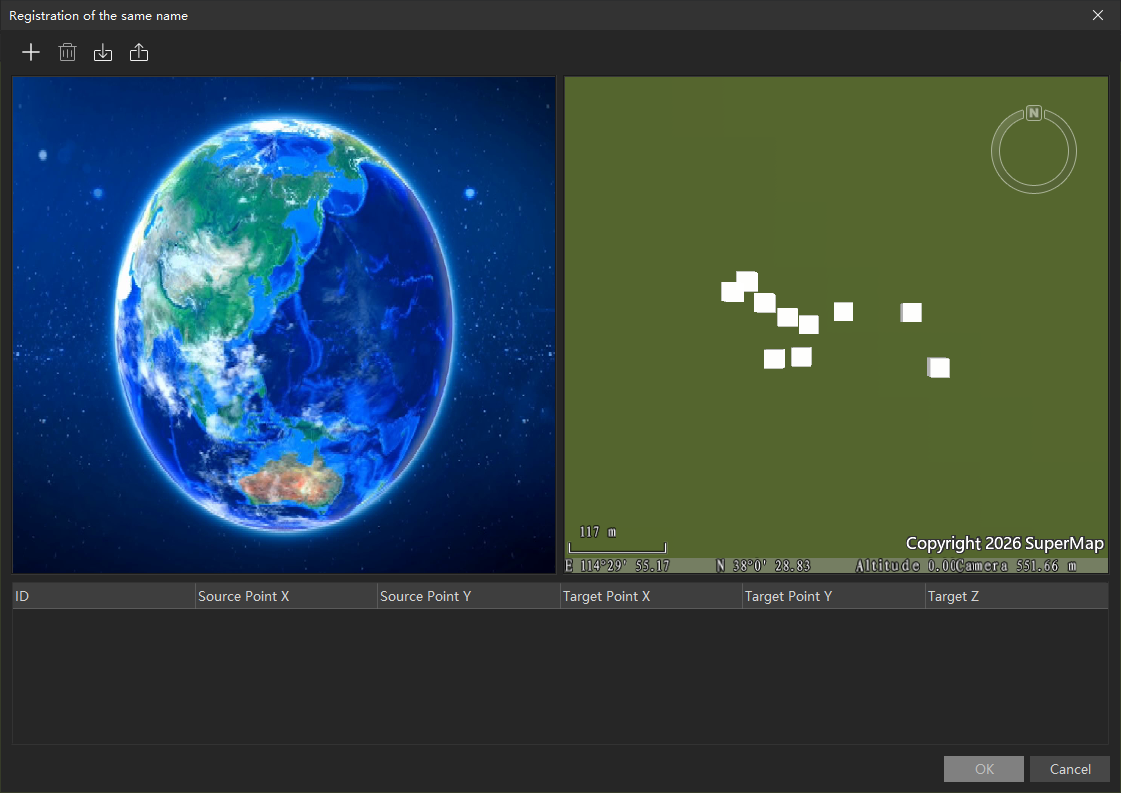
- Click the "Import" button to import a homologous registration file (*.xml) that records the coordinates of the source points and target points participating in the registration into the panel. Or, click the "Add" button on the homologous point registration panel to sequentially add the source points and target points participating in the registration in the left and right windows (which need to be within the video projection area). As shown in the figure below, the left window displays the video content, and the right window displays the scene content.
- Click the "Export" button to export the homologous registration file (*.xml) that records the coordinates of the source points and target points participating in the registration to a specified folder.
- After selection is complete, click "OK". The video projection plane will be automatically adjusted and matched based on the source and target points, achieving registration between the video content and the scene.
- Show Video: Controls whether to display the projected video.
- Show Projection Rays: Controls whether to display the projection rays, which are the connecting lines between the video projection point and the projection plane.
- Set Projection Information: Use the "Parameter Settings" and "Projection Information" on the panel in combination for settings.
- Parameter Settings: Adjust the horizontal view angle, vertical view angle, and projection distance of the projection area.
- Transparency: Sets the transparency of the projected video. The default value is 0, and the value range is (0,100). A value of 0 means completely opaque, directly using the video's own transparency. A value of 100 means completely transparent.
- Horizontal View Angle (degree): Sets the horizontal view angle for video projection, which can be used to control the length of the projection plane.
- Vertical View Angle (degree): Sets the vertical view angle for video projection, which can be used to control the width of the projection plane.
- Projection Distance (meter): Sets the projection distance for video projection. This distance is measured vertically downward starting from the projection point. The projection distance should be greater than the Z-value of the video projection point to ensure the projection plane intersects with the ground, allowing for proper video projection.
- Playback Settings:
- Loop Playback: Check the "Loop Playback" checkbox to enable the projected video to play in a loop within the scene.
- Start and Stop: Use the start and stop buttons to control the video playback status.
- Projection Information: Set relevant parameters to control the position and spatial orientation of the video projection point.
- X/Y/Z: Set the X/Y/Z coordinate values of the video projection point by entering specific numerical values.
- Azimuth (degree): Set the azimuth angle of the video projection point by directly entering a value or clicking the button on the right.
- Pitch Angle (degree): Set the pitch angle of the video projection point by directly entering a value or clicking the button on the right.
- Roll Angle (degree): Set the roll angle of the video projection point by directly entering a value or clicking the button on the right.