Skyline Analysis
Instructions for use
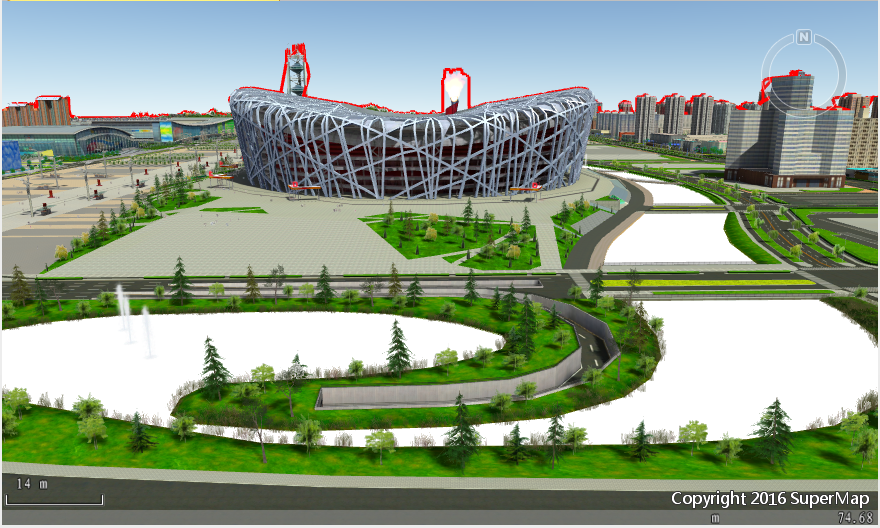
The skyline is the boundary line separating the sky from the surface and elements around the observation point. The Skyline Analysis function can generate the separation line between the top edge of the building and the sky in the current Scene according to the observation point. With the help of the separation line, the disharmonious building body can be found intuitively.
This function can be applied to the analysis of building height limit in urban planning and design, and the analysis of the impact of buildings on the skyline.
Operation steps
- On the 3D Analysis tab, in the Spatial Analysis group, click the Skyline Analysis
 button, or in the open 3D Spatial Analysis "panel, Select Skyline Analysis to display the Skyline Analysis Settings in the 3D Spatial Analysis panel.
 - Observation mode: Skyline Analysis observation mode and observation point position can be determined in the following ways.
- First-person Camera: Select the "First-person Camera" radio box, adjust the view of the current scene by zooming or panning through mouse operation in the scene, and perform Skyline Analysis with the view angle and range of the current scene.
- Custom 3D Point: Select the "Custom 3D Point" radio box and click the "Pick" button to pick a point in the scene as the observation point for extracting the skyline.
- Input View Position: In the above two observation modes, you can directly input the position of the observation point and the horizontal direction and elevation angle of the View Position in the X, Y and Z text boxes of the "View Position" to modify the position of the observation point.
- Azimuth: The angle between the direction of the camera at the observation point and the direction of true north. You can directly input the horizontal direction angle value to adjust the direction angle of Skyline Analysis. The angle range is 0 ° to 360 °.
- Pitch Angle: The angle between the camera direction of the observation point and the ground plane. You can directly input the pitch angle value to adjust the pitch angle of Skyline Analysis. The angle range is -90 ° to 90 °.
- Radius: The sight range of the observation point. You can directly enter the radius value to adjust the range of Skyline Analysis. The default value is infinite.
- In the Parameter Settings "of the 3D Spatial Analysis" Panel, modify the color and quality of the skyline.
- Skyline color: Click the Drop-down Button on the right side of the skyline color to select the line color, which is red by default;
- Skyline Width: It is used to set the width value of the generated skyline, the unit is pixel, and the range is 0, 10.
- Skyline quality: Click the Drop-down Button on the right side of the skyline quality and select the skyline display quality. The skyline quality can be set as high, medium or low level. When the skyline quality is set as high level, the skyline quality is the best. The default skyline quality is medium level.
- Show Viewer Position: This check box is used to control whether to Show Viewer Position. If this check box is checked, the observer position can be seen by translating the current scene to a direction far away from the observation point after analyzing the skyline; If it is not checked, Show Viewer Position will not be displayed.
- Look Around: This check box is used to control whether to perform 360-degree Skyline Analysis. If this check box is checked, Look Around will be performed with the observation point as the center of the circle. If this check box is not checked, Look Around will not be performed.
- HighLight Show Obstacle: This check box is used to control whether to highlight the model that affects the skyline. If this check box is checked, the model that affects the skyline will be highlighted in the scene, and the Open attribute table will be automatically associated. Displays Attributes that affect the skyline model.
- After determining the location of the observation point, click the "Analysis"
 button in the toolbar to perform Skyline Analysis and get a skyline in the current Scene.
Skyline Analysis results - The toolbar area also provides operations such as resetting, deleting, and exporting Skyline Analysis results.
 Button to revert to the previous scene perspective and roll back the Analyst Result.
  Button to remove Skyline Analysis results from the current scene.
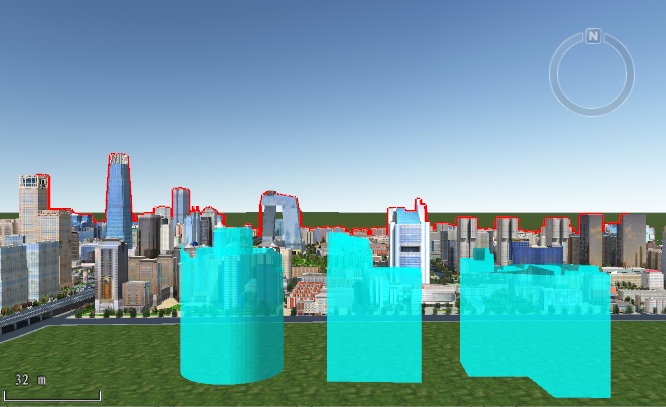
  Button: export Skyline Analysis results to Line Dataset, 3D Line Dataset, fan-shaped Region Dataset and Extrude Closed BodyDataset. Dataset save name can be set. When exporting as a fan Region Dataset, you can set the fan face radius. When exporting to a Extrude Closed BodyDataset, you can set the radius and Extended Height.
- Skyline Analysis can also be applied to urban planning. In order not to destroy the city's skyline, the corresponding height limit body of Region3D can be obtained through the analysis of the three-dimensional surface data of the new buildings to be built in urban planning and the skyline of a fixed perspective. The specific operation is as follows:
 Caution:
 The height limit Volume Dataset coordinate system exported
in Spherical Scene is Geographic Coordinate System: WGS 1984; The exported height limit Volume Dataset coordinate system in Plane Scene is Planar Coordinate System: meter.


 All button to select all the high-volume records in the list box.
  Selection to reverse the selection of records in the list box, that is, the records that were not selected become selected, and the records that were selected become unselected.