Texture Replacement
Usage
The "Texture Replacement" function enables the replacement of textures for specified objects within oblique photography data, offering two methods: direct color modification and color mosaic. This method can be used to remove extraneous objects or eliminate unclear ones.
Procedure
- Create a new spherical scene. Right-click "Scene" in the Workspace Manager and select "New Spherical Scene".
- Add 3D tile data. Right-click "Normal Layer" in the Layer Manager, select "Add 3D Tile Layer...", specify the OSGB data storage path to load OSGB data.
- On the "3D Geographic Design" tab, within the "Oblique Photography Operations" group, click the "Texture Replacement" button. The "Oblique Texture Replacement" dialog box will pop up, as shown below:
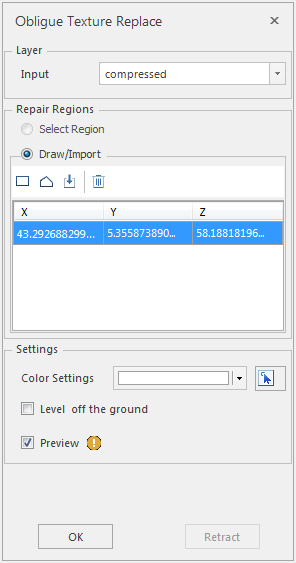
Figure: "Oblique Texture Replacement" Dialog Box - Layer Selection
- After opening the Oblique Texture Replacement function, if there are multiple oblique layers in the currently open scene, you need to select the layer containing the object for texture replacement from the dropdown list corresponding to "Object's Layer" under "Oblique Layer". If only the dataset layer for the object requiring texture replacement is loaded in the current scene, the text box will automatically acquire that layer.
- Patch Face Setting
- By default, "Draw Face" is selected for creating the patch face. Drawing the patch face provides rectangle, polygon, import, and remove tools.
- Parameter Setting
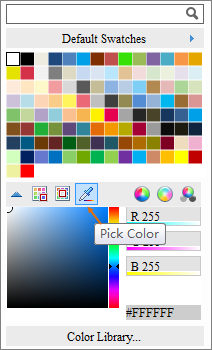
Figure: "Color Selection Panel" Dialog Box - Color Setting: Click the dropdown arrow to pop up the "Color Selection Panel". You can click a single color or use the picker tool (the eyedropper tool on the color panel or the arrow tool at the far right of the color setting) to determine the color. The "Color Selection Panel" is shown as above:
- Flatten Road Surface: Unchecked by default. When a color is selected, only the texture color is modified. When "Flatten Road Surface" is checked, a flattening operation is performed on the selected area.
- Preview Setting: Preview is checked by default. When modifying colors, the texture replacement effect is displayed in real-time.
- After setting the above parameters, click the "OK" button to execute the oblique texture replacement operation. A model dataset named after the dataset name will be generated under the specified result datasource.
- Click "Undo" to cancel the oblique texture replacement operation.
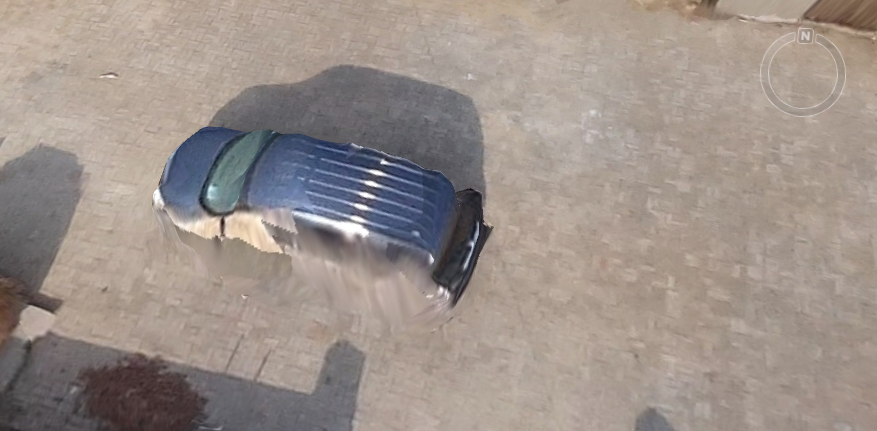
- The comparison effect before and after texture replacement is shown below:
Figure: Oblique Texture Replacement Effect Diagram
Notes
- The oblique photography texture replacement operation is also applicable to model tiles.