


Model Segmentation
Instructions for use
The Model Segmentation function supports setting the number of slices, splitting the model layer into the corresponding number of Datasets.
Operation steps
- Right-click Datasource in Workspace Manager and select Open File Datasource "to open the Datasource containing the Model Dataest.
- Select Model Dataest, right-click the Add to New Spherical Scene ", select the Model Dataset Layer in Layer Manager, and right-click the Jump to Layer".
- Click the Model Segmentation button in the Model Operation group on the 3D Geographic Design tab to pop up the Model Segmentation "dialog box, as shown in the following figure:
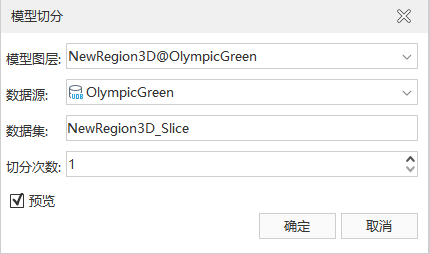
Image: Model Segmentation "Panel - Model layer: In the layer group, click the drop-down arrow to the right of Model Layer and select Split Layer of Object.
- Data source: Select the Datasource of the crop Result Storage.
- Dataset: Enter the file name of the crop Result Storage. Number
- of Segmentation: the number of Model Segmentation, which is 1 by default. The number of segmentation can be adjusted by clicking the up and down buttons on the right side of the number of segmentation or directly inputting the value.
- Click OK to prune the Result Storage.
- Preview: If you want to preview the Model Segmentation result, check the "Preview" check box; otherwise, leave it unchecked.
 Precautions
- The bounding face of the Model Segmentation preview effect is the Bounds of the model.
- The direction of Model Segmentation is determined according to the longitude and latitude of Model Dataest. If the range of longitude is larger, the longitude direction of Model Dataest is segmented, and vice versa.