



Mirror
Function Description
The Mirror button provides a way to flip the selected geometry (non-text) around a specified temporary mirror line to create a symmetric mirrored object. The selected original geometry remains unchanged, and the created mirrored object is a copy of the selected original geometry. The positional relationship between the created mirrored object and the selected original geometry is: the created mirrored object is the result of flipping the selected original geometry around the specified temporary mirror line.
Function Entry
- Edit Data tab -> Object Editing group -> General editing -> Copy and transform -> Mirror
Operation Instructions
- In the editable layer, select the geometry (non-text) to be mirrored. You can hold down the Shift or Ctrl key to select multiple geometries consecutively, or use drag selection to select multiple geometries.
- In the Edit Data tab, under the General editing drop-down menu, click the Mirror button in the Copy and transform group to perform the mirror operation.
- At this point, the mouse prompts: "please draw a mirror reference line." Then you can draw the temporary mirror line. The specific operation is: click the left mouse button at an appropriate position to determine the first point of the mirror line, move the mouse, a temporary line segment that changes as the mouse moves will appear, click the right mouse button at an appropriate position to determine the other point (the last point) of the mirror line, and the program performs the mirror operation. The determined line segment is the temporary mirror line around which the selected geometry is flipped.
- To perform the next mirror operation, repeat steps 1 to 3 above.
 |
| Figure: Mirror operation illustration 1 |
 Notes:
When multi-layer editing is enabled, users can select multiple geometries of different types (non-text) in multiple editable layers at the same time to perform the mirror operation, as shown in the following illustration.
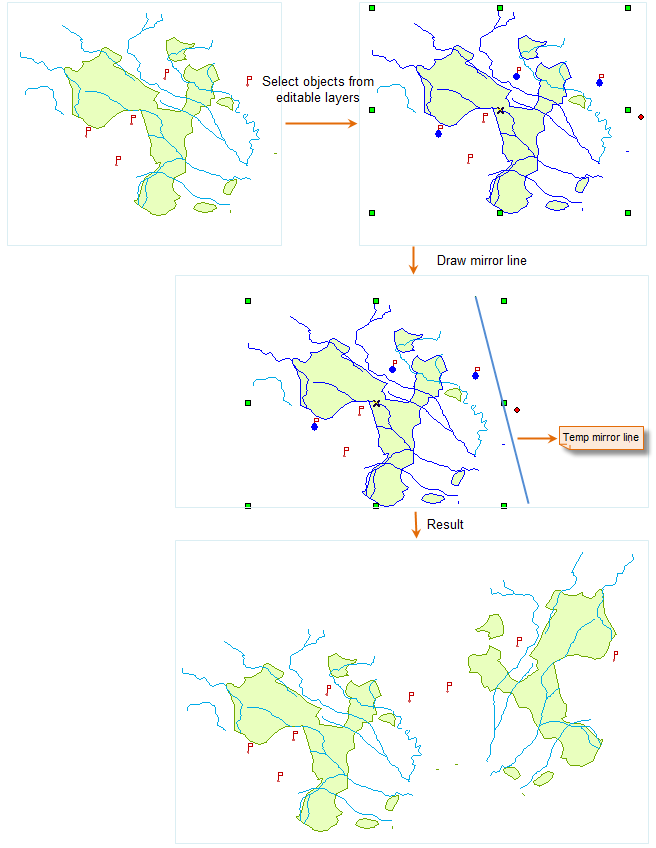 |
| Figure: Mirror operation illustration 2 |