A thematic map is a map designed to meet specific needs by highlighting one or several natural or socio-economic phenomena within a mapping area. In SuperMap iDesktopX, a thematic map is essentially a symbolic display of map layers, using various graphical rendering styles (size, color, linetype, fill, etc.) to visually represent certain characteristics of features. Vector data thematic maps can visualize data based on attributes in the attribute table.
Supports creating unique value thematic maps, graduated color thematic maps, label thematic maps, statistical thematic maps, graduated symbol thematic maps, dot density thematic maps, custom thematic maps, etc. In this case, it is necessary to create label thematic maps for administrative centers at all levels and tourist attractions.
Operation Steps
- Right-click the Mountain_P layer in the Layer Manager, select Create Thematic Map ..., choose single symbol label thematic map in the pop-up Create Thematic Map dialog, click the OK button to generate a label thematic map with default style, then modify the following parameters in the thematic map properties panel:
- In the Properties tab, modify Label Expression to "Name", and set Offset Y to: -5.
- In the Style tab, modify Font to "Huawen Zhong Song", Alignment to Center Top, font size to 8.5, and text color to R42, G102, B57.
- Similarly, create a single symbol label thematic map for Waterfall_P, then modify the following parameters in the thematic map properties panel:
- In the Properties tab, modify Label Expression to "Name", set Background Shape to Rectangle, Background Margin to 4, click the Background Style setting button, and set Background to R136, G111, B170.
- In the Style tab, modify Font to "WenQuanYi Micro Hei", Alignment to Left Center, Font Size to 10, Text Color to R255, G255, B255.
- Create a single symbol label thematic map for Monuments_P, then modify the following parameters in the thematic map properties panel:
- In the Properties tab, modify Label Expression to "Name", set Background Shape to Rectangle, Background Margin to 4, click the Background Style setting button, and set Background to R235, G104, B119.
- In the Style tab, modify Font to "WenQuanYi Micro Hei", Alignment to Left Center, Font Size to 10, Text Color to R255, G255, B255.
- Create a single symbol label thematic map for NaturalRegion_P, then modify the following parameters in the thematic map properties panel:
After creating the label thematic map for the NaturalRegion_P layer, turn off or remove the display of the original layer.
- In the Properties tab, modify Label Expression to "Name", set Background Shape to Rectangle, Background Margin to 4, click the Background Style setting button, and set Background to R60, G119, B135.
- In the Style tab, modify Font to "WenQuanYi Micro Hei", Alignment to Left Center, Font Size to 10, Text Color to R255, G255, B255.
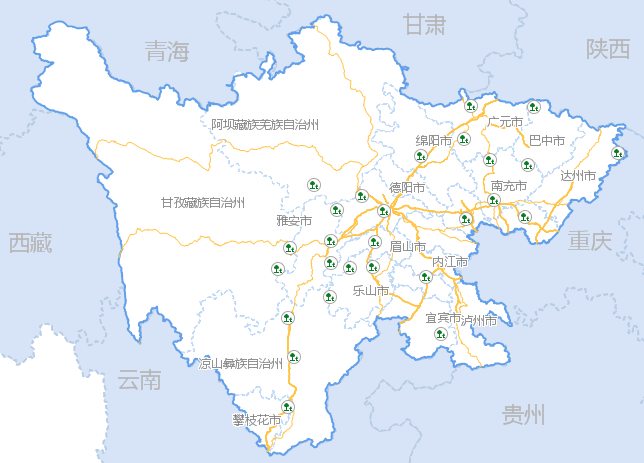
- The method for creating single symbol label thematic maps for other administrative point layers is similar, and will not be elaborated here. After completing the creation of single symbol label thematic maps for these layers, a complete map of tourism resources in Hunan Province can be obtained, as shown below: