


Instructions for use
The Point Style group in the Styles tab is used to set the marker style for point objects in 3D layers of point dataset type in the scene. All marker style settings are applied in real-time to the selected 3D layer, achieving what-you-see-is-what-you-get.
Operating Steps
Icon File
The "Icon File" command is used to set or clear the icon file displayed for point datasets added to the scene. Note: Only when the selected layer is a 3D layer of point dataset type are the function controls in the "Point Style" group available; otherwise, this item is unavailable.
- Click the Icon File drop-down button in the Point Style group on the Styles tab, and select the Settings item from the drop-down menu.
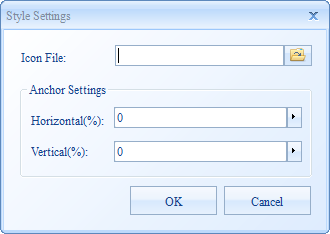
- The "Point Icon Settings" panel as shown above pops up. Specify an icon file at "Icon File" (icon file formats include: *.png, *.jpg, *.jpeg, *.bmp, *.gif, *.sgm, *.3ds, *.mesh, *.obj, *.dae, *.x, *.osg, *.osgb, where *.sgm, *.3ds, *.mesh, *.obj, *.dae, *.x, *.osg, *.osgb are model symbols).
- At the "Billboard Mode" section, users can select a billboard mode via the drop-down arrow, providing three modes: Screen Align, ClampGround, Rotation Free.
- At the "Orbit Settings" section, users can directly input rotation angle values for the X, Y, Z directions, or click the up and down arrows on the right side of the text box to adjust the rotation angle.
- At the "Anchor Point Settings" section, users can adjust the horizontal and vertical relative relationship between the added icon and the source data point. The default position aligns the bottom-left corner of the added icon with the source data point. The unit of the anchor point is %, with a range of [-100, 100].
Horizontal: A positive value indicates a shift to the right, and a negative value indicates a shift to the left. For example, setting it to 100% means the icon file shifts to the right by the length of the icon file.
Vertical: A positive value indicates a shift upwards, and a negative value indicates a shift downwards. For example, setting it to 100% means the icon file shifts upwards by the width of the icon file.
- To fix the icon size, check the "Fixed Size" checkbox, which is checked by default. Once fixed, the icon size does not scale with scene zooming.
- To enable instant refresh, ensuring that changes to parameters are reflected in real-time in the scene for preview convenience, check "Enable Instant Refresh", which is checked by default.
- To delete the set point icon file, click the Icon File drop-down button in the Point Style group on the Styles tab, and select the Clear item from the drop-down menu. The point marker style will revert to the system default.
 |
Symbols
The "Symbols" command is used to set the style of point symbols for point datasets in the 3D scene.
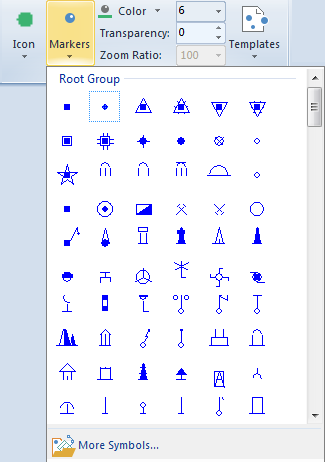
- Click the Symbols drop-down button in the Point Style group on the Styles tab to pop up the point symbol resource list as shown below. The upper part displays user recent symbols, and the lower part provides the system default root group symbol library. Users can select symbols from the list as the symbol style for point objects in the current point layer.
- Users can also click the "More Symbols" button at the bottom of the point symbol resource list to set the symbol style for point objects in the popped-up "Marker Symbol Selector" window.
- When users select a point symbol style, all point objects in the current point layer are displayed in real-time on the 3D globe in "billboard" form using the selected point symbol style.
 |
Color
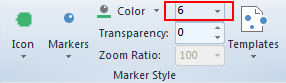
The "Color" command is used to set the display color of point symbols. Click the color button on the right to select and set the color of point symbols in the popped-up color panel.
If the point symbol is displayed with an icon file, setting the point symbol color will overlay the icon with the color set here. If the point symbol color is set to white, the icon displays in its original color.
Transparency:
The "Transparency (%)" command is used to set the transparency effect for point symbols. Users can input a value in the numeric display box on the right of the label, or click the up and down arrows to adjust the value. Transparency values range from 0 to 100, where 0 represents completely opaque and 100 represents completely transparent.
Size
The combo box shown below is used to set the display size of point symbols. Note: This setting is effective only when no icon file is specified in the "Icon File" item.
 |
In the marker size combo box, enter a value and press Enter to apply the setting, or select a reference value from the drop-down list. The unit for marker size is pixels.
Icon Zoom
When using an icon to replace a point symbol, this item sets the scaling ratio of the icon. Enter a value in the combo box on the right and press Enter to apply, or select a reference value from the drop-down list. The unit for symbol scaling is percentage (%). This setting is available only when the point symbol uses an icon file.
 Related Topics