


Vector Dataset Build 3D Tiles
Feature Description
By selecting 'Generate 3D Tiles...' in the context menu of a dataset, you can generate 3D tiles from a vector dataset, thereby optimizing the browsing speed of vector data on multiple terminals.
Functional Entry
- Workspace Manager->Vector Dataset context menu->Generate 3D Tiles... button
Operation Steps
- In the Workspace Manager, select 'Generate 3D Tiles...' from the context menu of a vector (point, line, polygon) dataset.
- The 'Build 3D Tiles' dialog box pops up, used to add vector data and set vector tile parameters. The default selected dataset is already added to the list. If you need to add other vector datasets, you can use the toolbar to filter and search for the required datasets.
- Toolbar: Provides buttons such as Add Dataset, Select All, Invert Selection, and Delete.
- Add Dataset: Click
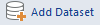 , in the pop-up selection dialog, select the target dataset, click OK, then return to the dialog, and you can see the selected dataset displayed in the list.
 - Select All: After selecting all datasets in the data list, you can perform batch operations on the datasets, such as delete and batch setting tile parameters.
- Invert Selection: Select datasets in the data list that are not selected.
- Delete: Remove datasets from the current data list.
 Note:
Note:- When batch setting tile parameters, after typing specific parameter values, you need to press the Enter key to make it effective; otherwise, it may cause the batch assignment of the same parameter values to not work.
- Add Dataset: Click
- Data List Area:
- Dataset: Displays the dataset name used to generate vector tiles.
- Data Source: Displays the name of the data source where the dataset used to generate vector tiles is located.
- tile type: Displays the type of 3D tiles to be generated, here it is 'Vector'. tile type: is a drop-down button, and the drop-down list shows all tile types supported by the selected data; users can choose from them.
- scene type: The type of scene tiles is spherical.
- Basic Settings:
- Tile Name: In the text box to the right of 'Tile Name', enter the tile name, which is the name of the tile root directory.
- Storage Path: The storage path for model tiles and upload. A folder named after the tile name is created under this path to store tile files, and the tile name can be modified.
- Tile Bounds: Set in the 'Tile Bounds' area, with the following two methods:
- Select the 'Default Range' radio button, which uses the dataset's extent by default.
- Do not select the 'Default Range' radio button, users can customize bounds. There are two ways: one is through the 'Select Range' button to choose the extent of a specified dataset as tile bounds; the other is to select the 'Specify Range' button and directly enter the range values in the top-left and bottom-right four text boxes.
- parameters::
- Object ID field:: Customize the content of the Object ID Field by selecting a field from the right-click drop-down menu to define it as the Object ID Field.
- S3M Version: Supports four S3M version numbers: S3M1.0, S3M2.0, S3M3.0, S3M3.01.
- Attribute Storage Type: Supports two attribute storage types: S3MD and ATTRIBUTE, improving the download efficiency of property files. S3MD stores in JSON format, while ATTRIBUTE stores in binary stream format.
- Altitude Mode: Set the altitude mode for the vector dataset type. Includes clamp to ground, clamp to object, and absolute. For details, refer to About Altitude Mode.
Note:
- When the source data is a point or line dataset, it is not recommended to set the altitude mode to clamp to object. This is because currently, it is not supported to retain the clamp to object effect after generating 3D tiles from point or line datasets with clamp to object altitude mode.
- Bottom Altitude, Extended Height: Only available when the altitude mode is set to absolute. For details, refer to Setting Bottom Altitude and Extended Height.
- Foreground: Used to set the foreground color of polygons, i.e., the color of the polygon itself. By clicking the color button on the right, select and set the fill color in the pop-up color panel.
- Select Fields: Set the select fields from the original dataset that need to be saved in the tile result. Click the 'Settings' button to pop up the 'Select Fields' dialog, where users can choose the required fields; if no field settings are performed, the result will not save any fields from the dataset.
- Cutting Tiles: Can be used to reduce the data volume per tile. If checked, data will be cut according to the set tile side length and stored in different tiles; otherwise, data will be stored in the tile where the data center point is located. Checked by default.
- Contour Line: Only available when the altitude mode is clamp to ground or absolute, used to set whether the result data displays the contour lines of polygon objects.
- After setting, click the 'OK' button to perform the tile generation operation.
Note:- If you need to modify the vector line width when generating tiles, you can select the corresponding layer in the Layer Manager, right-click and choose 'Layer Properties', then set the line width in the 'Special Effects' tab of the Layer Properties panel. Open the workspace in the tile result folder to load and browse the line effect after setting the width. For detailed operations on special effect settings for lines, refer to 3D Line Layer Special Effects.