Handling automated modeling not only supports one-click execution of the entire model, but also supports execution of a part of the model, i.e. partial execution. If you want to execute to a tool node in the model and then stop, you can do so by "Execute to this node" and then continue to the last tool node by "Execute from this node". .
Usage Instruction
Select a tool with the left mouse button and right click on "Execute to this node" to execute the processing automation model to the selected tool;
Select a tool with the left mouse button and right click on "Execute from node" to execute the processing automation model from the selected tool to the last tool node.
Usage Example
We provide you with a wealth of models in the Desktop Toolbox Custom Tools grouping to debug the Terrain Suitability Analysis model as an example.
Expand the model to the canvas by right-click menu "Edit Model", select the DEM data of a region, and adjust the model parameters.
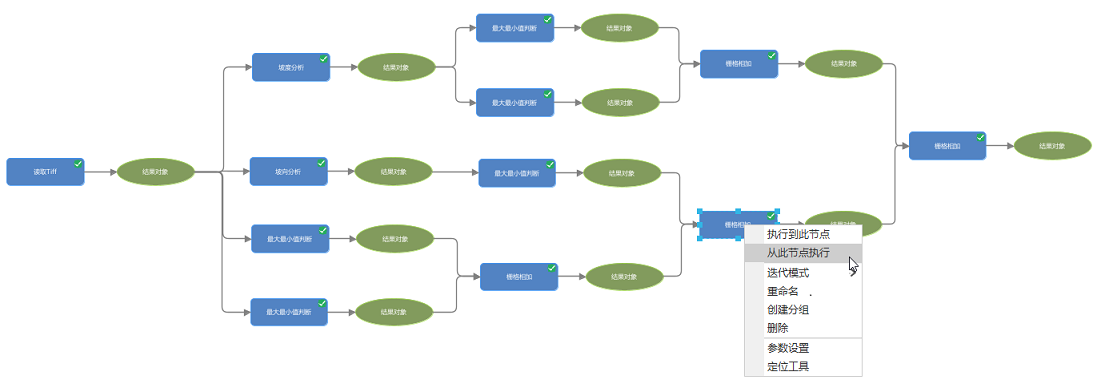
Verify the correctness of the tool parameters by partial execution. As shown in the figure, select the [Raster Sum] tool and click "Execute to this node". The upper-right corner of the tool will be marked as √ if the execution is successful, and the upper-right corner of the tool will be marked as × if the execution is not.
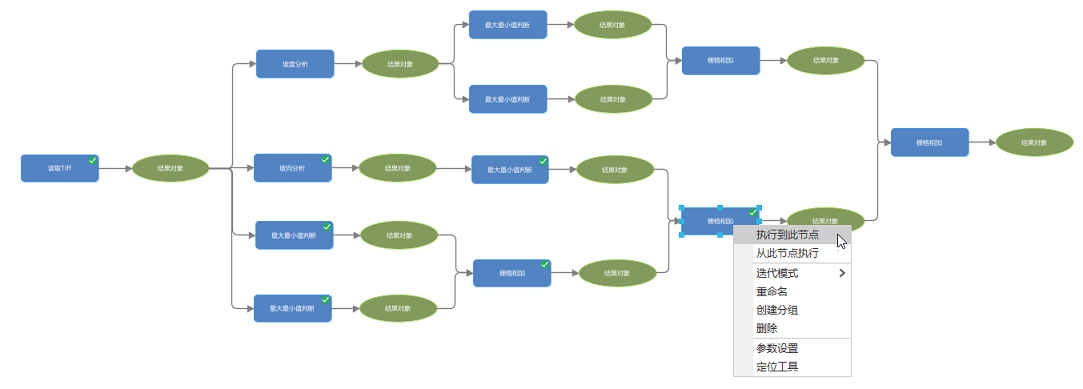
- After the successful local execution, continue to select the [Raster Sum] tool and click "Execute from this node" to execute the unexecuted tools in the model. At this time, you can directly get the results of the previous execution for execution, so it greatly reduces the model execution time.