


Merge Tiles
Feature Description
Merge Tiles refers to merging multiple raster or vector tiles stored locally or in MongoDB to update existing tiles or create new tiles. The Merge Tiles function is often used to integrate data from different regions or data from different periods in the same region, avoiding repeated tile generation and improving work efficiency.
The supported merge methods include: merging between MongoDB Tiles and MongoDB Tiles; merging between local tiles and MongoDB Tiles; merging local tiles and storing them as MongoDB Tiles.
Before merging MongoDB Tiles, ensure that the MongoDB service is started on the local machine. Additionally, the tiles to be merged must meet the following conditions:
- The coordinate systems of the tiles to be merged are consistent.
- The tile sizes are consistent.
- The origin coordinates of the tiles to be merged are consistent, i.e., the origin of tile. This can be adjusted during the tile bounds parameters when generating map tiles.
- The tile formats of the tiles to be merged are the same.
Feature Entry
- Data tab -> Manage Tiles group -> Manage Tiles.
Operation Instructions
- Add Tiles: Supports adding MongoDB tiles and local tiles. For detailed operations, see Add Tiles.
- Merge Tiles: In the Manage Tiles panel, click the Merge button on the toolbar to open the Merge MongoDB Tile dialog box.
- On the left side of the dialog box, select the storage mode for the merged tiles. Options include Merge to Existing Tile and Merge to New:
- Merge to Existing Tile: Update the tile data from the list into existing tiles. That is, merge multiple versions of data into an existing tile dataset. You can click the dropdown box on the right and select the tile name from the list.
- Merge to New: Merge the tiles in the list into a new tile, which can be merged locally or into a MongoDB database.
- Storage Format: Set the storage format of the tile, including Original, Compact, and MongoDB. When selecting Original or Compact as the storage format, you need to set the target tile directory and the target tile name. When selecting MongoDB as the storage format, you need to set the server address, database name, tile name, username, and password.
- Target Tile Directory: Set the storage path of the target tile.
- Target Tile Name: Set the name of the target tile.
- Server Address: Enter the address of the MongoDB server.
- Database Name: Enter the database name for storing map tiles.
- Tile Name: Enter the name of the map tiles.
- Username/Password: If the database has set a username and password, you need to enter the corresponding username and password for that database.
- On the right side of the dialog box, set the tiles participating in the merge and their merge order:
- Select tiles to merge: Check the tiles in the list that you want to include in the merge.
- Tile order: The order of tiles in the list affects the union result. Use the order adjustment buttons above the tile list to adjust the merge order. The merge operation proceeds sequentially from top to bottom. The example below uses Tile1 and Tile2:
Tile NameTile OrderIllustration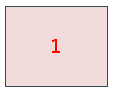
When the order is Tile1 first then Tile2, the overlapping area is covered by Tile2 over Tile1. 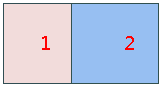
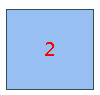
When the order is Tile2 first then Tile1, the overlapping area is covered by Tile1 over Tile2. 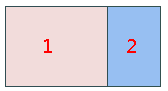
Handling Overlapping Areas in Merge Tiles:
- Raster Tile Merging
- When the selected tile image type is PNG and has a transparent background, the program performs blending in the overlapping area. This can be used to handle data merging and edge alignment issues.
- When the selected tile type is JPG_PNG, tiles containing invalid data pixels (at the map boundary) use PNG format; otherwise, they use JPG format. The program can automatically determine which format to use based on whether the tile contains invalid data pixels, which can solve the white tile issue at tile edges.
- For tile types other than the above two, overlapping areas in merged tiles are overwritten according to the merge order.
- Vector Tile Merging
- Vector Tile Data: Overlapping areas of vector tiles are overwritten according to the merge order.
- Tile Style: If the styles of the merged vector tiles are inconsistent, the style files with the same name from later tiles will replace the earlier ones, while style files with different names will be retained.
- Enable Multiprocessing: Supports setting multiple processes for merging tiles. The default value is determined by the CPU thread count. If the CPU thread count is no more than 16, the default value is thread count - 1; if greater than 16, the default value is thread count - 2. You can set the number of processes reasonably based on machine resources to improve merge performance.
- Click the OK button to execute the merge operation. After the merge is completed, a success prompt will be displayed in the Output Window.
- For example, a global hillshade raster tile dataset is divided into upper and lower parts stored locally and in MongoDB respectively. By merging the two datasets into one using the Merge Tiles function, the result is shown in the figure below:
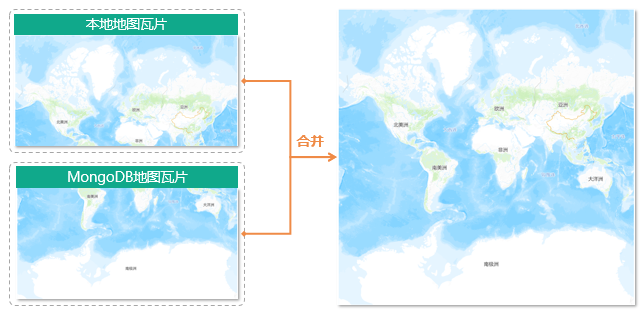 |
| Figure: Union result of local tiles and MongoDB tiles |
Related Topics